WHEN YOU DEMAND HIGH QUALITY AND ACCURACY, GO WITH........ SPEED CITY !
"IN PROGRESS"
PAGE 4
On these pages you'll see how we create our master models,
so you can see the labor of love that goes into all our products.
Follow along
as we create a NEW  ....
....
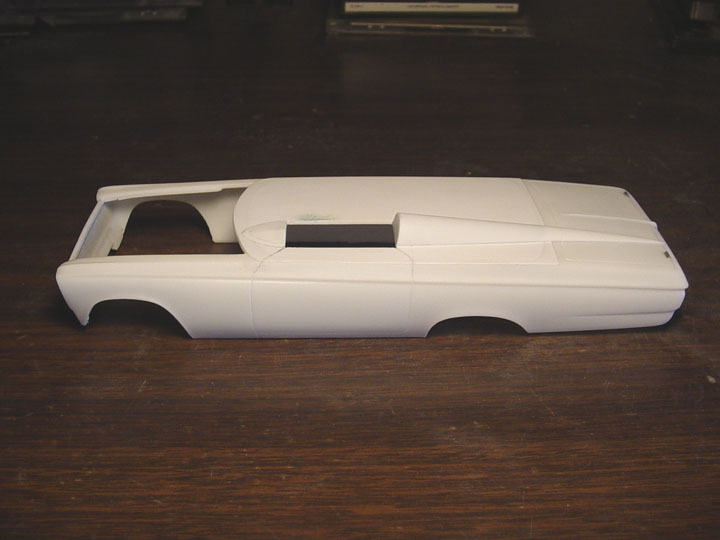
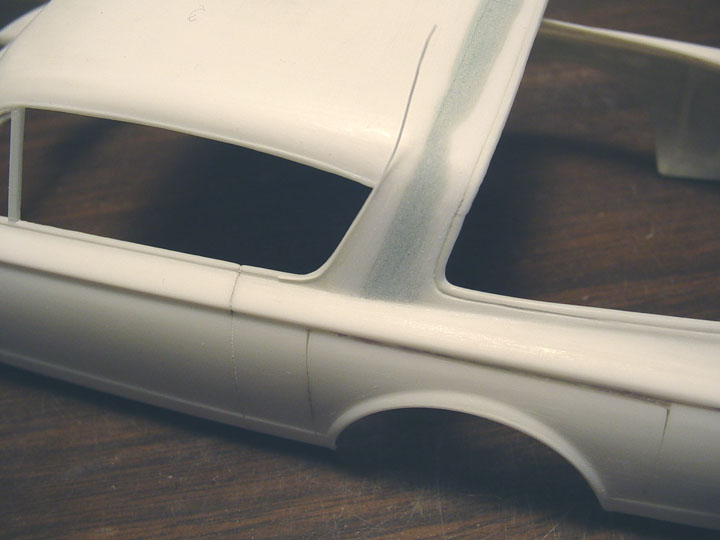
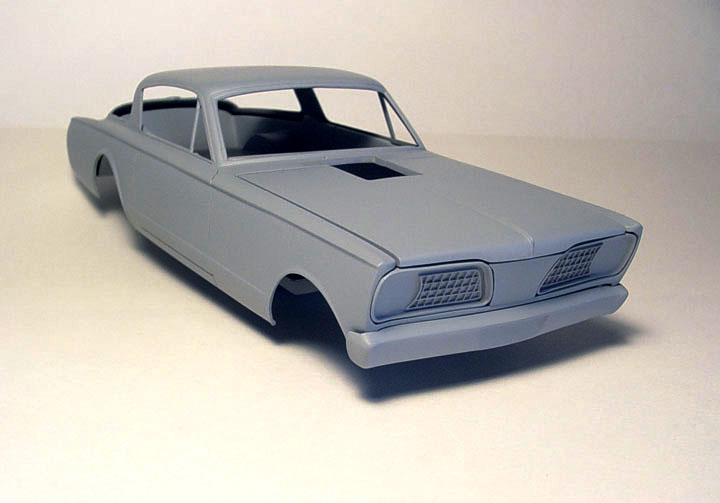
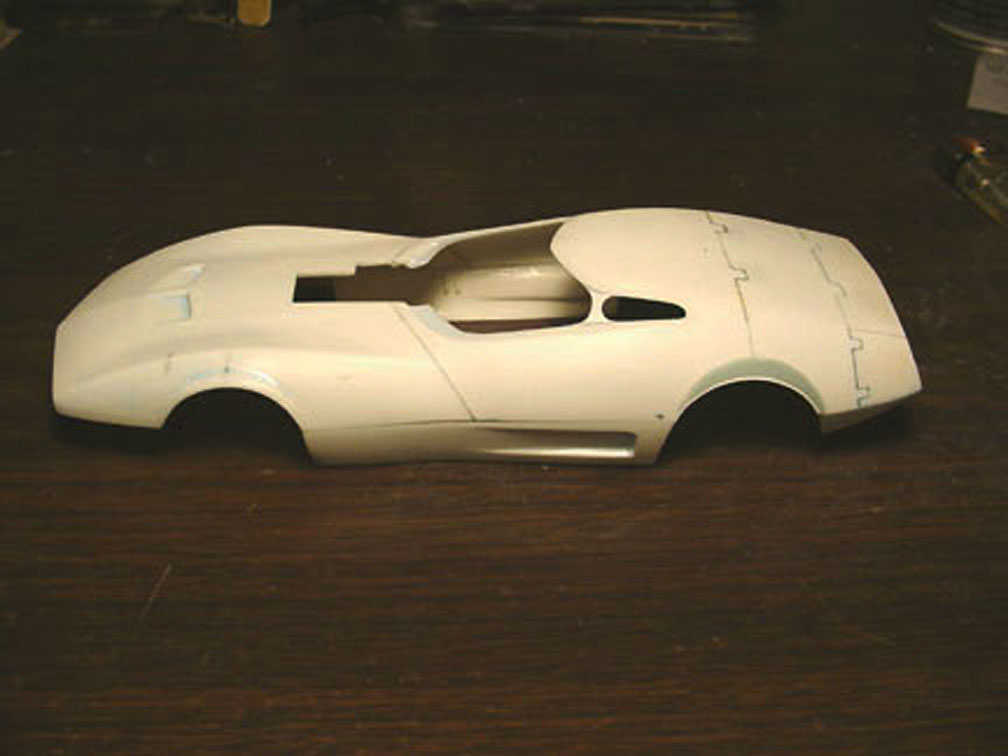
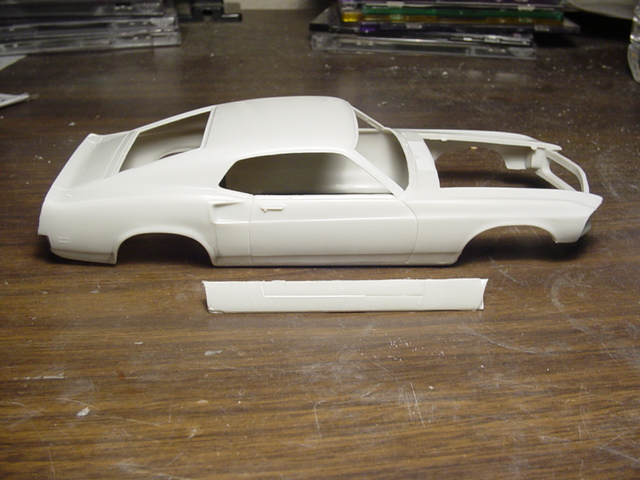
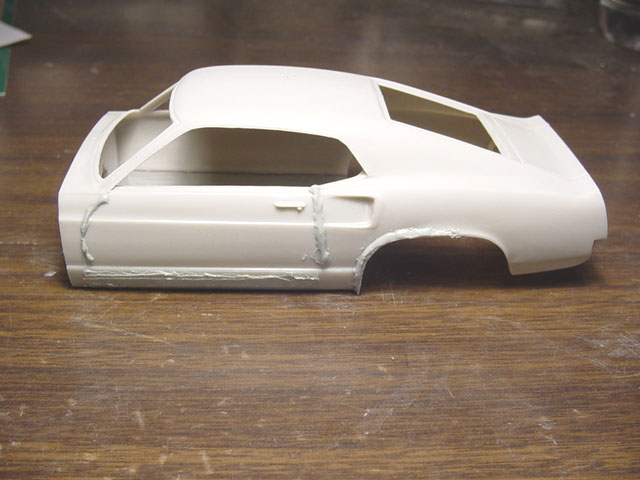
TOPLESS "MELROSE MISSILE" A/FX
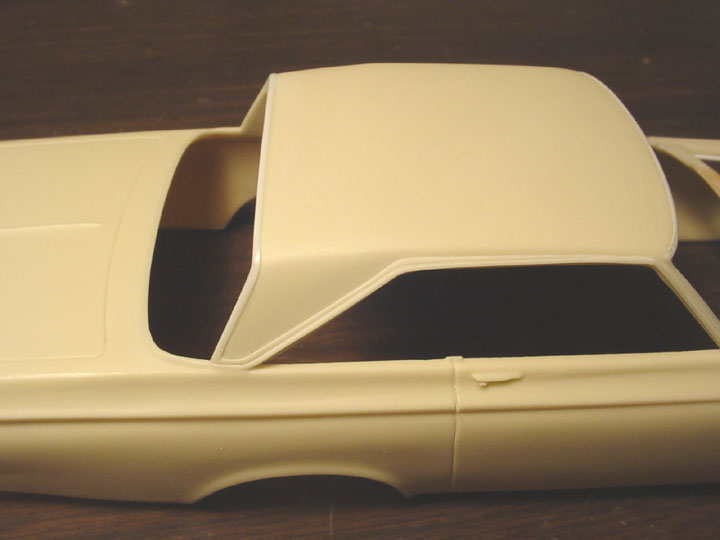
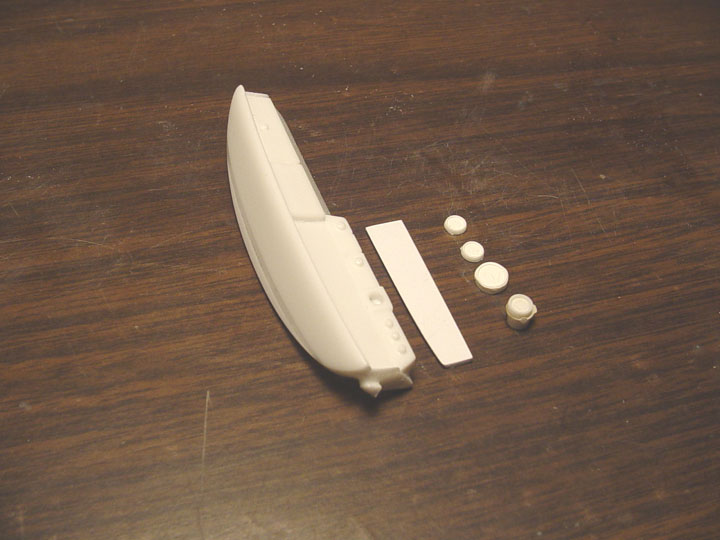
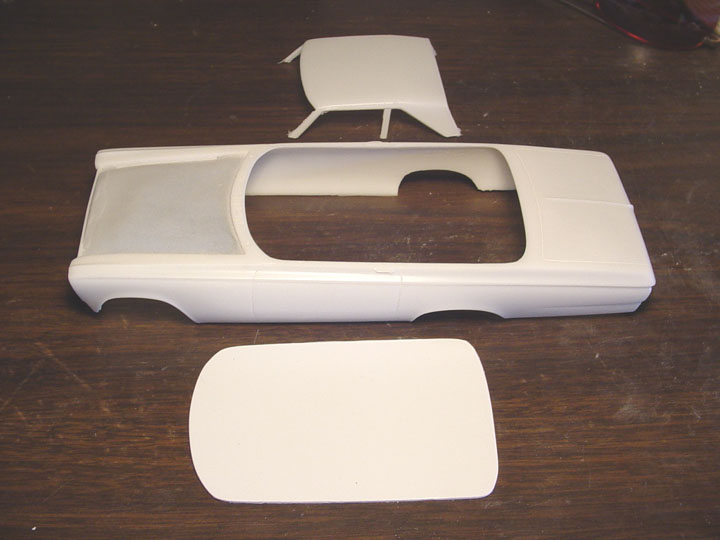 Starting with our '65 Ply
Belvedere A/FX resin body, the Hardtop roof was removed and a filler panel was
cut from 0.30 Plastic sheet,
Starting with our '65 Ply
Belvedere A/FX resin body, the Hardtop roof was removed and a filler panel was
cut from 0.30 Plastic sheet,
and was given' a slight arch to match the top of
the body.
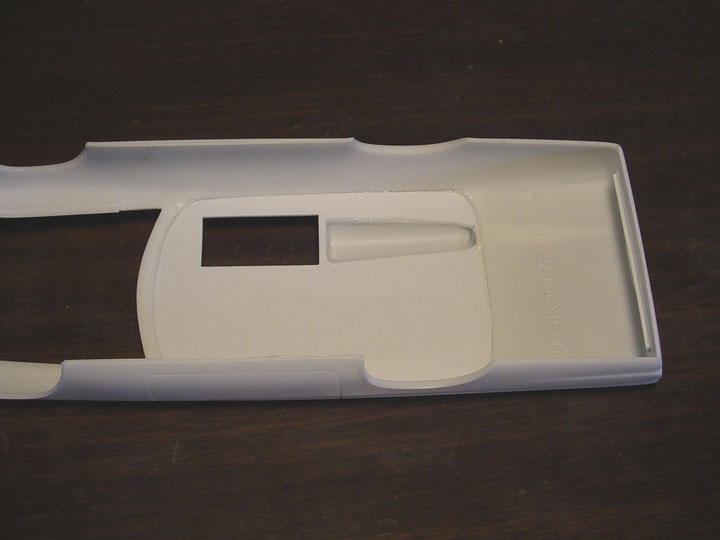
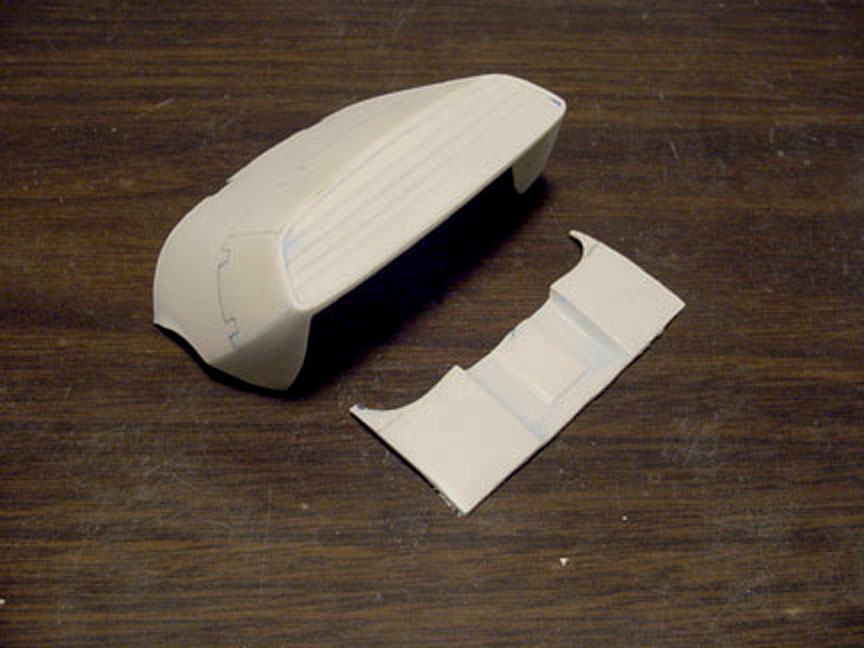
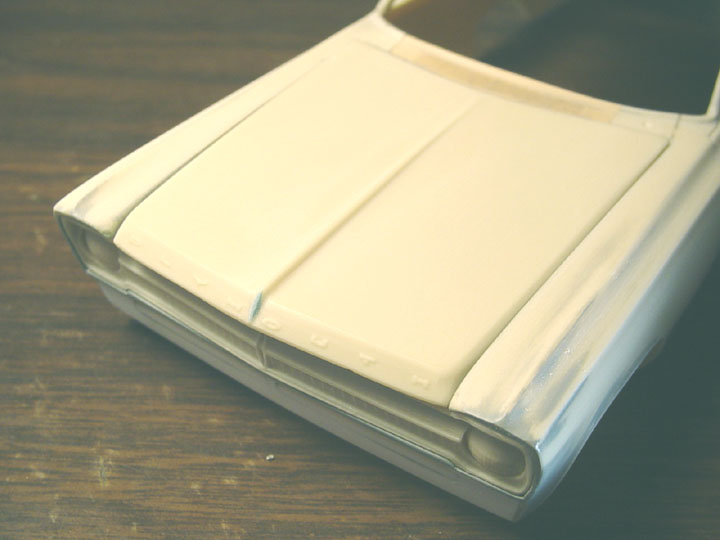
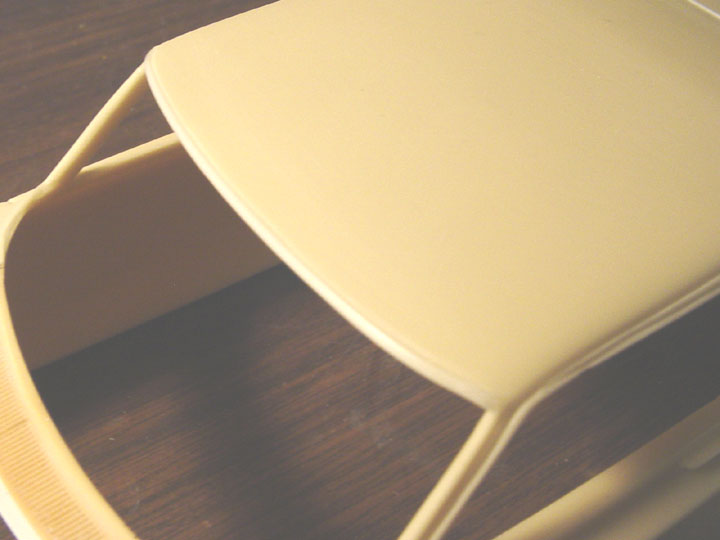
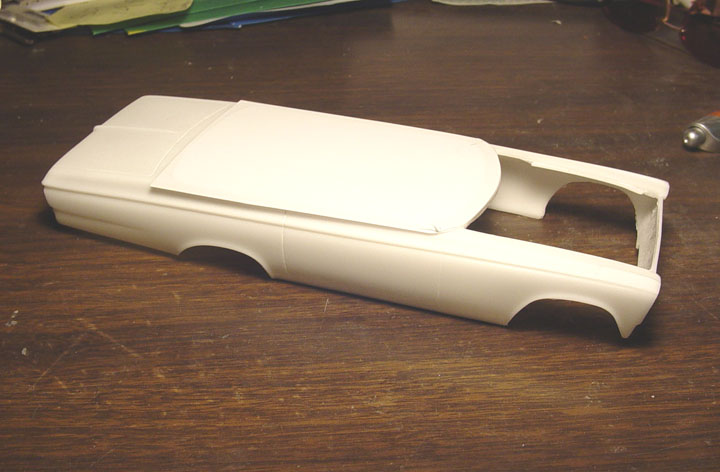 To make the tonnue cover look like sheet metal, 0.10 plastic sheet was cut and
formed to the top of the body.
To make the tonnue cover look like sheet metal, 0.10 plastic sheet was cut and
formed to the top of the body.
Just need to clean it up now !
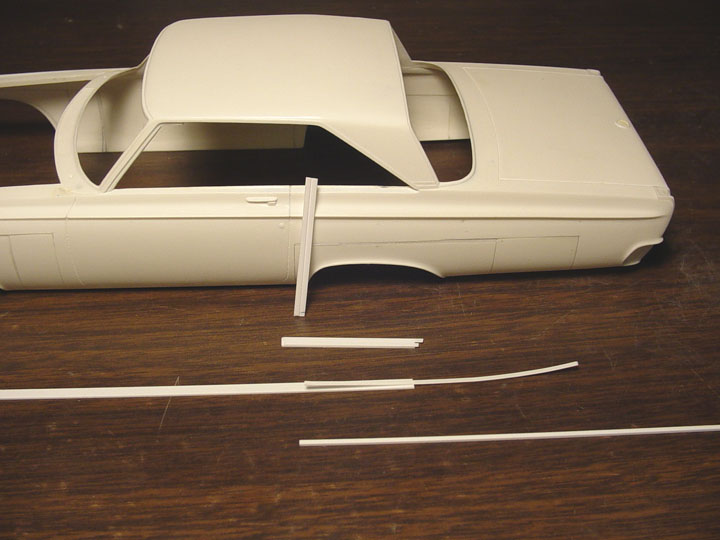
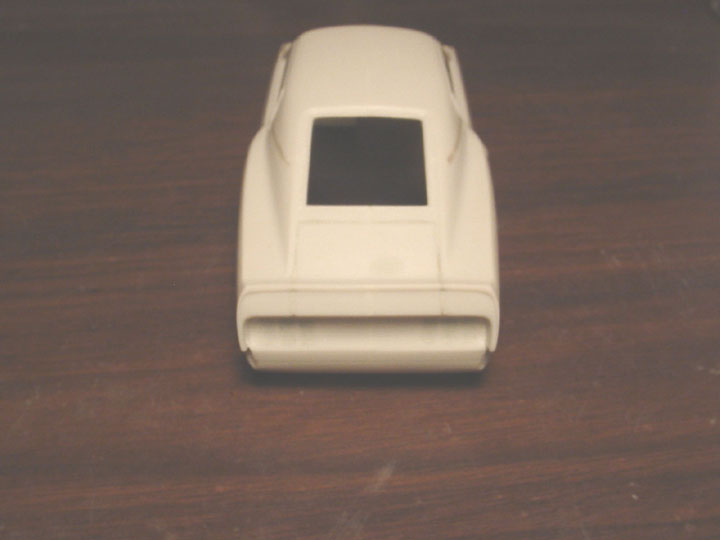
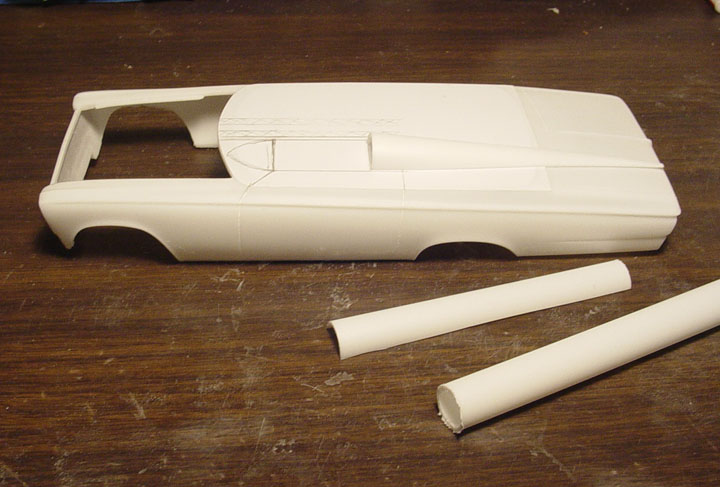 Evergreen plastic 1/2" TUBE was used for the Canopy, the tube was cut in
half, and then shaped on an angle and sloped down, to create the point.
Evergreen plastic 1/2" TUBE was used for the Canopy, the tube was cut in
half, and then shaped on an angle and sloped down, to create the point.
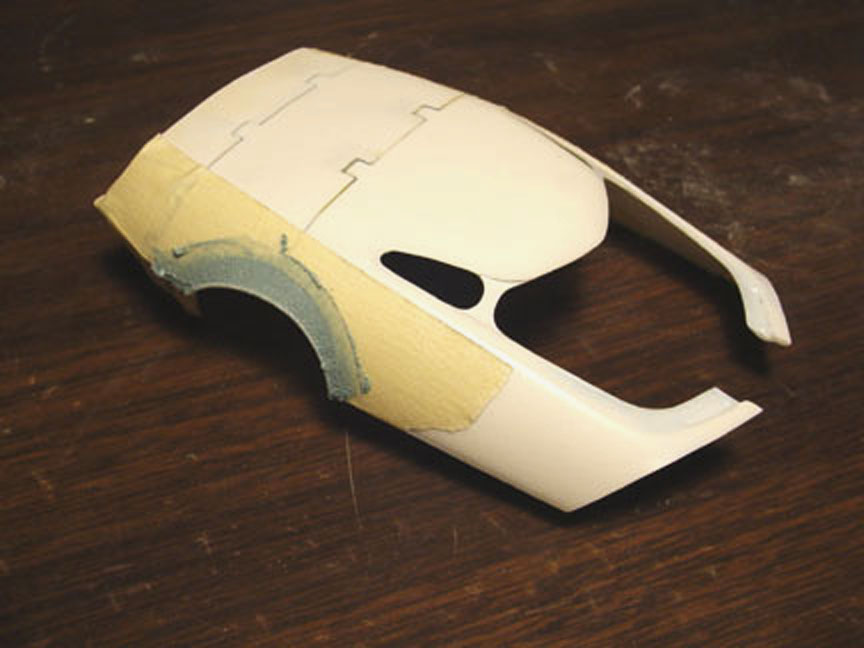
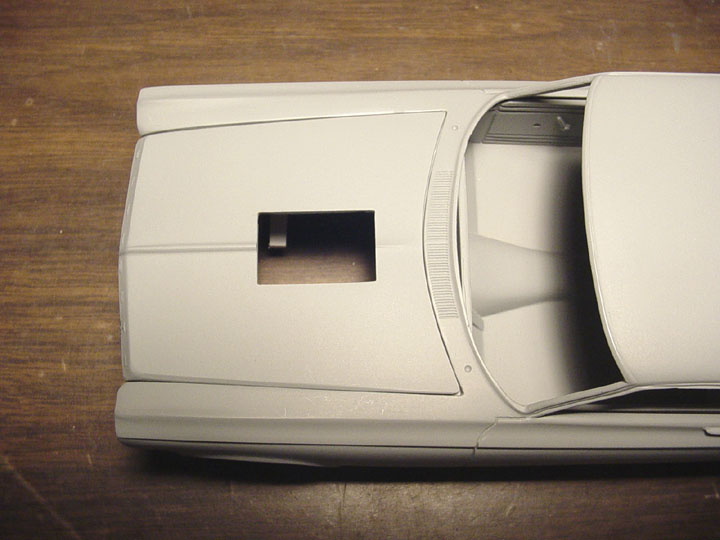
You
can see the pencil tracings where the blue racing stripes would be located.
This was done to insure a correct location for the canopy and hole for driver.
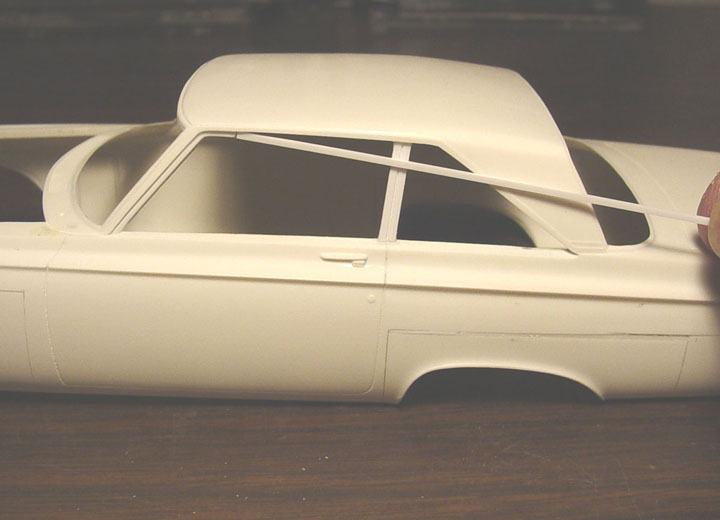
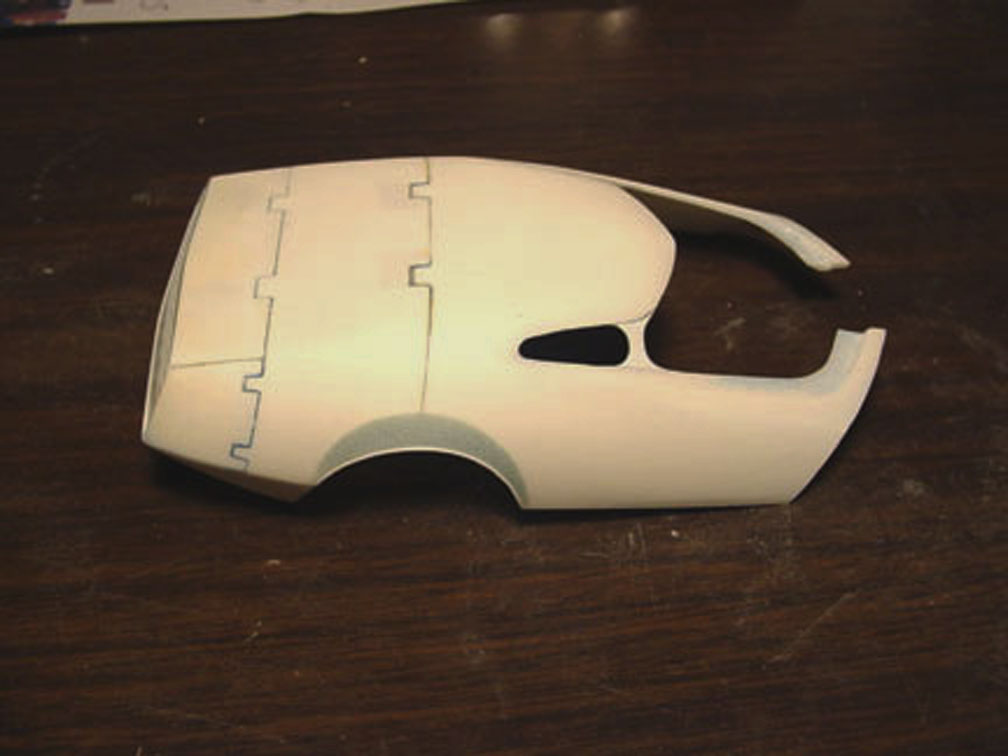
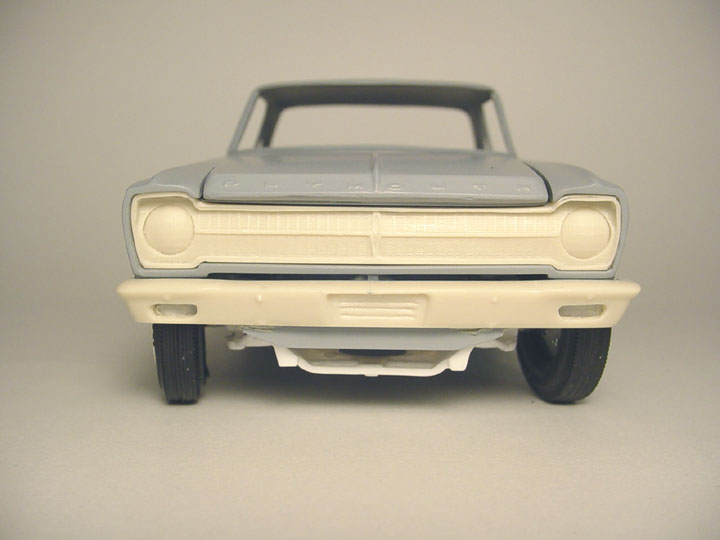
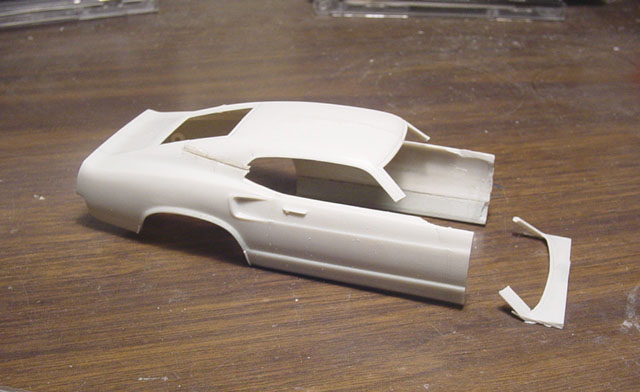
Now its starting to look like the" MELROSE MISSILE". You can also see the tracing for the bullet shaped cowl.......
soon to come.
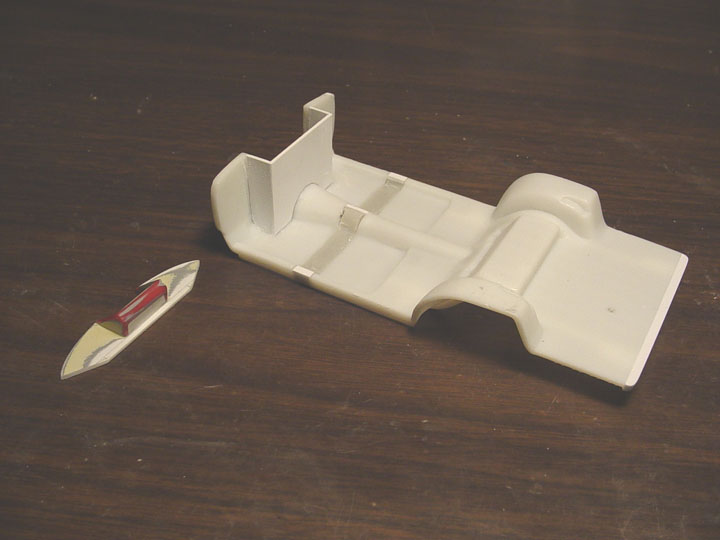
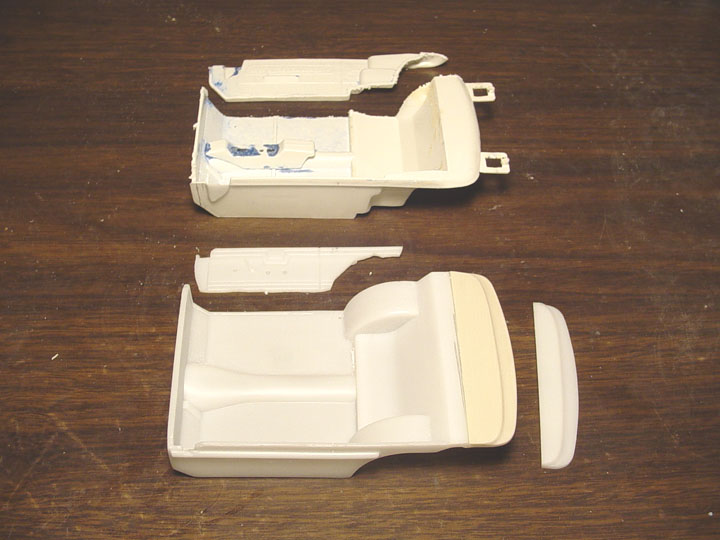
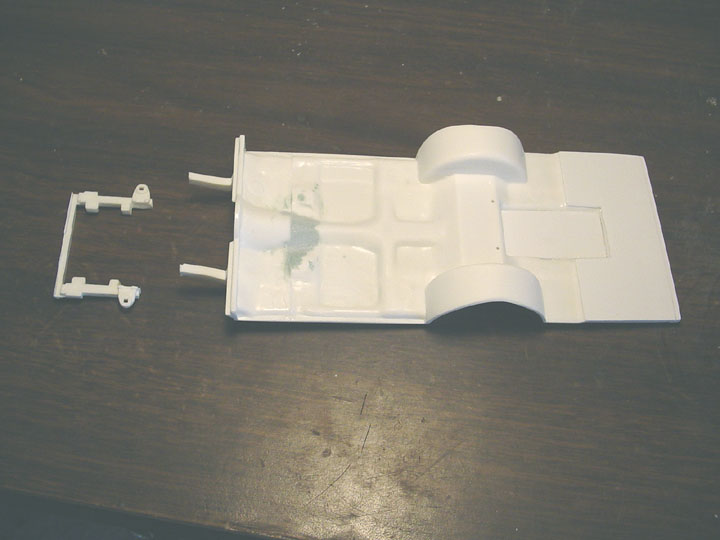
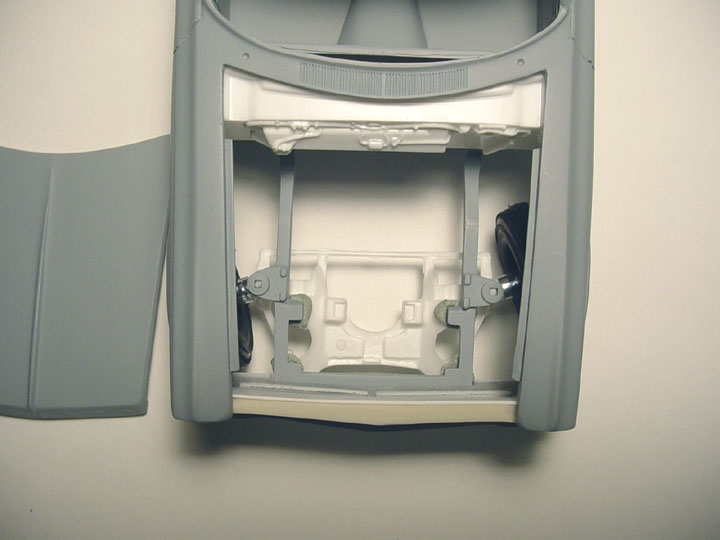
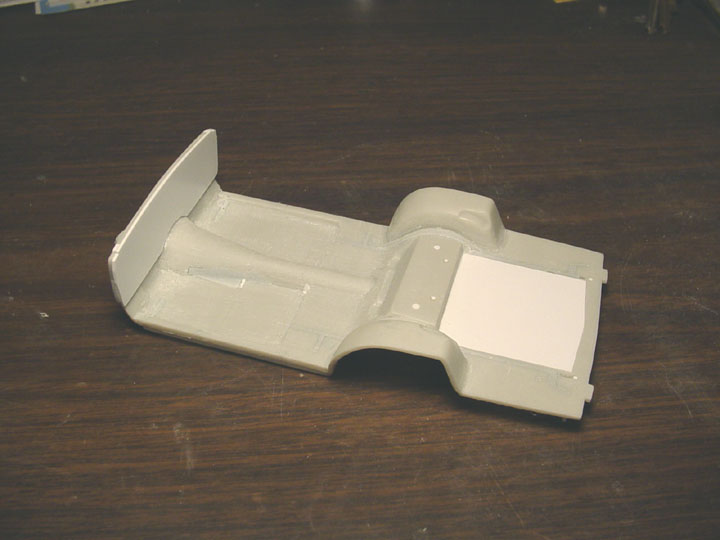
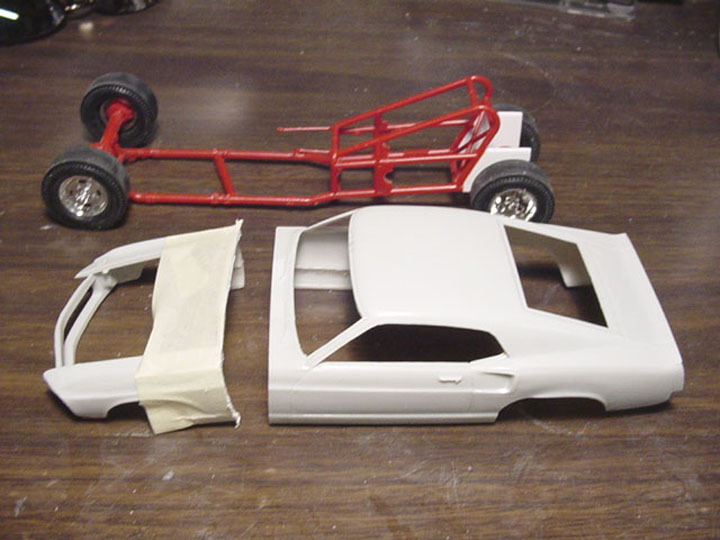
 The interior tub & chassis was installed to measure were the dash would
line up with the new cowl.
The interior tub & chassis was installed to measure were the dash would
line up with the new cowl.
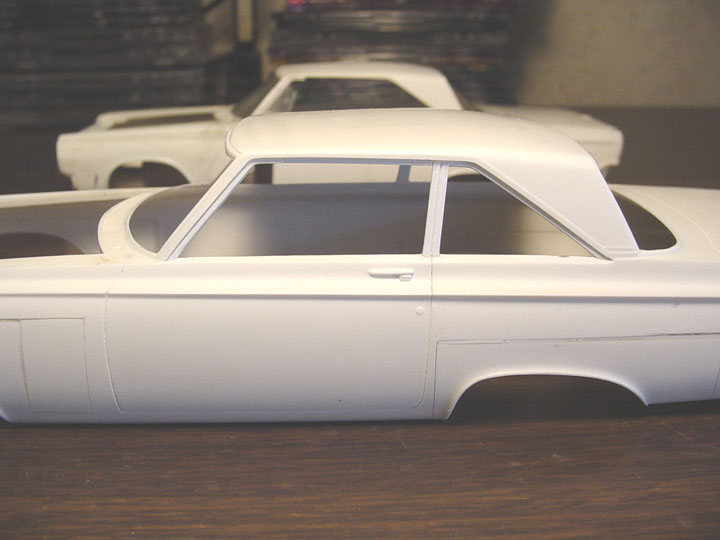
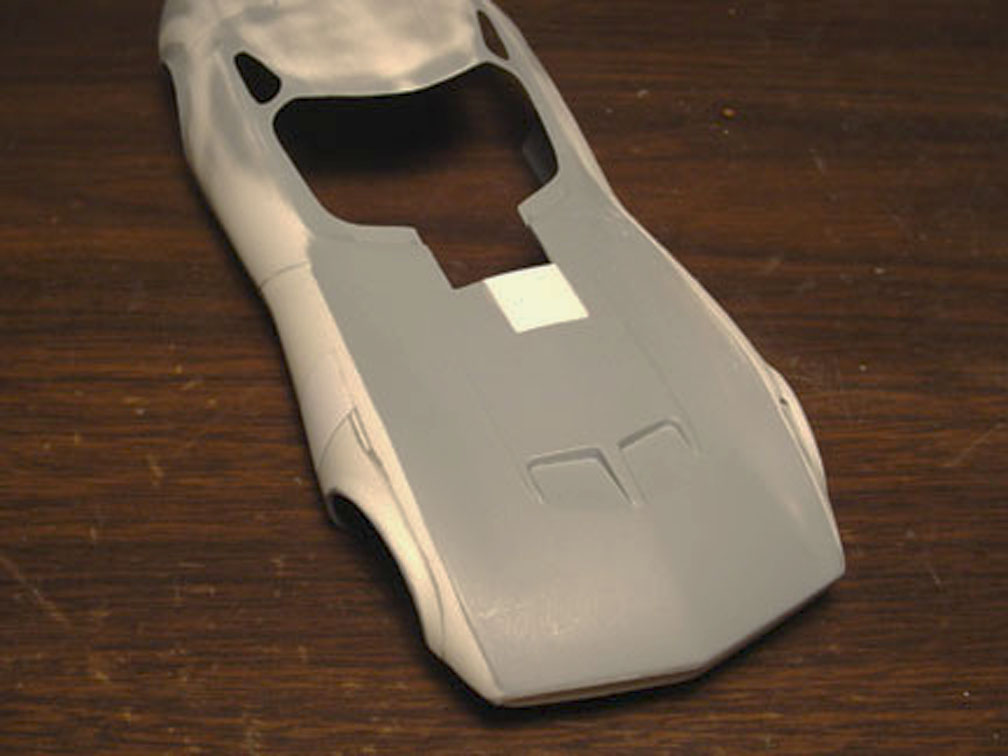
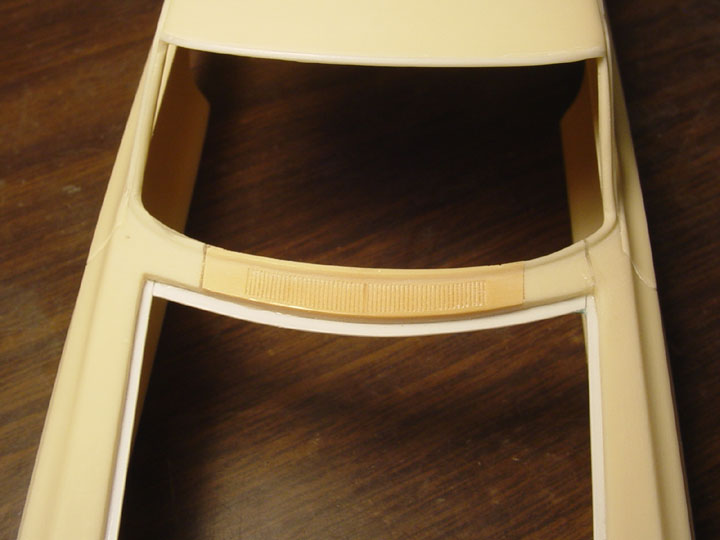
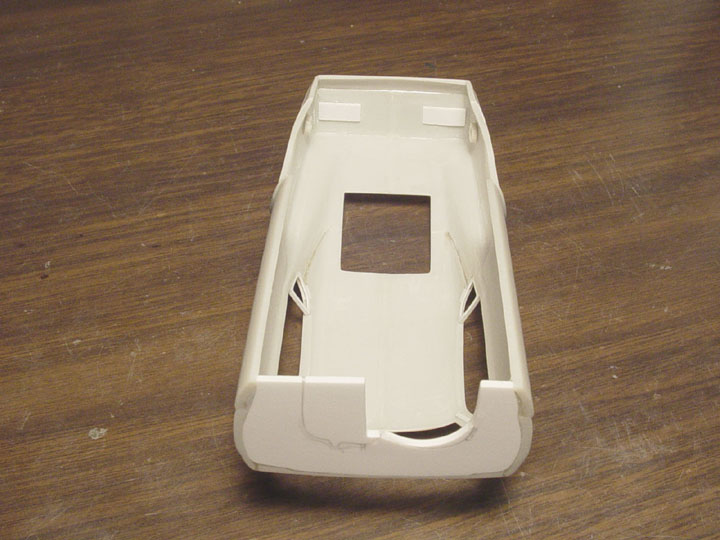
The headrest was filled in with sheet plastic, the
hole for the driver was cut out and New door lines were scribed in.
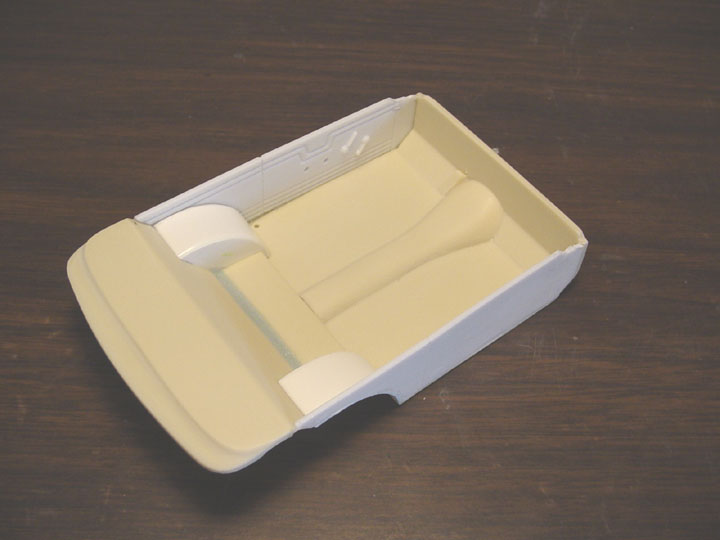
 The Canopy was hollowed out from the bottom for realism and to save on weight
and resin.
The Canopy was hollowed out from the bottom for realism and to save on weight
and resin.
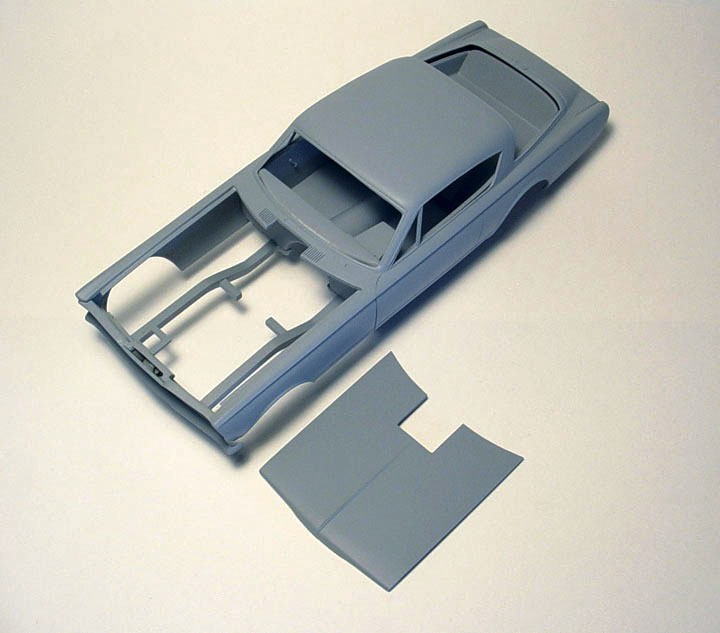
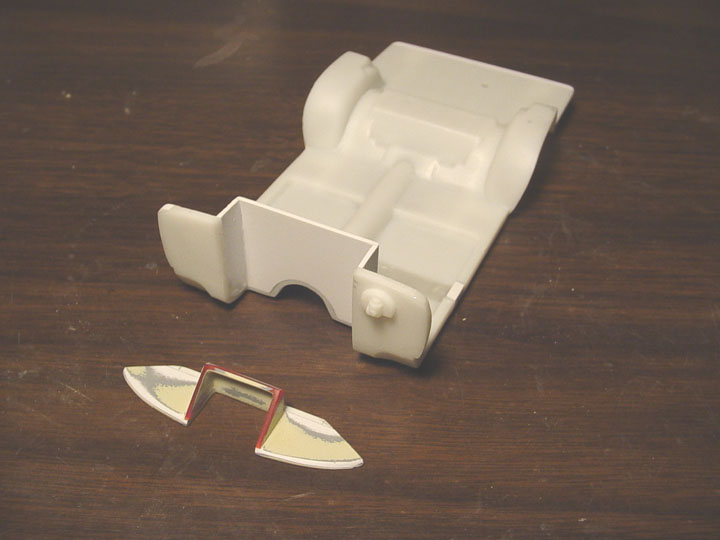
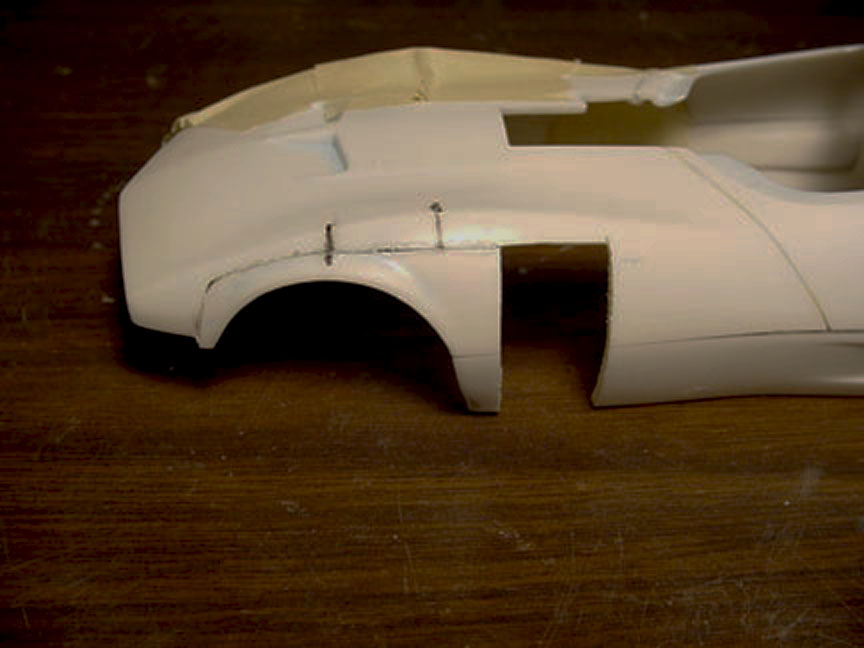
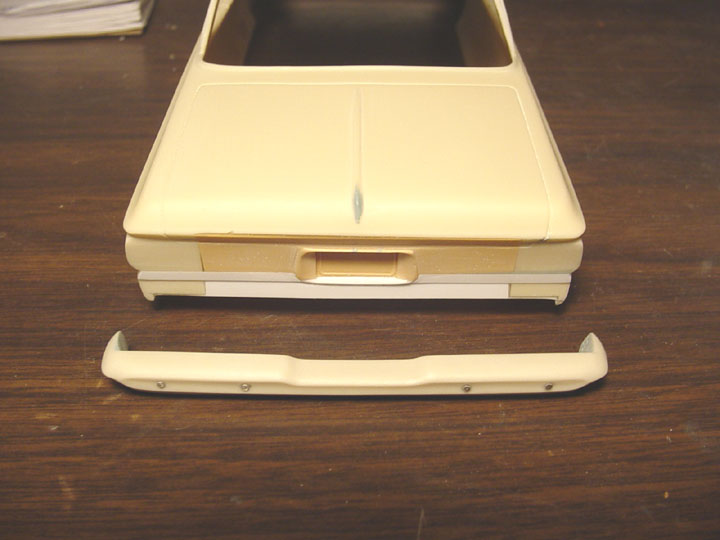
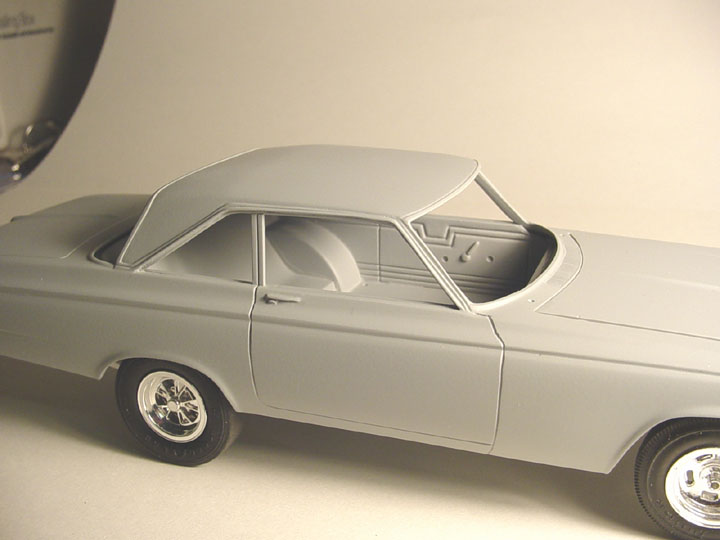
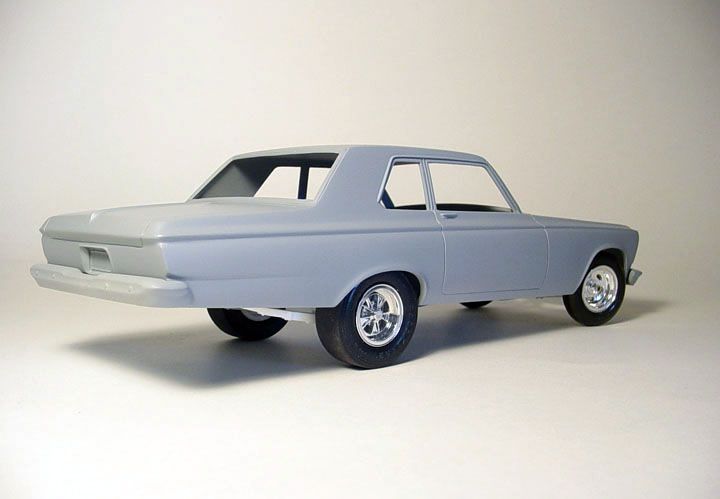
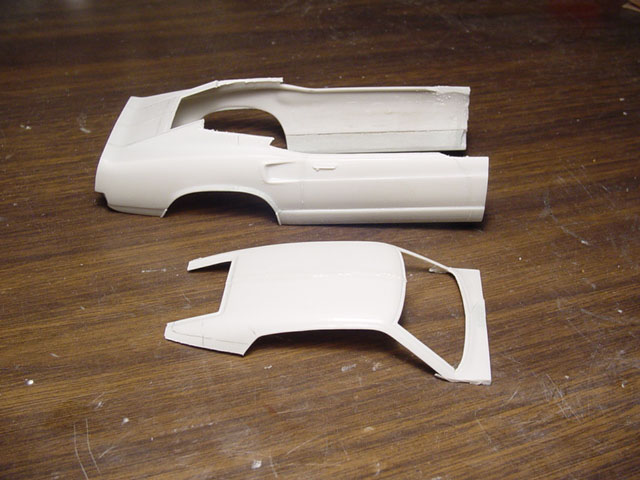
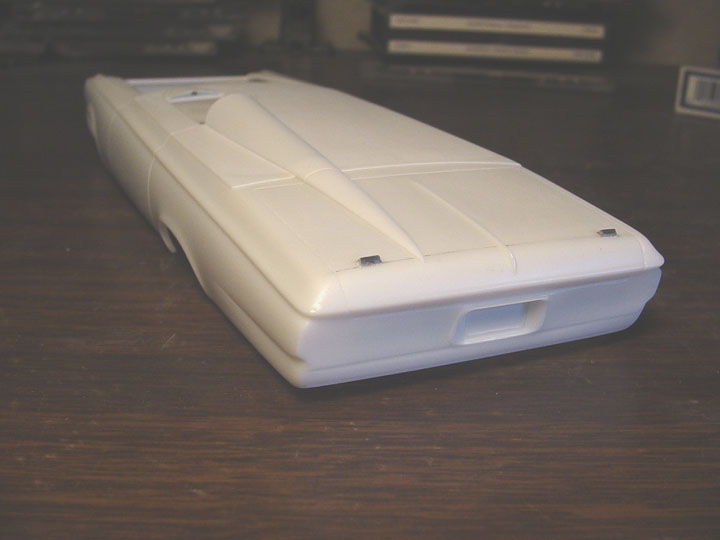 The rear valance was slightly rolled, and rear 1/4 panels were slightly re-shaped.
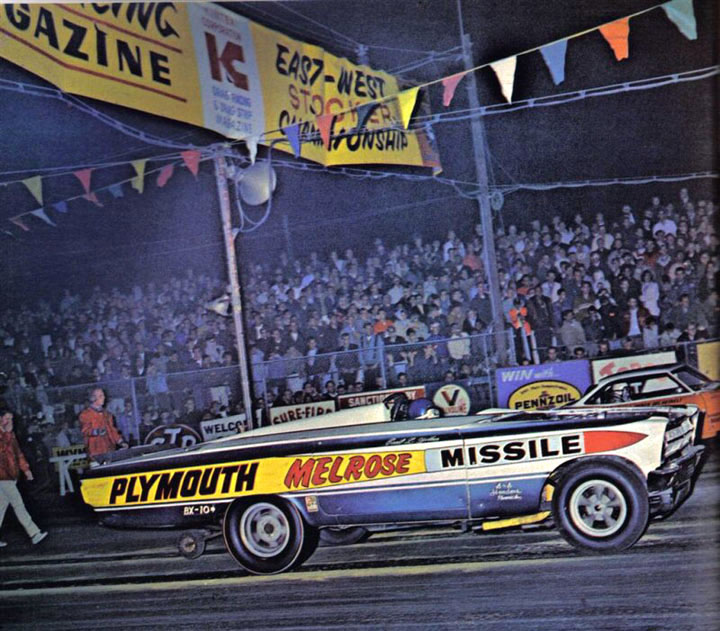
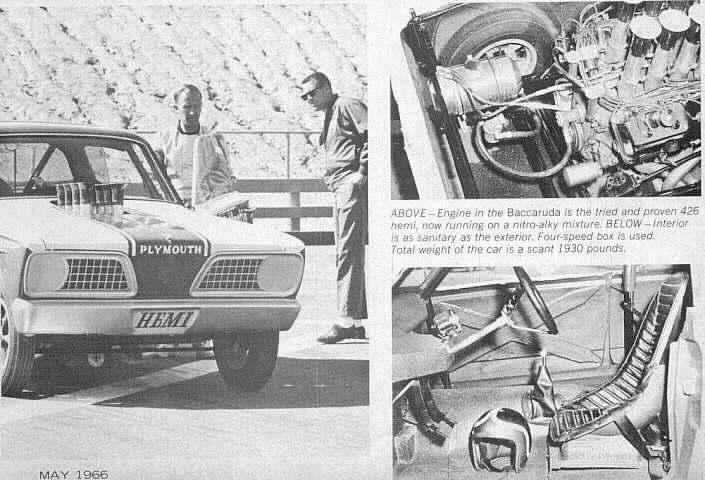
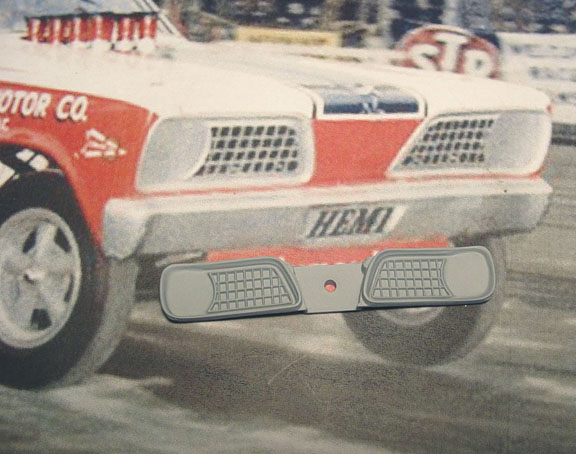
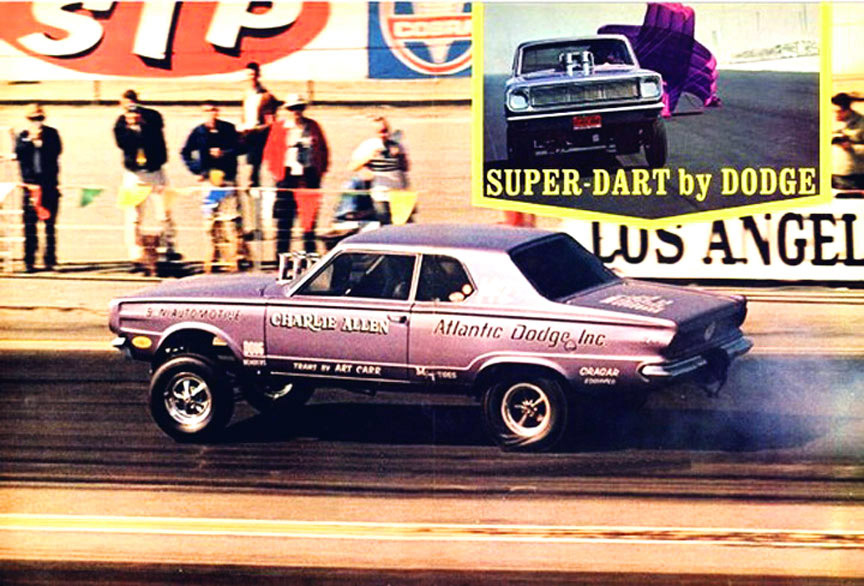
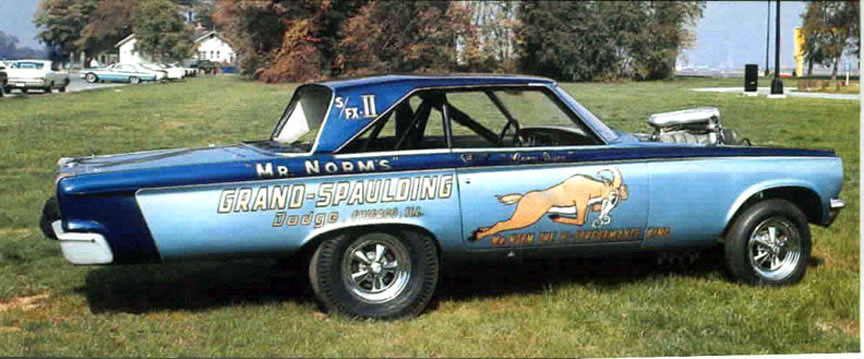
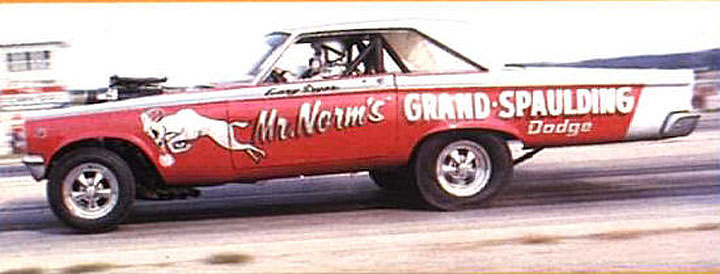
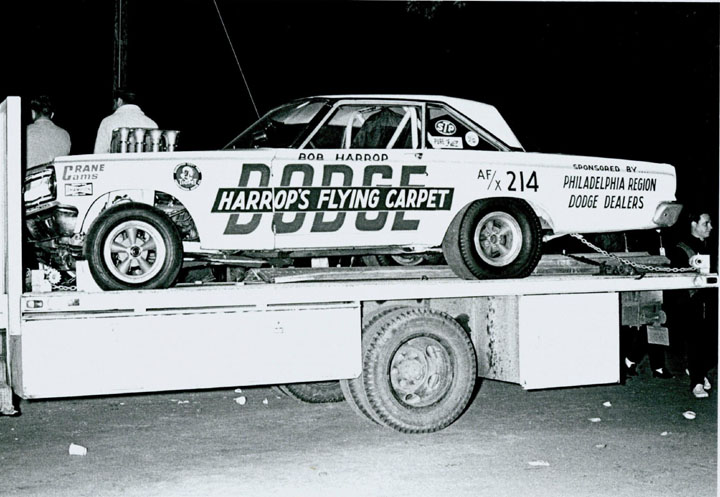
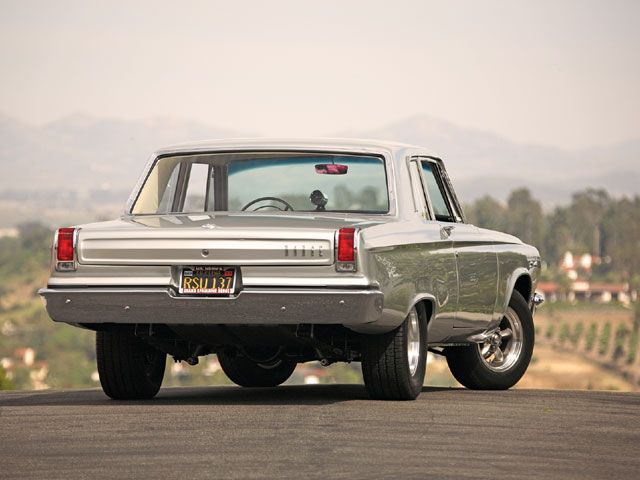
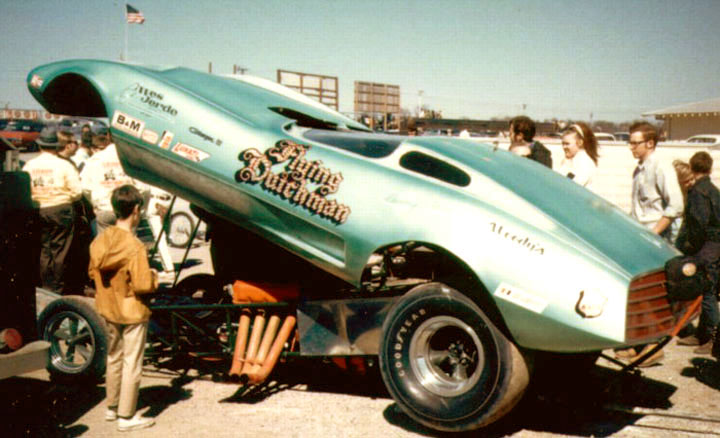
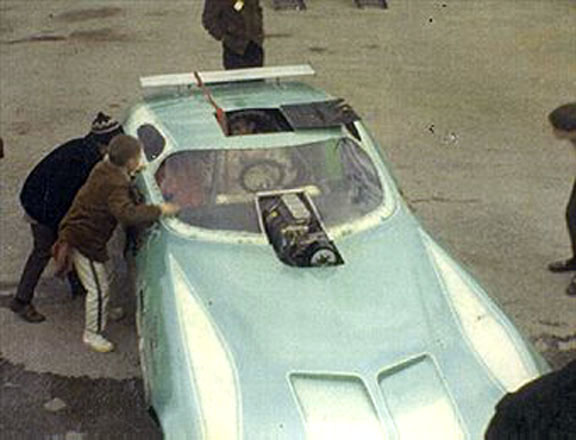
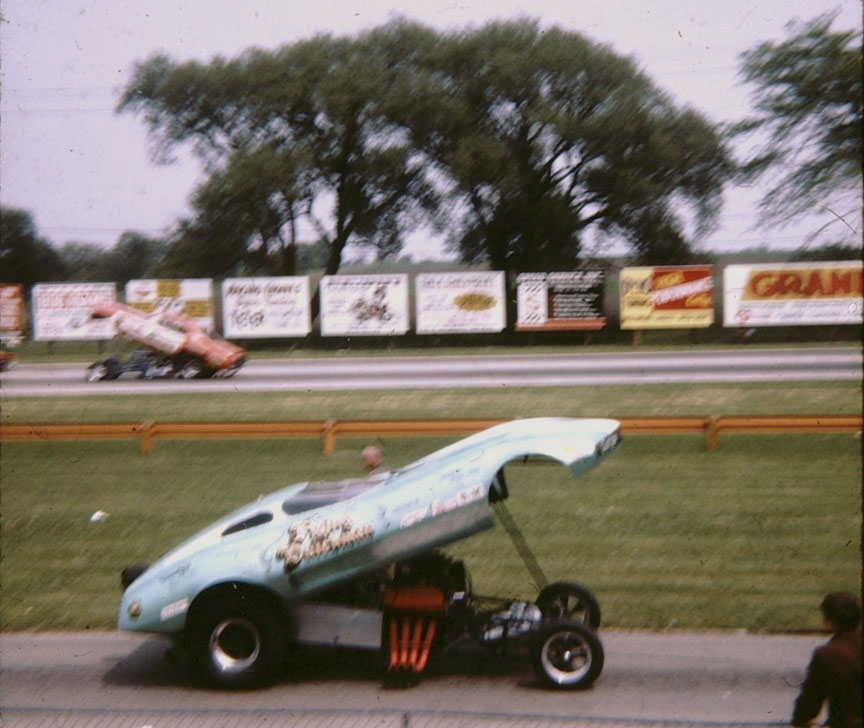
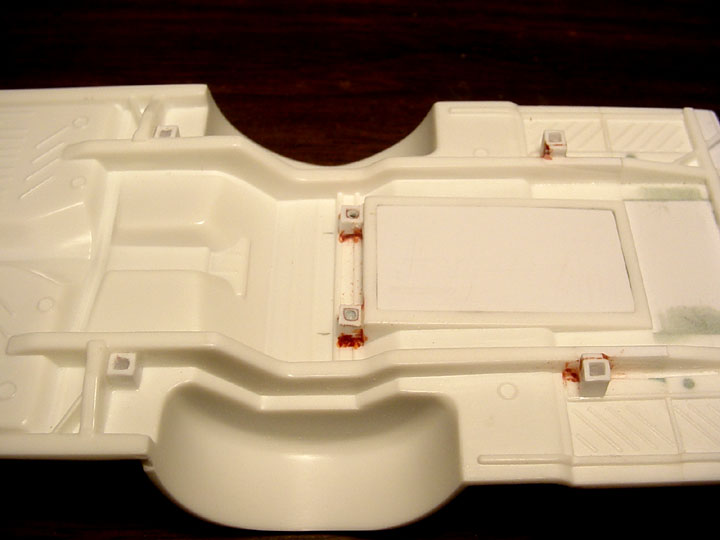
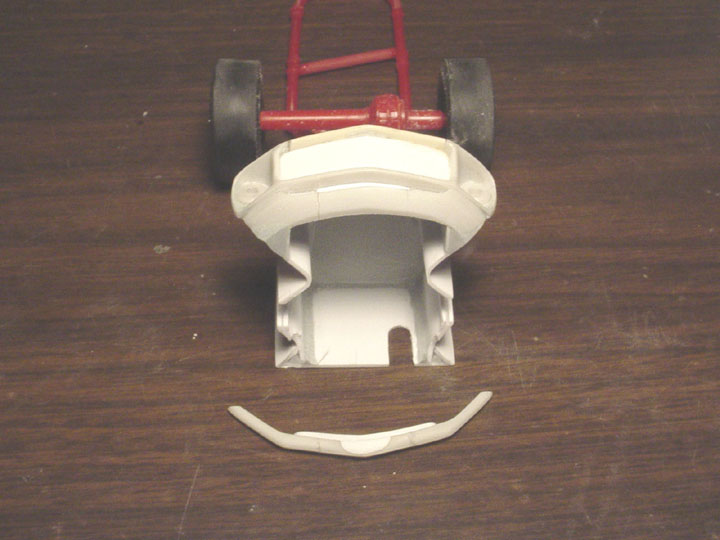
My initial plan was to include the rear "AIR FOIL" but, after finding
this rare photo (below),
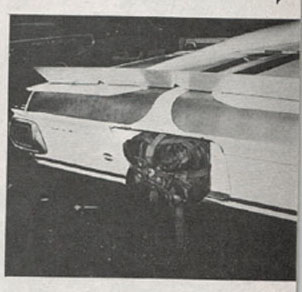
it would have been to hard to do the paint job with
the Air Foil on it.....So instead,
I added hinges to be able to mount an aluminum
sheet rear foil to the new hinges on a 45 degree angle.
 At this point the master is finished, other than priming & polishing !
MASTER
MODEL IS FINISHED !
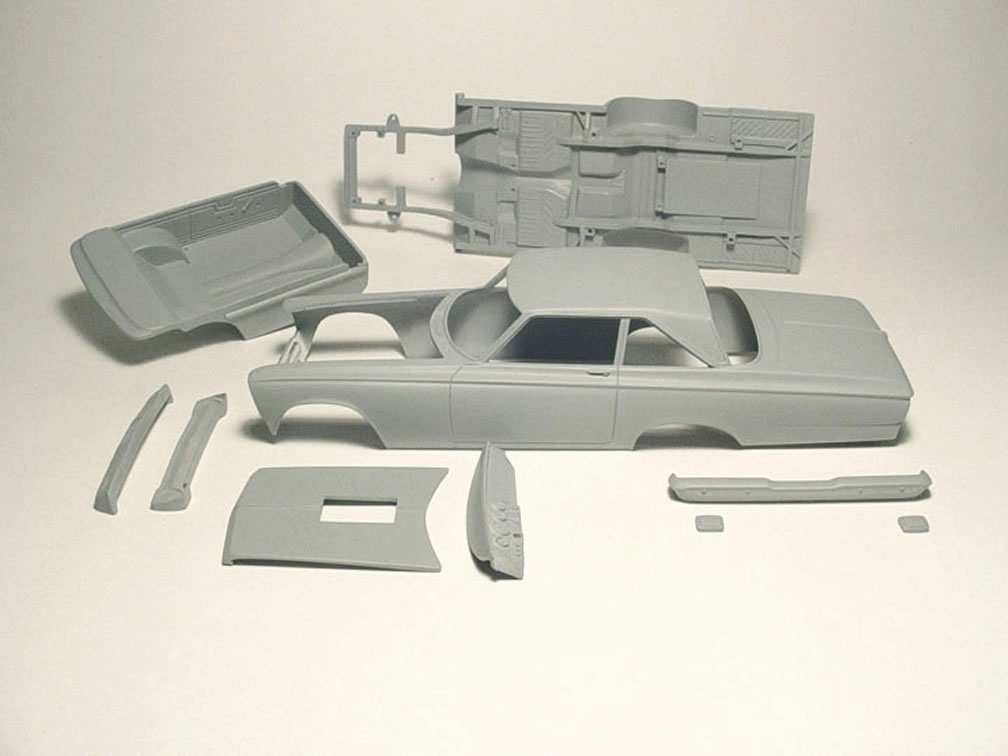
This model will come with the same parts as the '65 Plymouth
Belvedere & Sedan A/FX.
'66
LONG NOSE BARRACUDA FUNNY CAR
Mastered by: Ron Ramsey and Scott Kapellusch


Ron
has passed the master over to us to rework some issues, such as:
Chassis / Interior tub, Dash, Front frame clip &
extra body modifications.
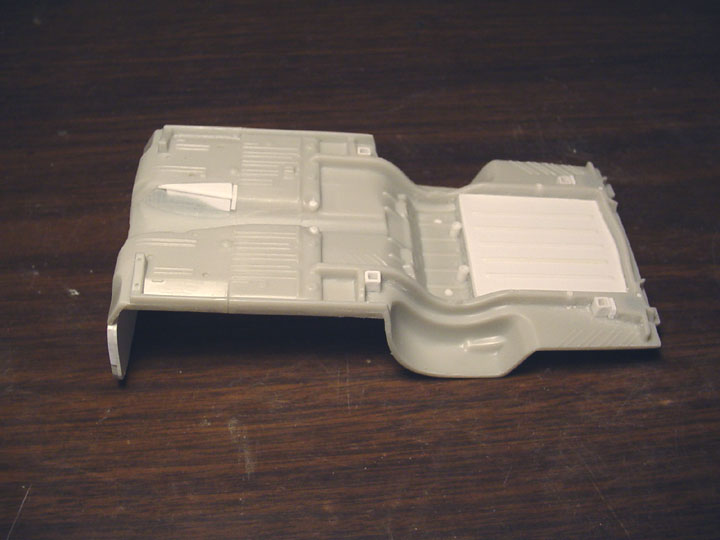
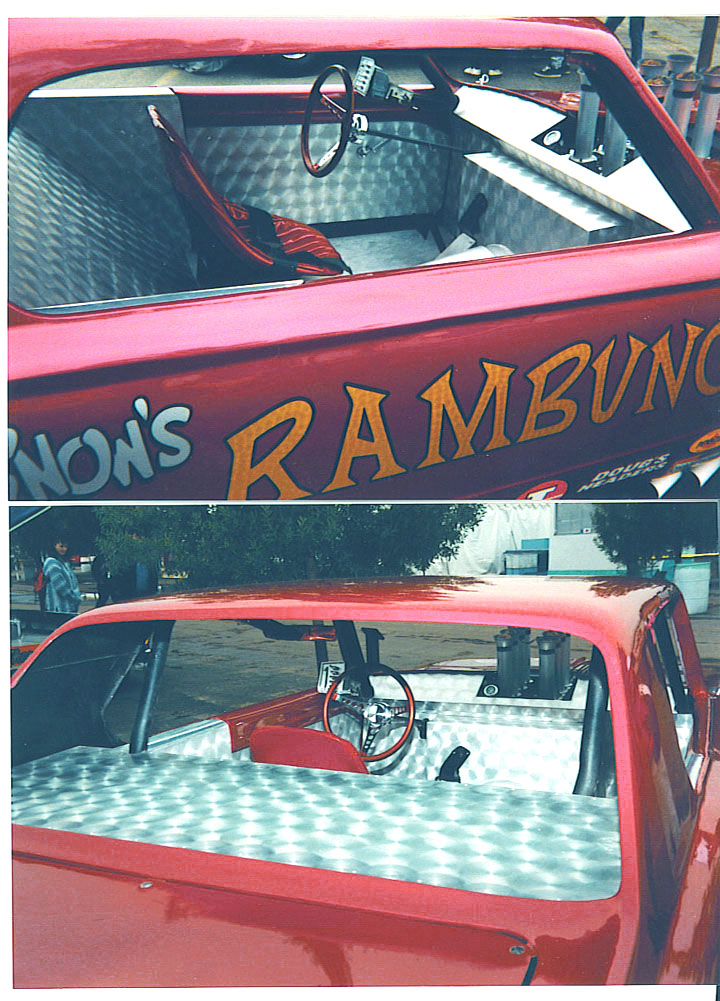
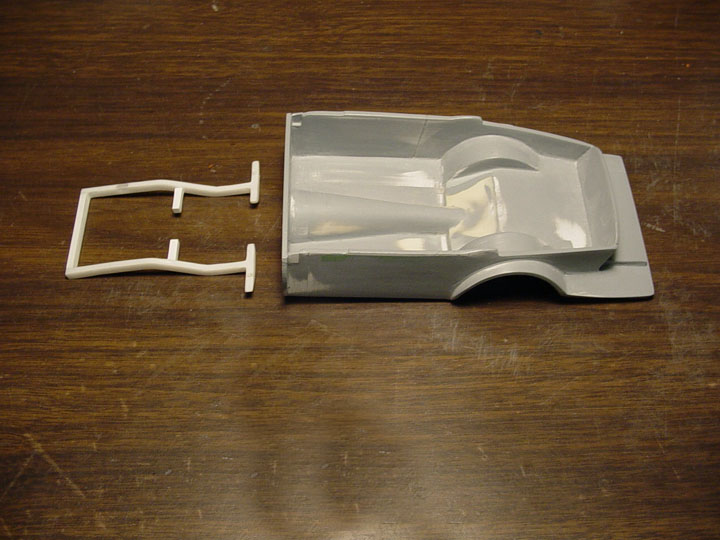 Ron Ramsey
started this Interior tub by using the center of our Speed City Long Nose
Mustang F/C Interior tub.
Ron Ramsey
started this Interior tub by using the center of our Speed City Long Nose
Mustang F/C Interior tub.
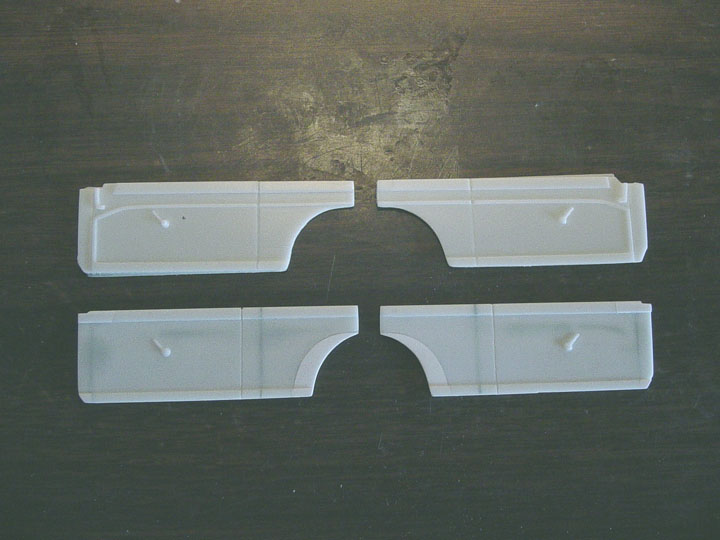
Ron added some width to all the sides of the Chassis floor
with sheet plastic, then added his own door panels,
by copying a stock '66 Barracuda
interior tub.
AMT Funny Car Wheel wells were installed as well as a new firewall & Trunk shield.
He left the clean up to me (Scott Kapellusch).
 Using these photos as reference....
 I installed new frame rails
to the chassis to be in alignment with the Frame Clip from our '65 Gene Snow Rambunctious
Dart.
I installed new frame rails
to the chassis to be in alignment with the Frame Clip from our '65 Gene Snow Rambunctious
Dart.
Motor mounts were also added. Fuel tank mounts will also be
added later (not shown in this photo).
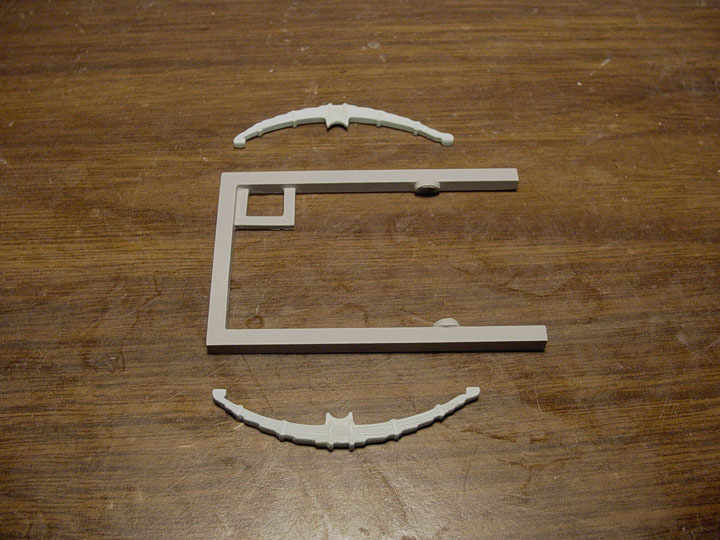
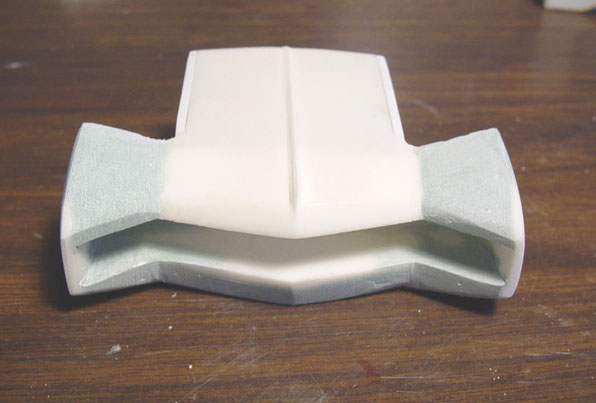
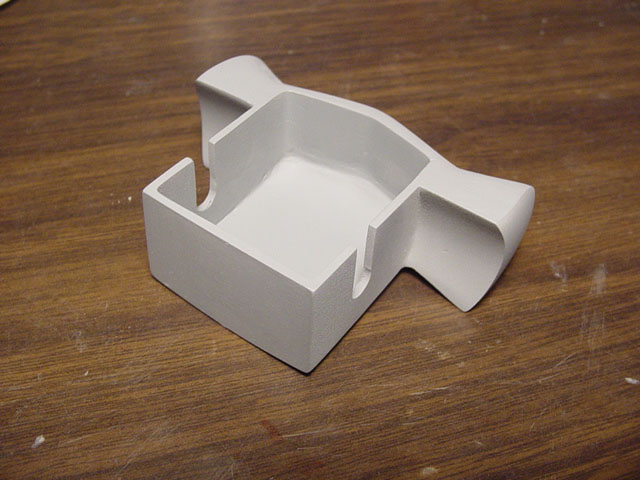
I created a Steering Column Box (re-worked from our '66 Corvair Funny Car), to match the the Sox & Martin Cuda.
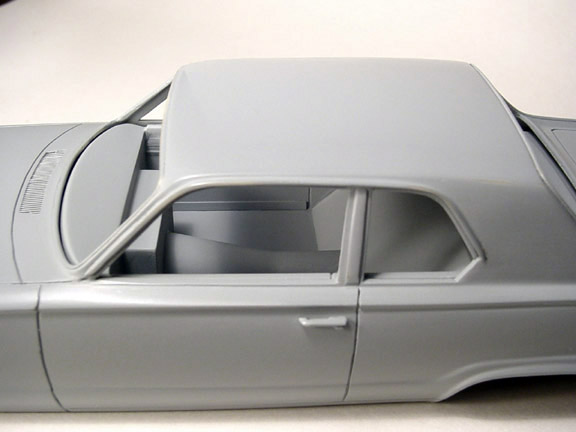
The Dash was reworked from
the AMT Hemi Under Glass kit.
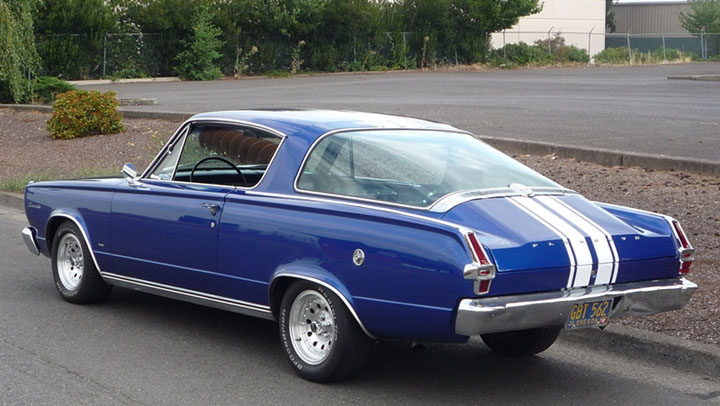 After doing some research
I realized that the AMT kit got the sail panel on the roof wrong !!!
After doing some research
I realized that the AMT kit got the sail panel on the roof wrong !!!
Here is a stock 1966 barracuda, notice there is no step in the roof Sail panel,
but is angled downward.
 I had to strip off Ron's primer coat, so the putty will bond stronger. Tape was used to mask off the area to be puttied.
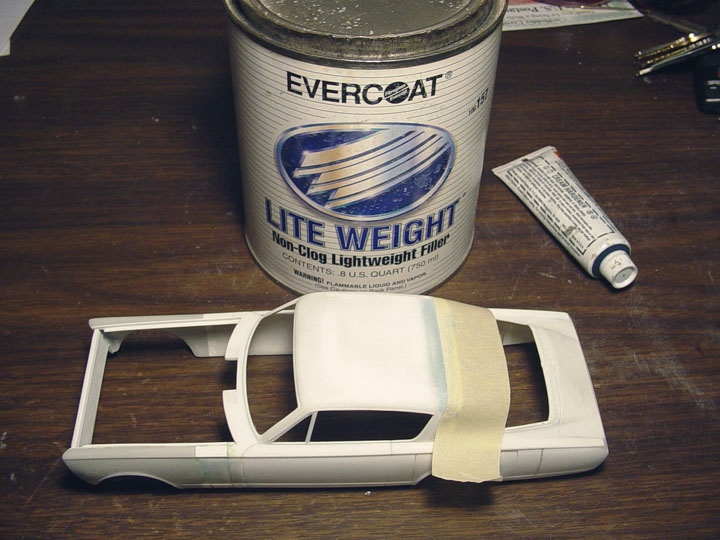 The top of the roof slanted down too much, so that was also puttied to make
a perfect transition.
The top of the roof slanted down too much, so that was also puttied to make
a perfect transition.
Now its just perfecting the angle from top to rear.
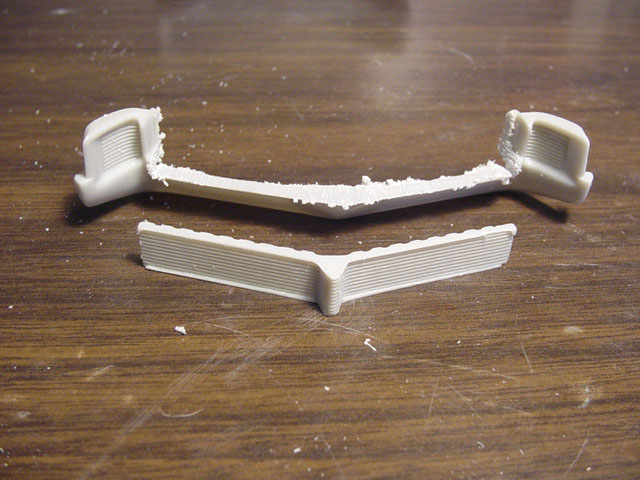
 The original amt kit drip rails were too faint and could barely make it out,
so plastic strip was used to create a new ones !

 The grill was designed to match the Sox & Martin Cuda (which is what most
of us will build).
The grill was designed to match the Sox & Martin Cuda (which is what most
of us will build).
Some of the
other cars were actually the old Sox & Martin Barracuda anyway, so this only made sense to do!
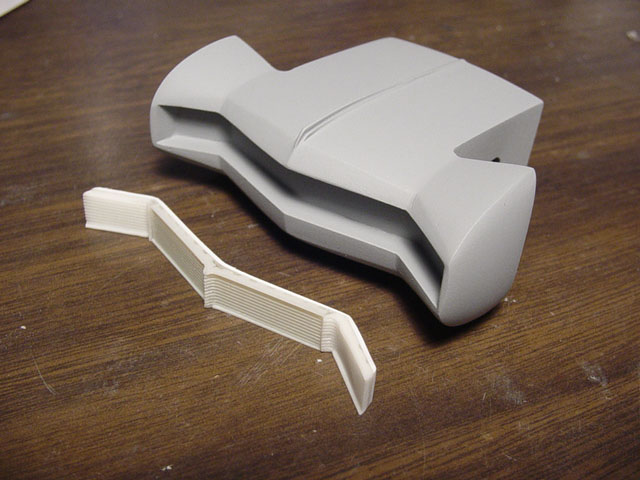
 Hood supports were added
for strength and appearance !
Hood supports were added
for strength and appearance !
THE MASTER IS FINISHED !

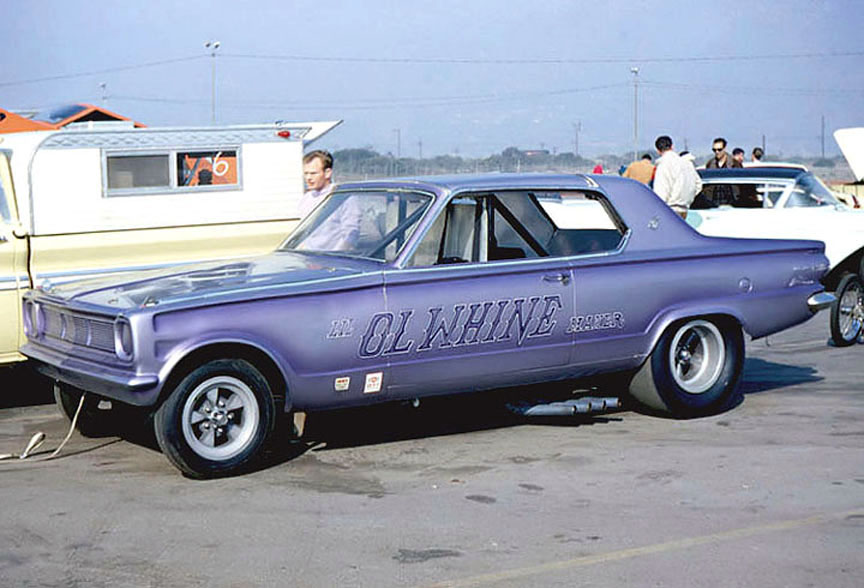
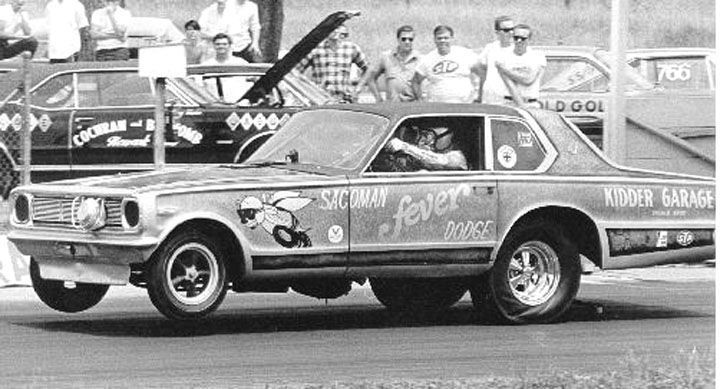
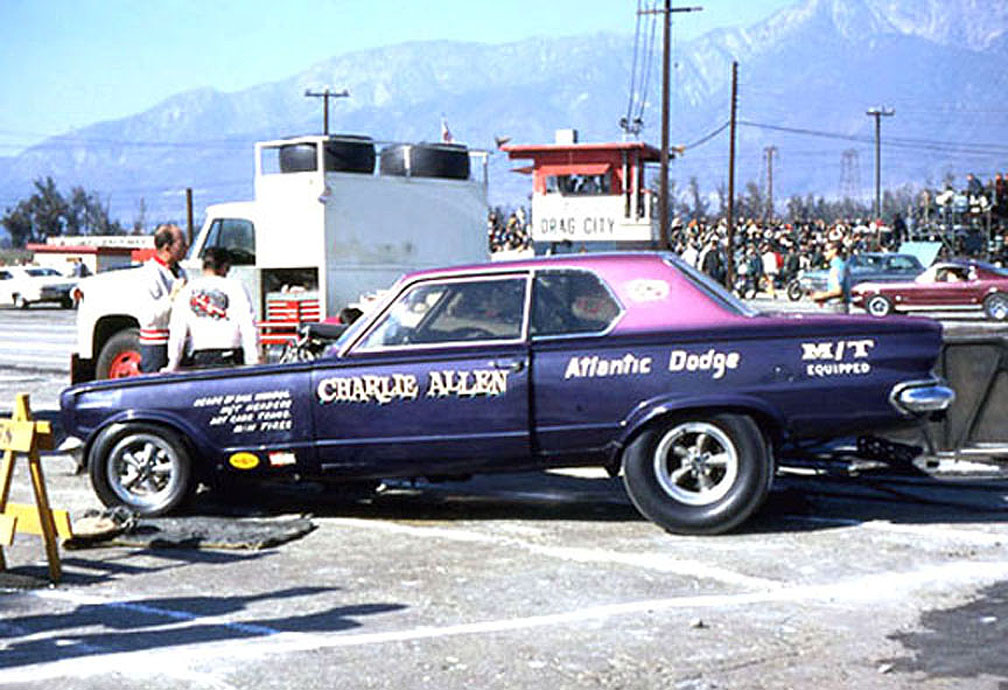
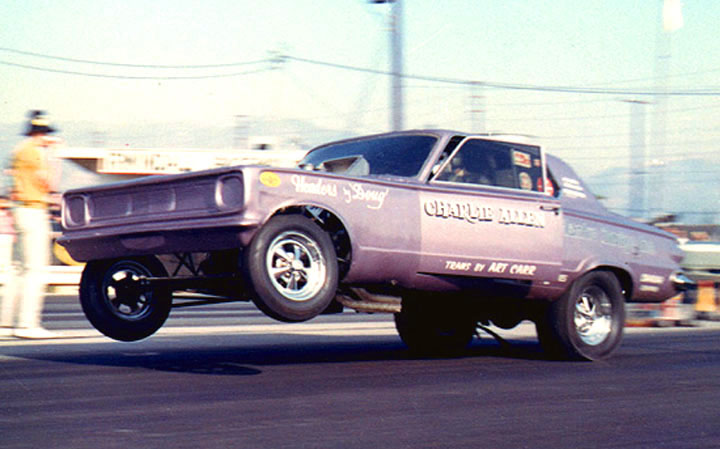
Charlie
Allen's
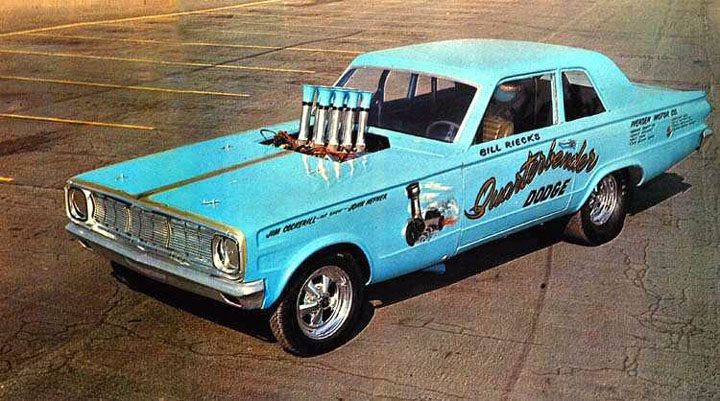
"PURPLE TERROR"
1965/'66
Dodge Dart A/FX
THIS
ITEM HAS BEEN RE-MASTERED WITH
NEW AWB CHASSIS / INTERIOR TUB,
SQUARE TUBE FRONT FRAME, LEAF SPRINGS
& DOOR PANELS.
There
were things we couldn't do to the original Charlie Allen Dart,
because of all
the other models we wanted to build from it.
But since this will be an all new
tool,
we want to create an all out correct body..... Such
as: Hogging out the front of both front & rear wheel wells,
cutting a hole
in the cowl & hood for the injector stacks and scribing a new straight door
line for the flip front end.
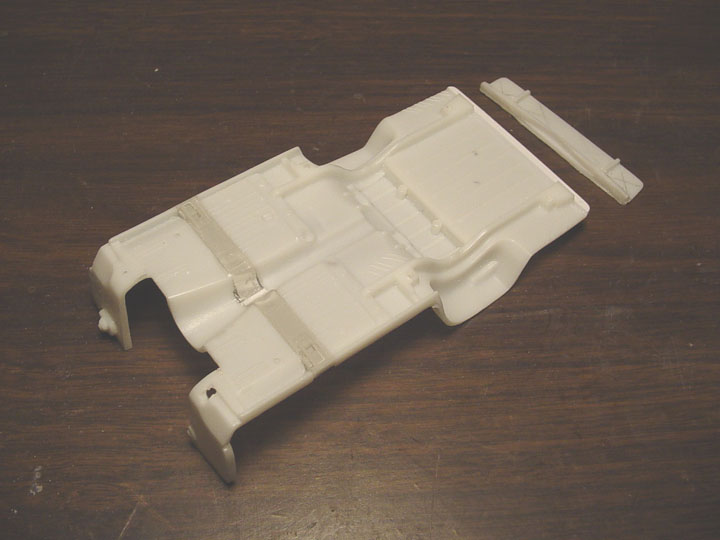 Using the new chassis from
our '65 Dart AFX, we needed to bring back the rear of the chassis
Using the new chassis from
our '65 Dart AFX, we needed to bring back the rear of the chassis
(to stock
wheel base position), and lengthen the front of the chassis.
The tail piece
was removed and we added a new section of interior/ chassis floor.
The
'65 Dart chassis was stretched by using a'71 Ply Duster 340.
The area for
the new motor surround has been cut out in this photo.
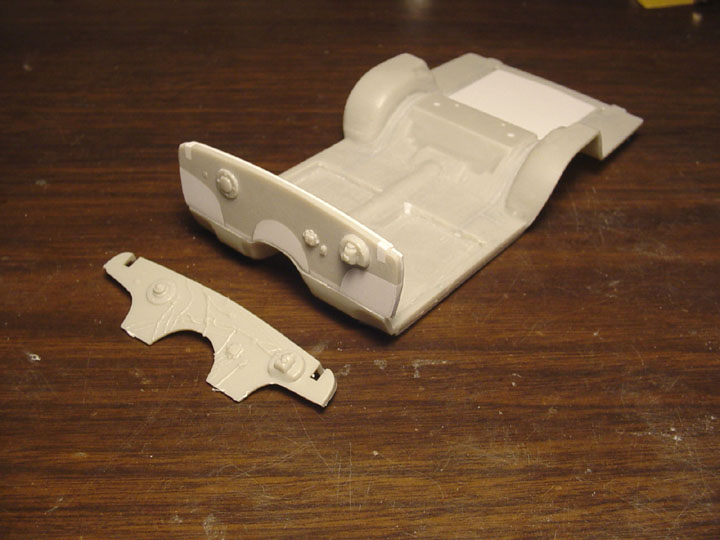
 Here is the new fire wall with motor surround, and the updated Dash Cowl
(with
scoop).
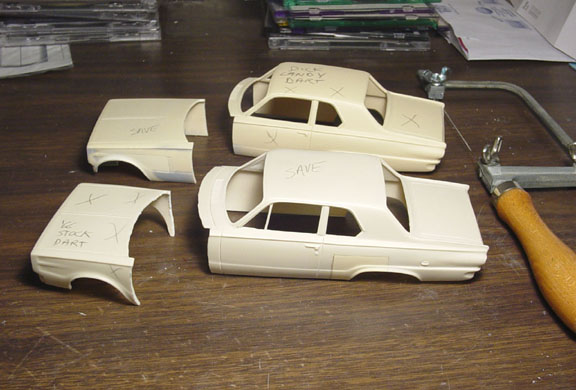
 Starting with the '65 Dart AFX door panels (shown on top), the chrome trim was
removed,
Starting with the '65 Dart AFX door panels (shown on top), the chrome trim was
removed,
the wheel well area had to be lengthened, as well as some minor trim
inserts.
Old door lines were filled in and new door lines had to be scribed.
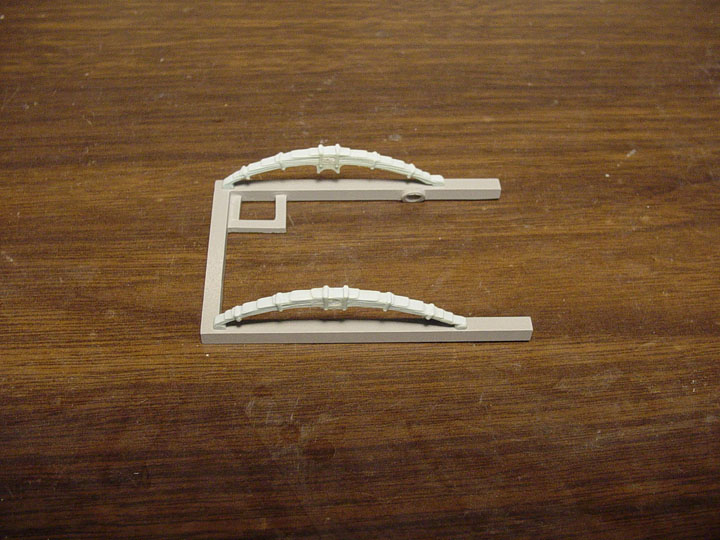
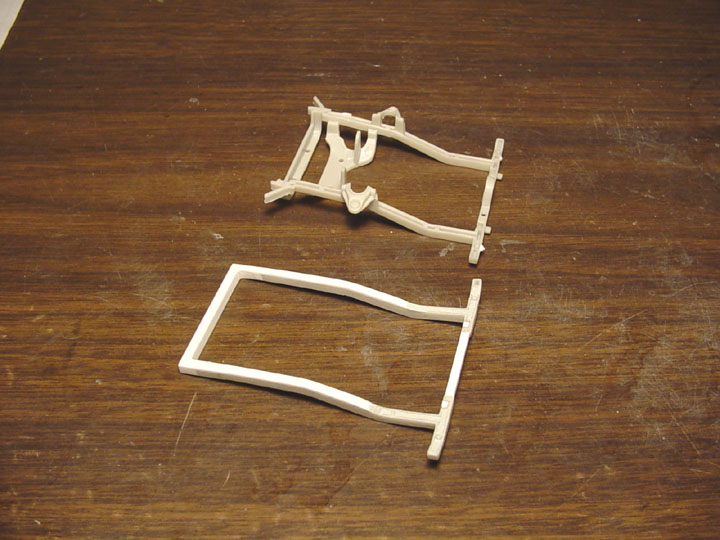
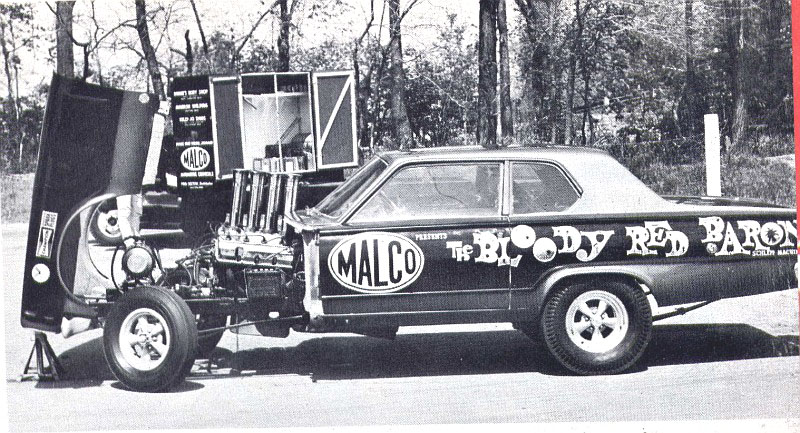
This Square tube frame was
designed from the original frame I built for my personal build up.
Were also adding
a set of "Malco Willys Gasser" Rear leaf springs, to use as the front
leaf springs on the new frame.
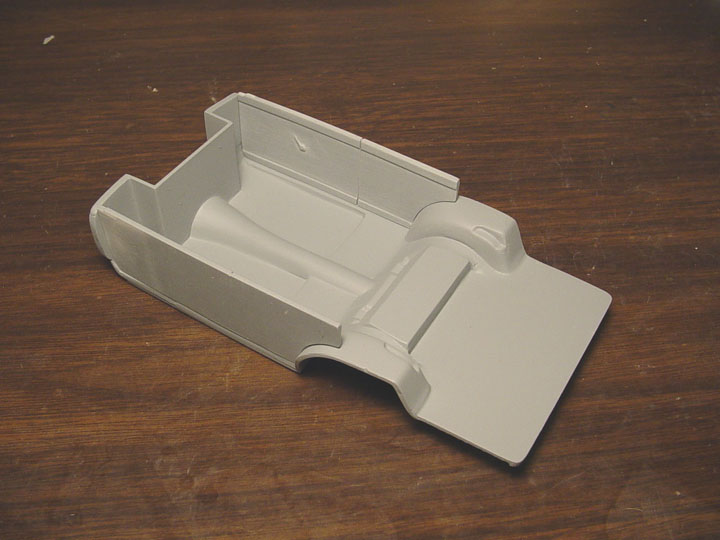 Here is the new Interior tub
!
Here is the new Interior tub
!
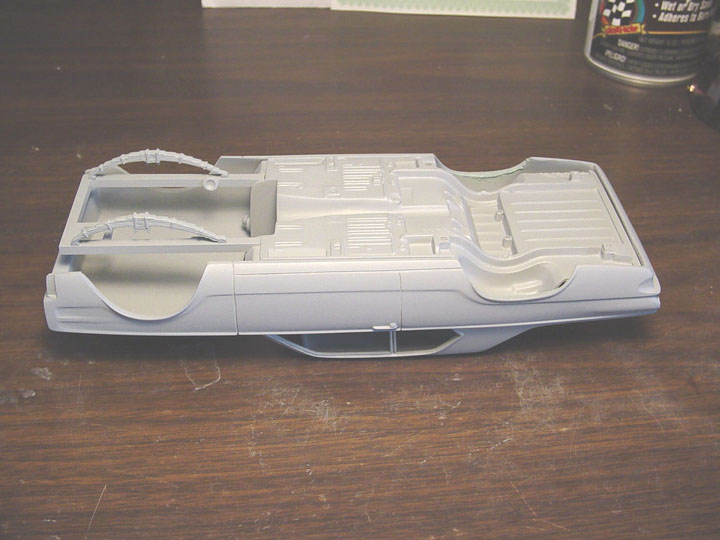
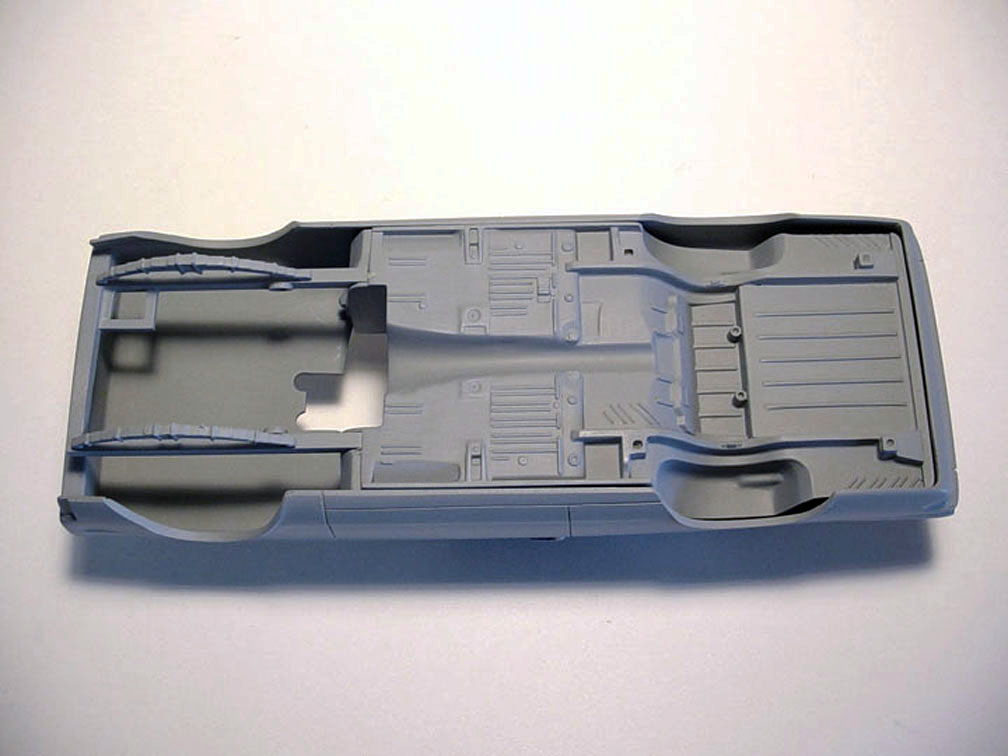 Here is the new chassis with square tube frame (with motor mount location pins) and Front leaf springs.
 The new Charlie Allen "PURPLE
TERROR" body....... Now with correct body modifications
!
The new Charlie Allen "PURPLE
TERROR" body....... Now with correct body modifications
!
MASTER IS FINISHED !
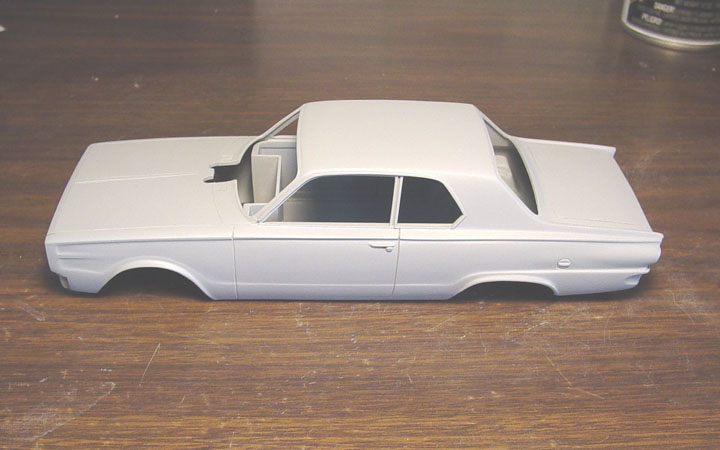
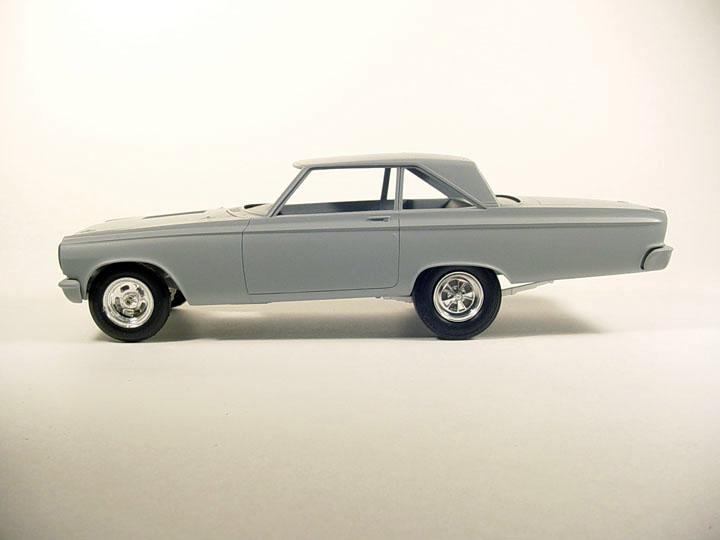
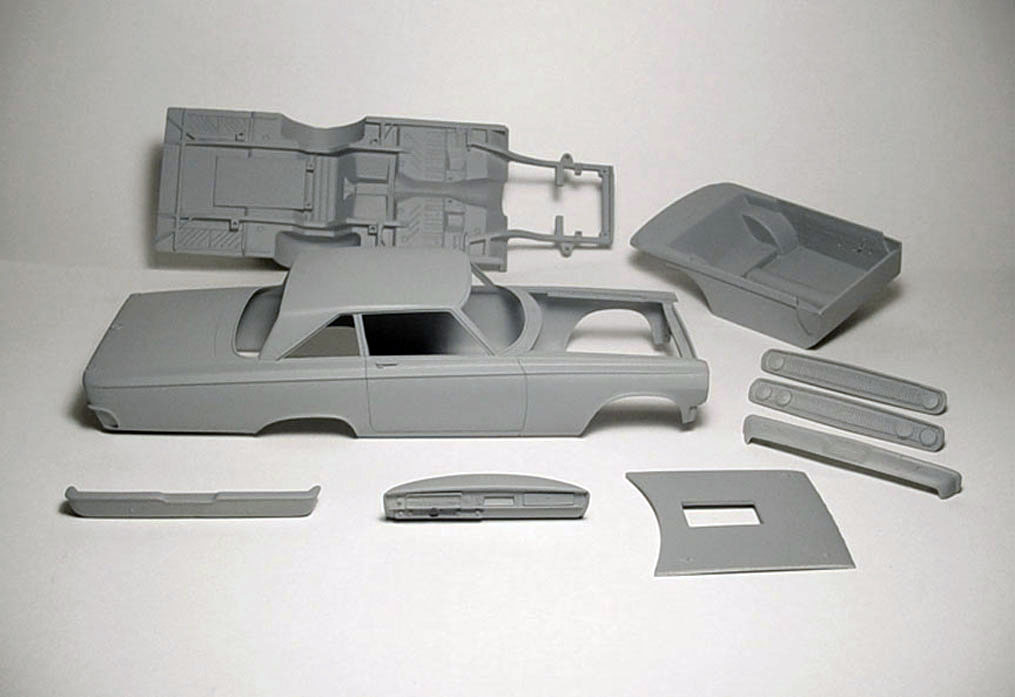
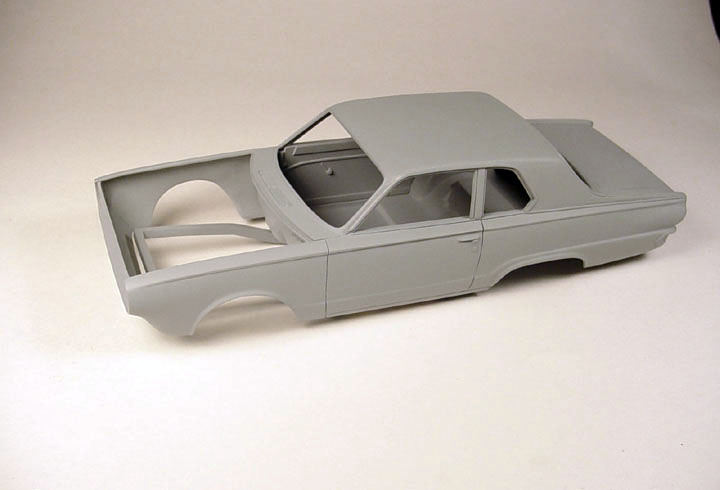
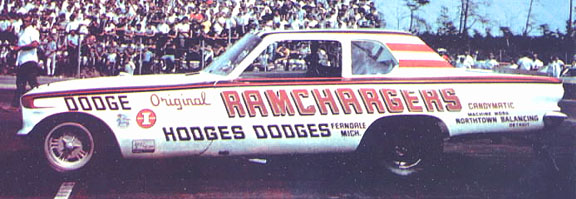
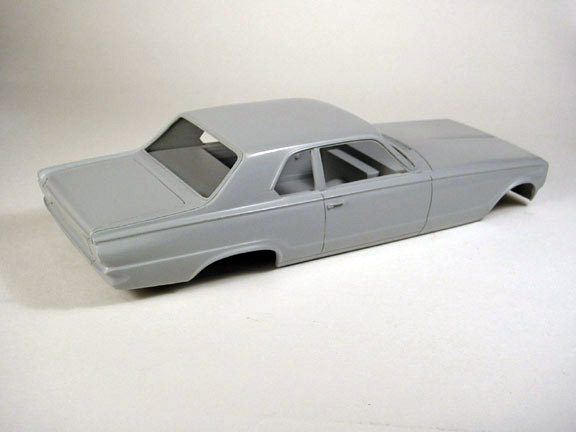
1965 Dodge Coronet Hardtop A/FX
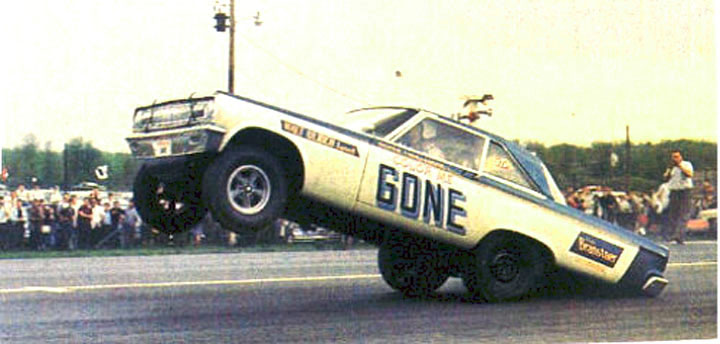


Our goal is to create an all out "Correct" '65 Dodge Coronet A/FXer.
We decided NOT to
use the Polar Lights Coronet because of all the bad reviews it received.
I personally never bothered buying one, hearing it was too toy looking and out
of proportion.
Our 1965 Dodge Coronet A/FX will be designed from 2 original amt. bodies !
 The
entire stock Coronet body was cleaned up of all original defects,
The
entire stock Coronet body was cleaned up of all original defects,
(such as sink
holes, Parting lines, A-Pillar problems,Mounting Pins, Etc.)
Then all the trim,
moldings & emblems were removed, except the 500 trunk emblem and Rocker
Panel Trim.
That was left for alignment for the wheel well alterations.
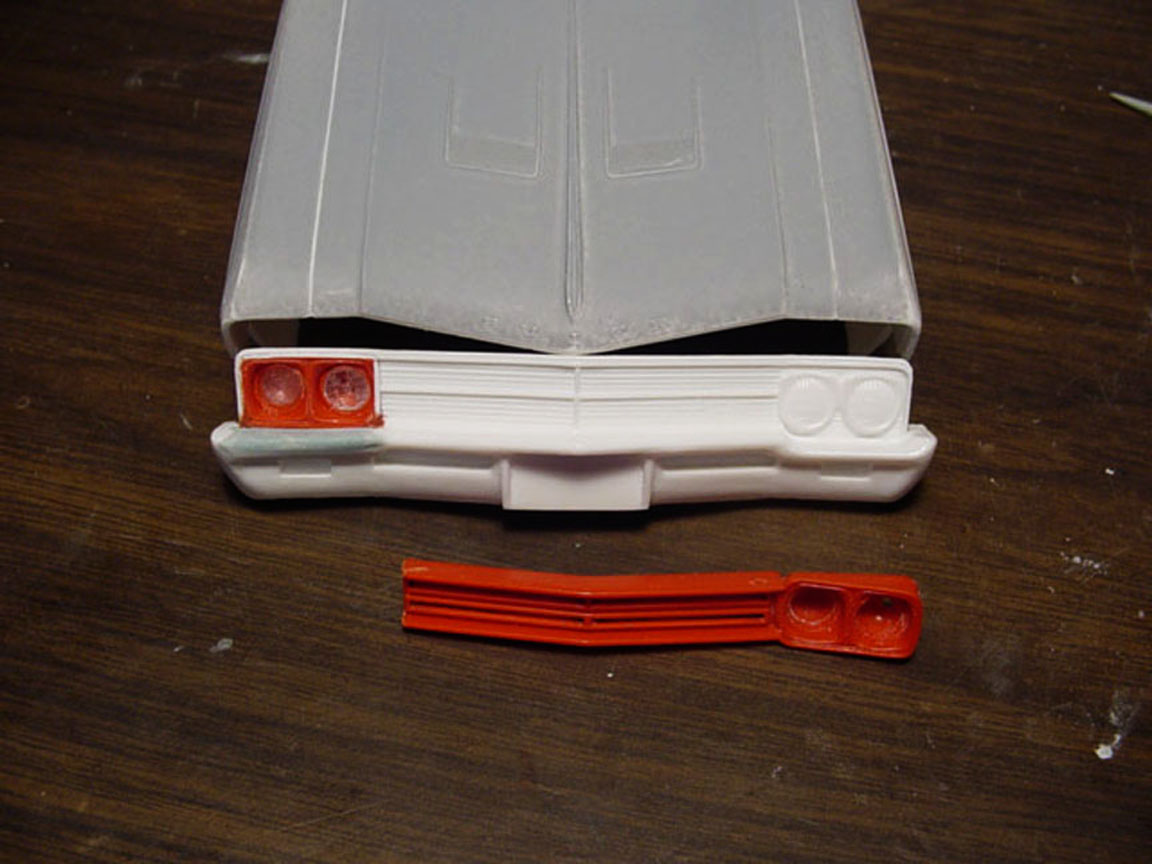
TAIL LIGHTS & MOLDING
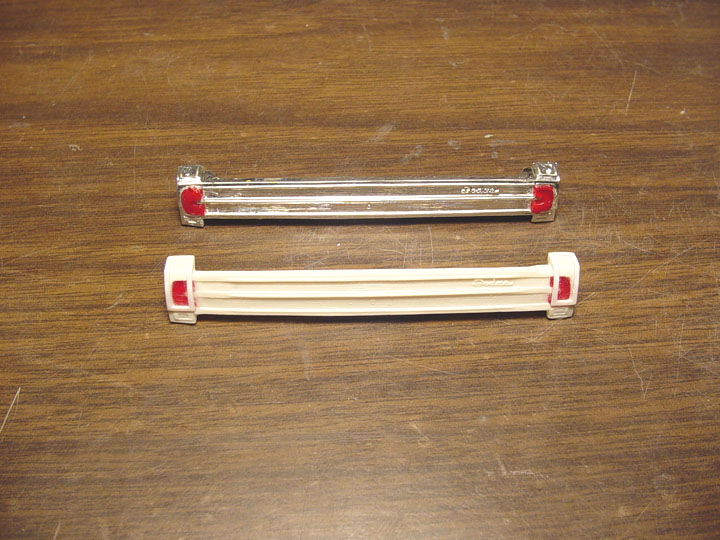
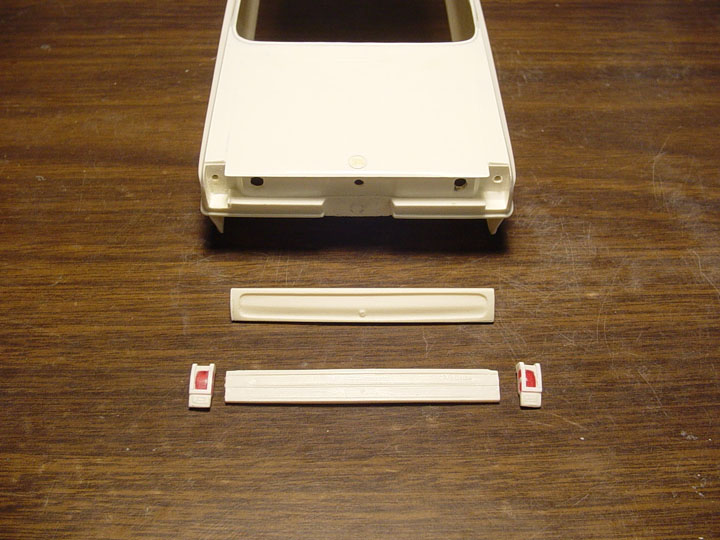
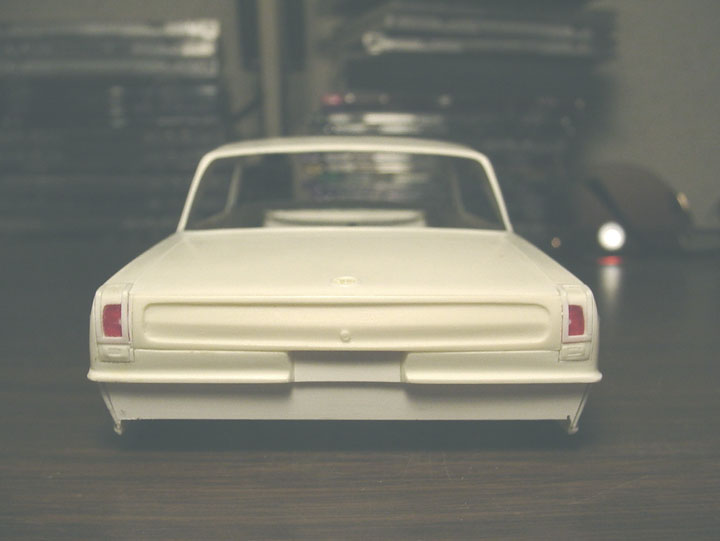 The tail lights have been corrected.
We're also adding
a corrected stock trunk molding. It just needs to be fine tuned at this point
!
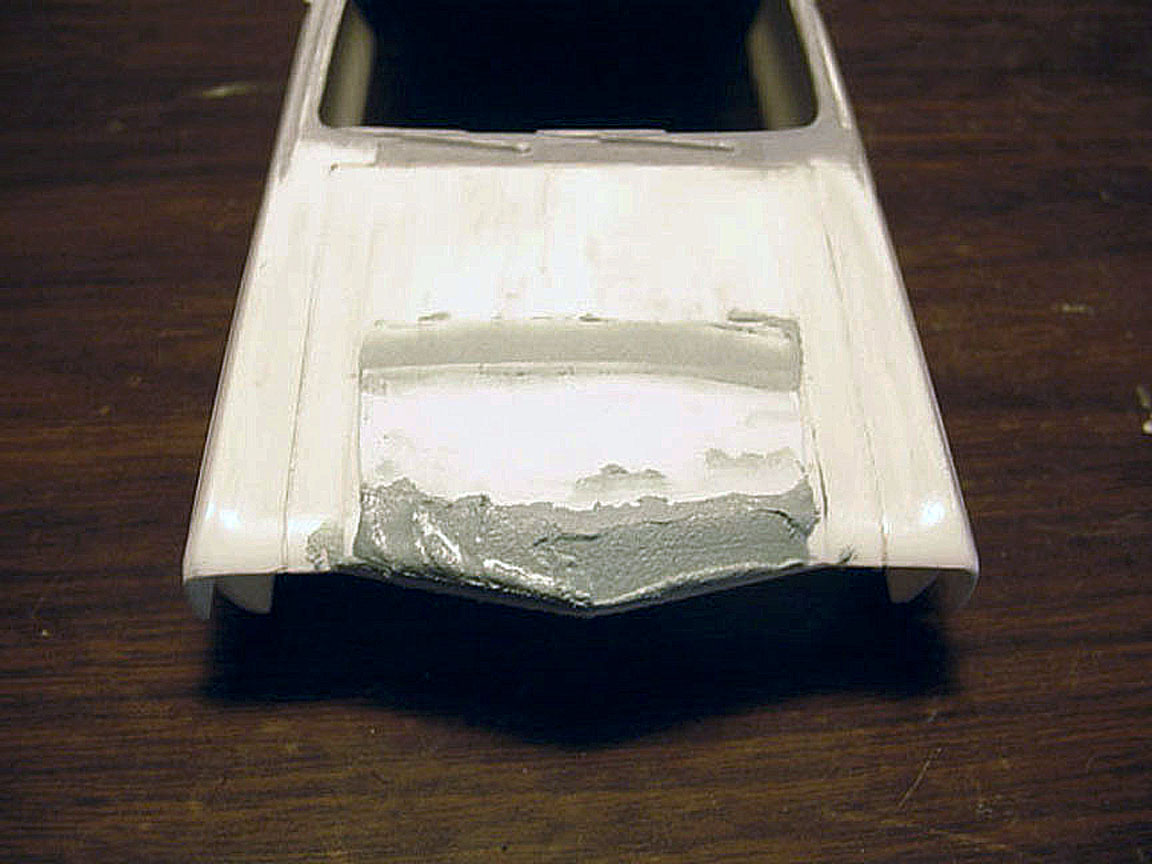
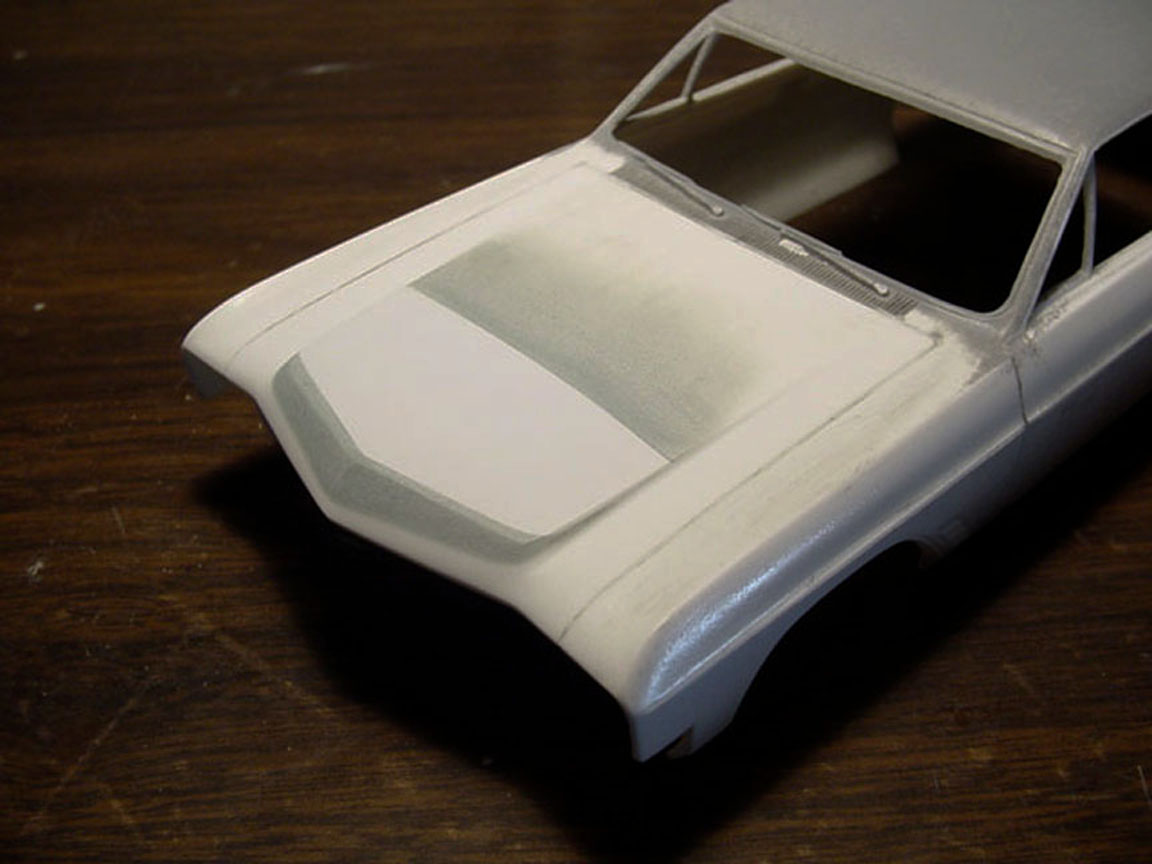
HOOD
 The original amt. hood had a Blower hole that was in-correct, so after measuring
it to fit Fuel Injectors,
The original amt. hood had a Blower hole that was in-correct, so after measuring
it to fit Fuel Injectors,
the sides were filled in with sheet plastic.
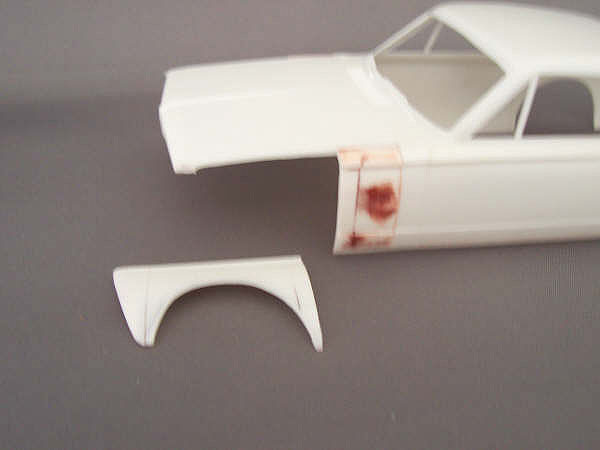
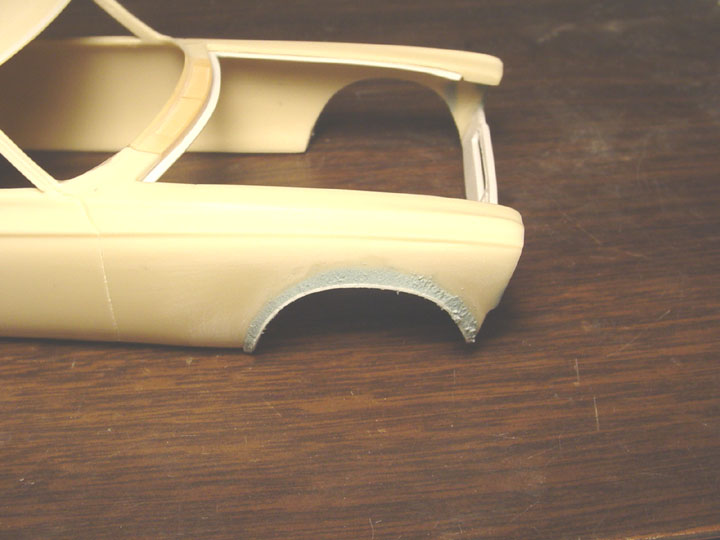
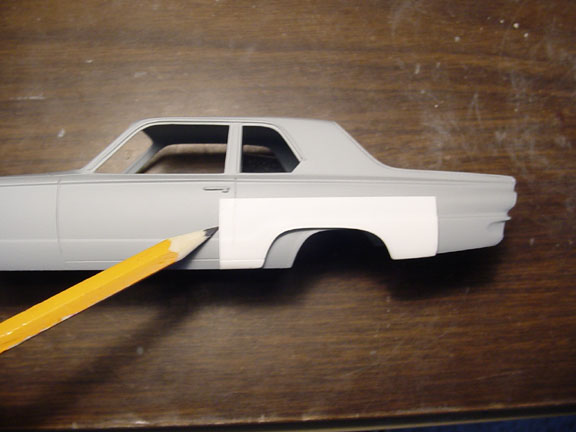
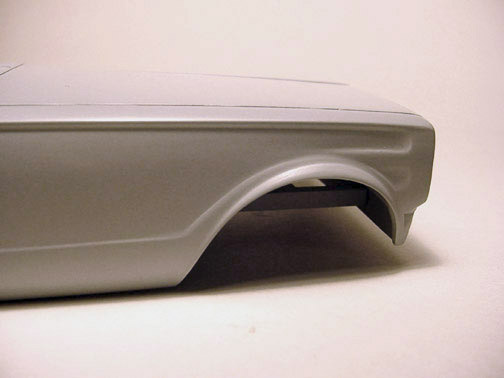
WHEEL WELL ALTERATIONS
 Rear Wheel wells were "correctly"
measured and taped off, using A/FX factory specs.
Rear Wheel wells were "correctly"
measured and taped off, using A/FX factory specs.
 you can see the Patch Panel we used
from the other '65 Coronet amt body in the back ground.
you can see the Patch Panel we used
from the other '65 Coronet amt body in the back ground.
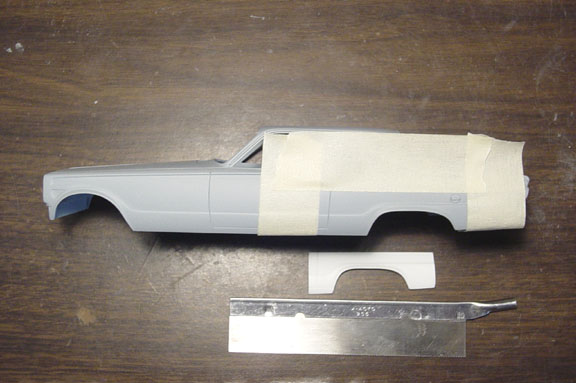
 Front Wheel wells were "CORRECTLY" measured and taped off.
 We now have a totally correct
wheel base (Front & Rear).
We now have a totally correct
wheel base (Front & Rear).
Adding a bead
of super glue to all the joints, we now come to the hard part, sanding it all
to perfection.
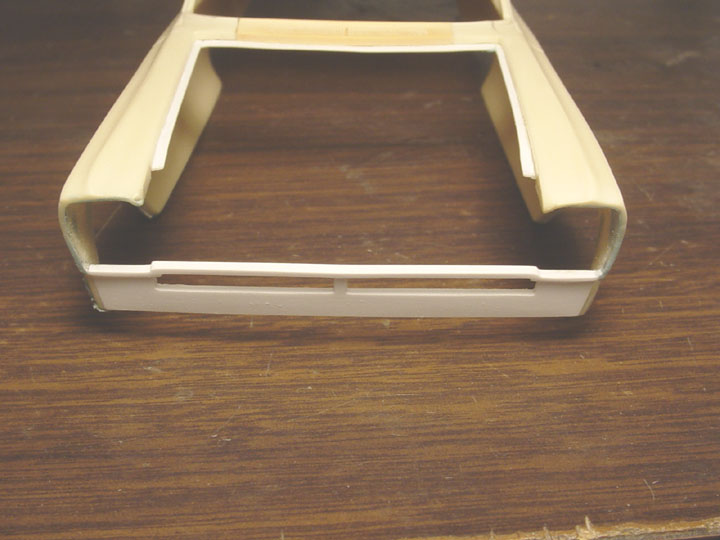
FRONT END
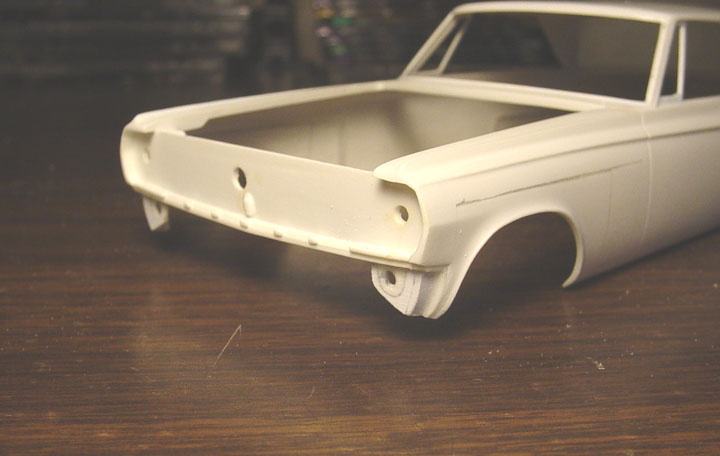 Every amt. Coronet I have ever seen has a factory flaw on the Hood support !
This was filled in with a small piece of sheet plastic.
The
Points on the fenders were too sharp and would break very easily, so we created
an insert behind the bumper location.
The loops for the bumpers to be attached were also weak,
so we wrapped sheet plastic around them and connected them to the new bumper
molding.
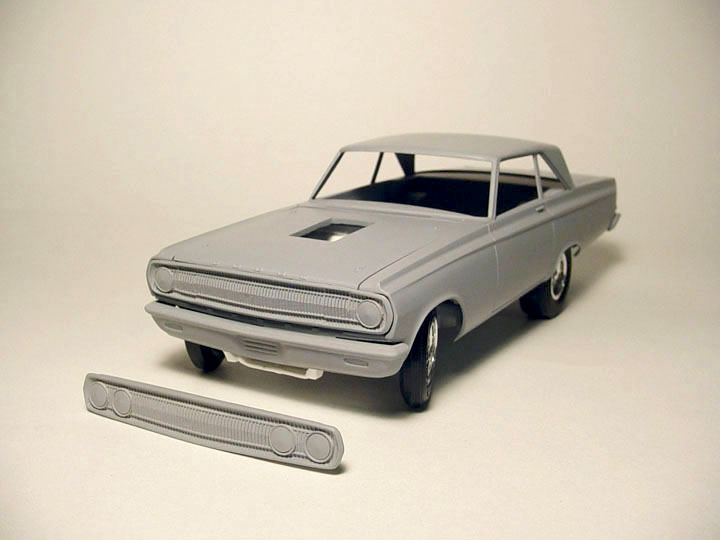
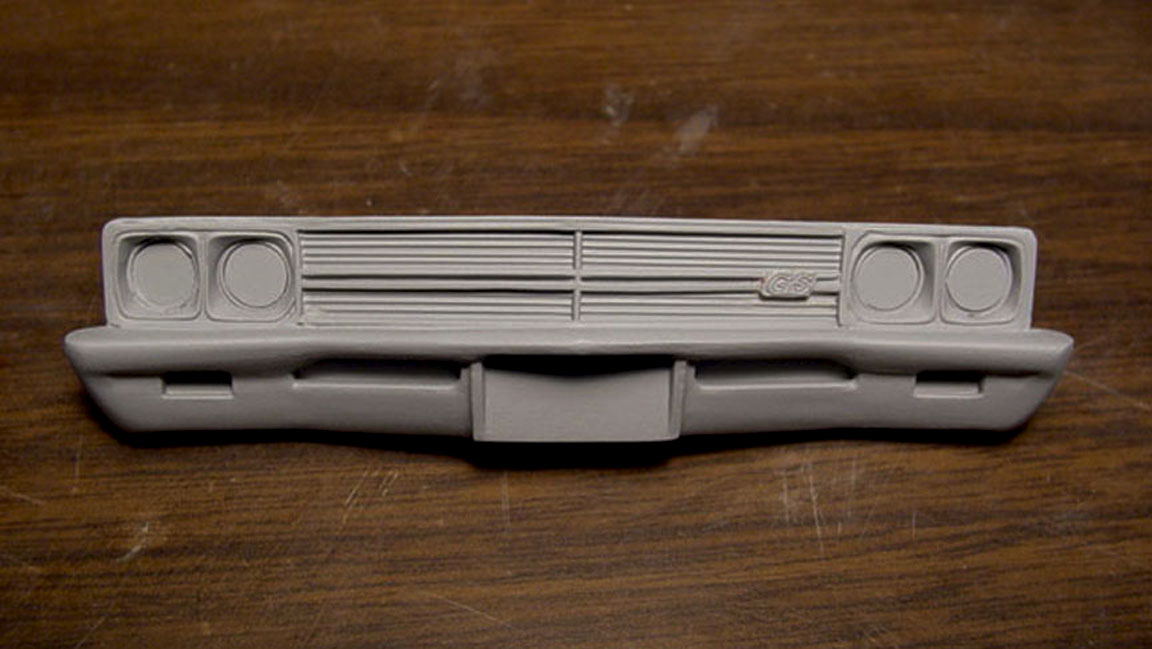
SINGLE
AND DOUBLE HEADLIGHT GRILLS
Because
some cars ran a single headlight grill and some ran a double, we decided to
include both grills with our model !
 The grill we started
with was too short, so it needed a small strip a plastic all around the edge
of the frame,
The grill we started
with was too short, so it needed a small strip a plastic all around the edge
of the frame,
then it needed putty to re-form the lip around the sides.
Also
you can see were adding Cone Shaped Block out head lights to the single headlight
grill,
these headlights had to be re-sized to fit the headlight buckets.
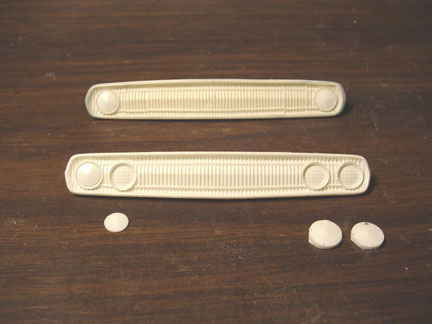 Here is the double headlight
grill getting the same treatment
!
Here is the double headlight
grill getting the same treatment
!
 New Single & Double Headlight grills with Correct Cone Shaped Block outs
!
New Single & Double Headlight grills with Correct Cone Shaped Block outs
!
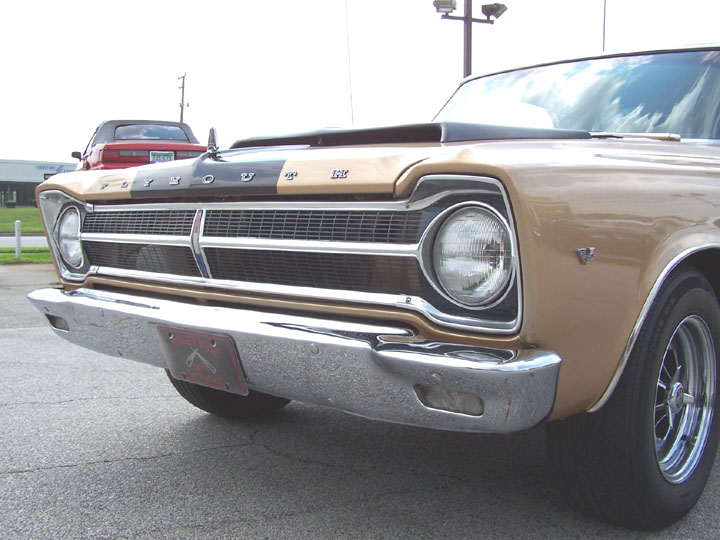
BUMPERS
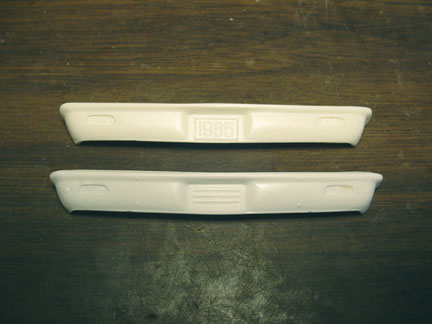 The 1965 License plate was
removed from the front bumper and then we created the correct vent grooves.
The 1965 License plate was
removed from the front bumper and then we created the correct vent grooves.
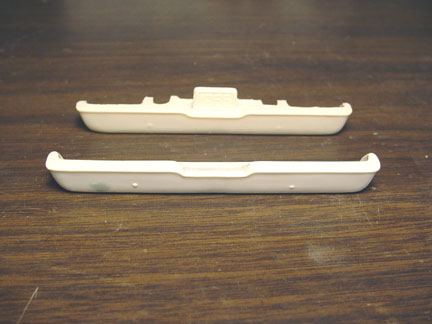 The rear bumper had its 1965
License plate removed as well, along with the original screw mounts.
The rear bumper had its 1965
License plate removed as well, along with the original screw mounts.
A new mount was then added.
WINDOW & DOOR TRIM
It's not understood
why AMT didn't add side window & door trim on their Coronet when it clearly
shows it on the box art for both Ramchargers & Color Me Gone cars.
After
reviewing all the '65 Coronet Funny Cars that ran, it was decided that they
all had some sort of side window and door trim, or at least they still had the molding
that the trim would have been attached to !
The way we plan to do it, you will be able to build any Funny Car car you want,
but may need to remove some trim,
depending on the car you decide to build ?
But, its easier to remove some trim, rather than add it !
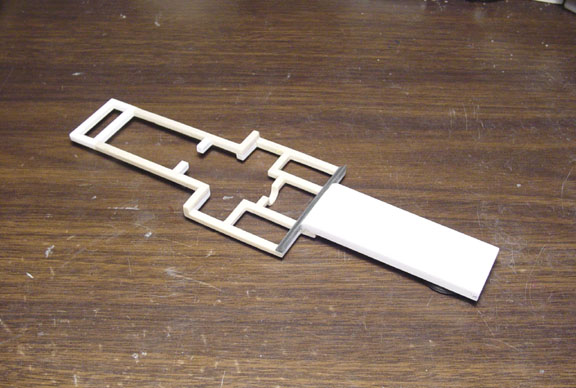
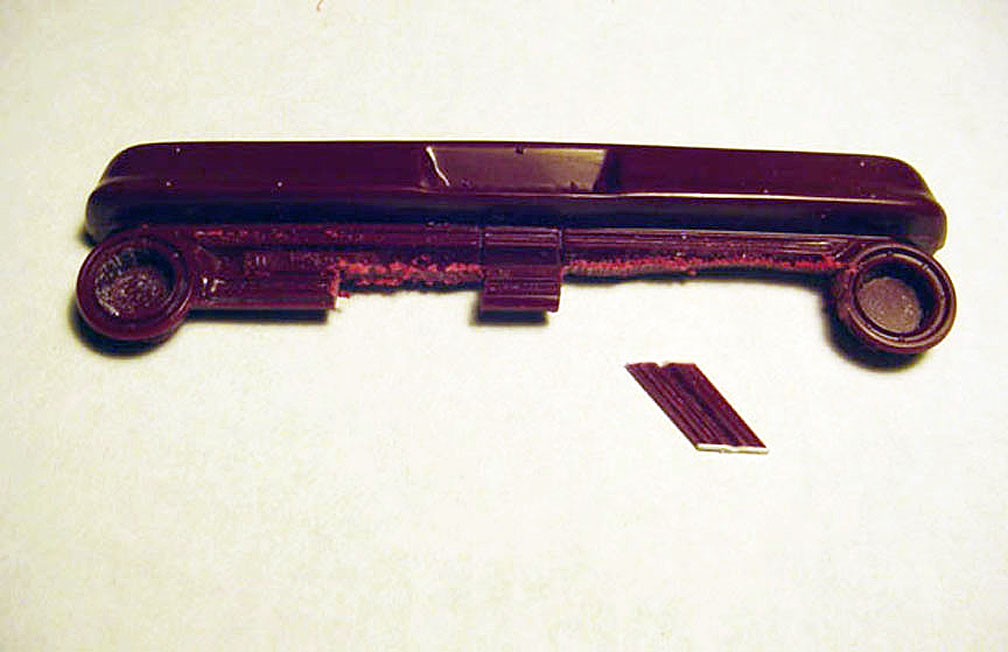
 To do the door trim, we started with .020 x .100 evergreen plastic strip, then
2 strips of .010 x .040
To do the door trim, we started with .020 x .100 evergreen plastic strip, then
2 strips of .010 x .040
(shown in the middle). These were glued side by side
leaving a small gap to simulate a weather strip (shown on top).
 The side window trim is .030 x
.040 plastic strip, this will be the same thickness as the new door trim.
The side window trim is .030 x
.040 plastic strip, this will be the same thickness as the new door trim.
 New side Window and Door Trim,
but still needs a little Liquid glue to fill the cracks and some minor sanding.
New side Window and Door Trim,
but still needs a little Liquid glue to fill the cracks and some minor sanding.
We also fixed the
drip rails on the left side A-pillar that was barely visible on the amt. model.
 Here is the finished body
ready for its first shot of primer, it will then be checked for any minor imperfections,
Here is the finished body
ready for its first shot of primer, it will then be checked for any minor imperfections,
re-sanded, primed and then polished to a high gloss.
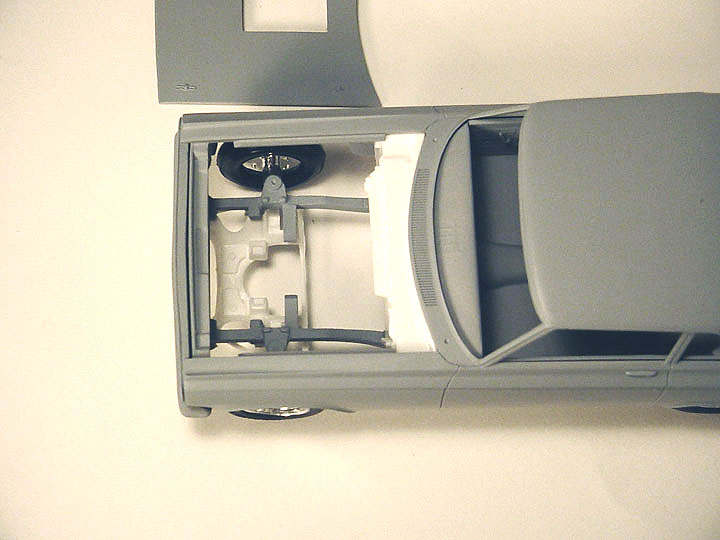
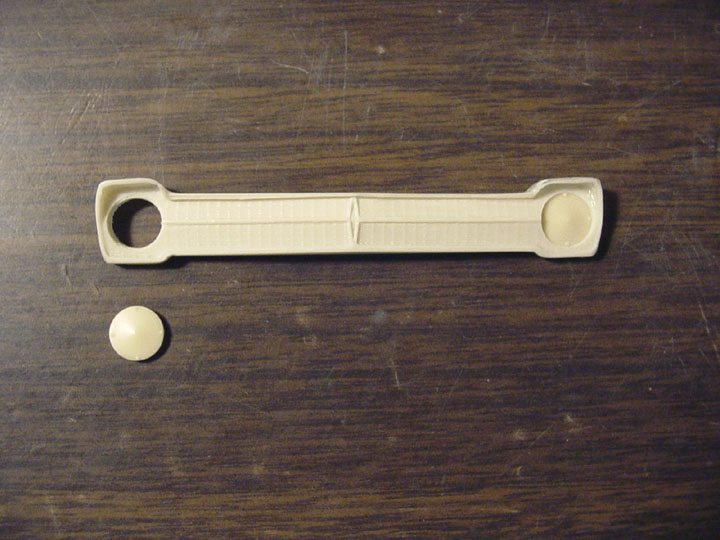
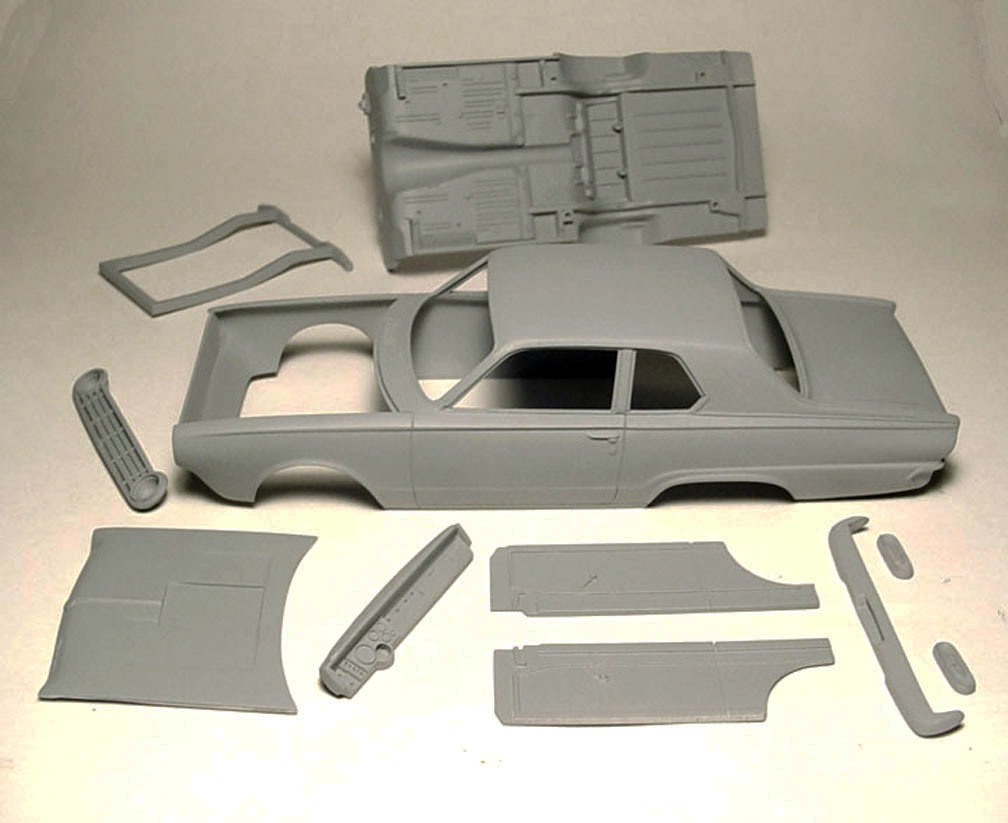
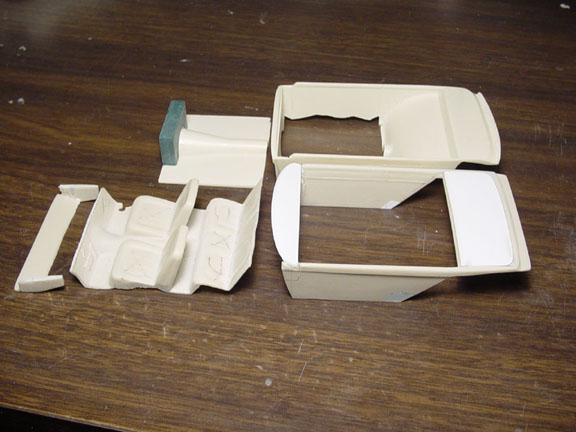
INTERIOR TUB
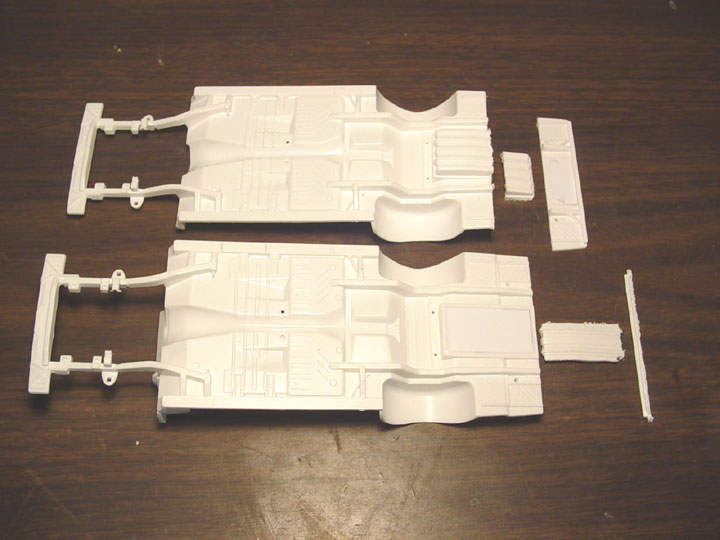
 Starting with our '65 Plymouth
A/FX interior tub (bottom of photo) , the door panels were removed.
Starting with our '65 Plymouth
A/FX interior tub (bottom of photo) , the door panels were removed.
Then the door panels from the amt. '65 Coronet were removed from the tub (top
of photo).
The arm rests and window cranks were carefully removed.
Holes were drilled for the
locations of the arm rests, window cranks.
The door handles were taken
from the Ply AFX door panels & glued to the NEW Coronet door panels for
more realism.
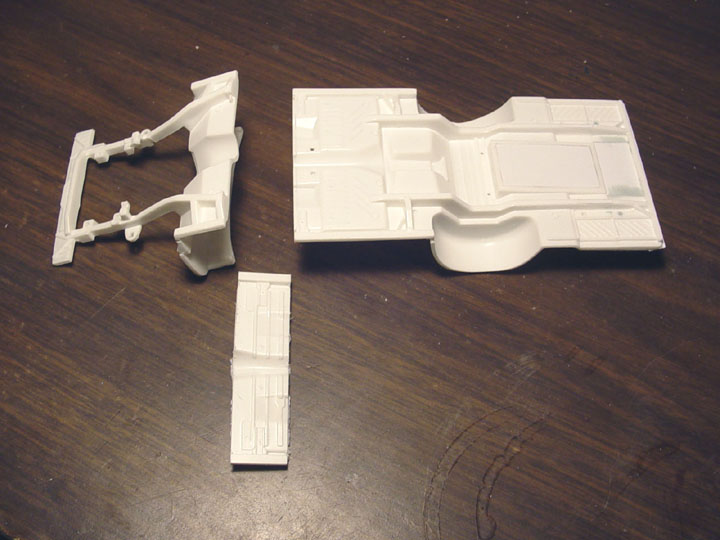
 We have a new '65 Dodge Coronet
A/FX interior tub !
We have a new '65 Dodge Coronet
A/FX interior tub !
This
master is finished and we guarantee it to be the only "CORRECT"
1965 Dodge Coronet A/FX Hardtop ever offered !
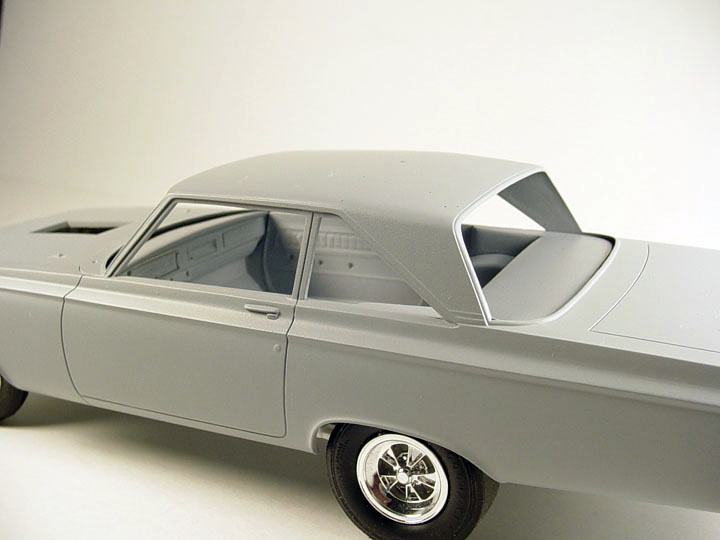


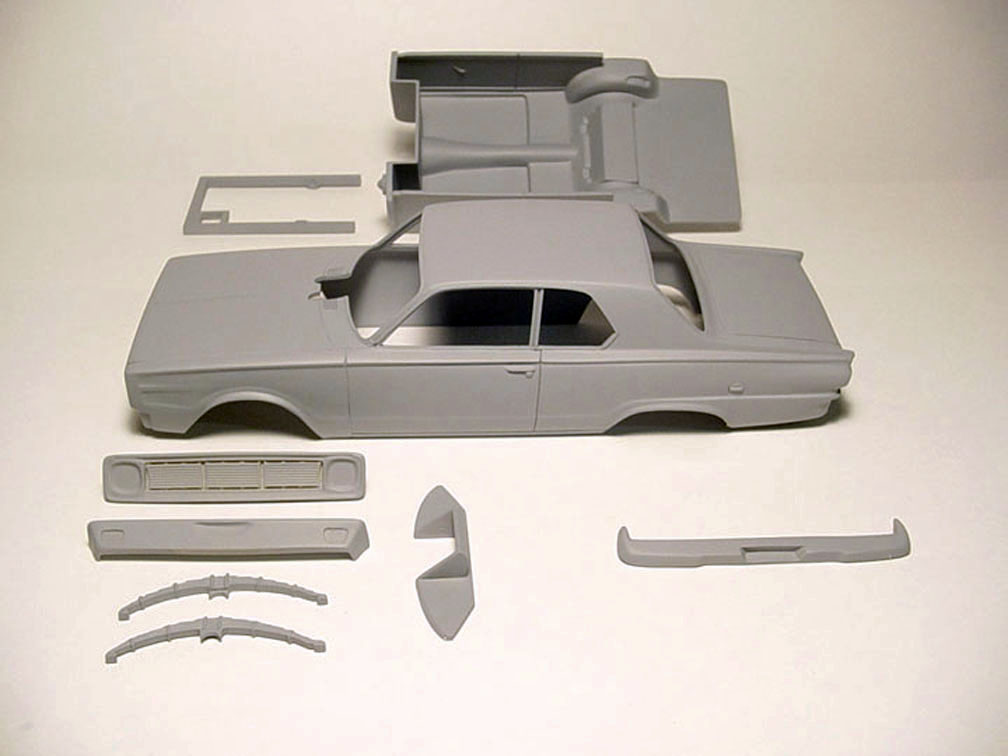
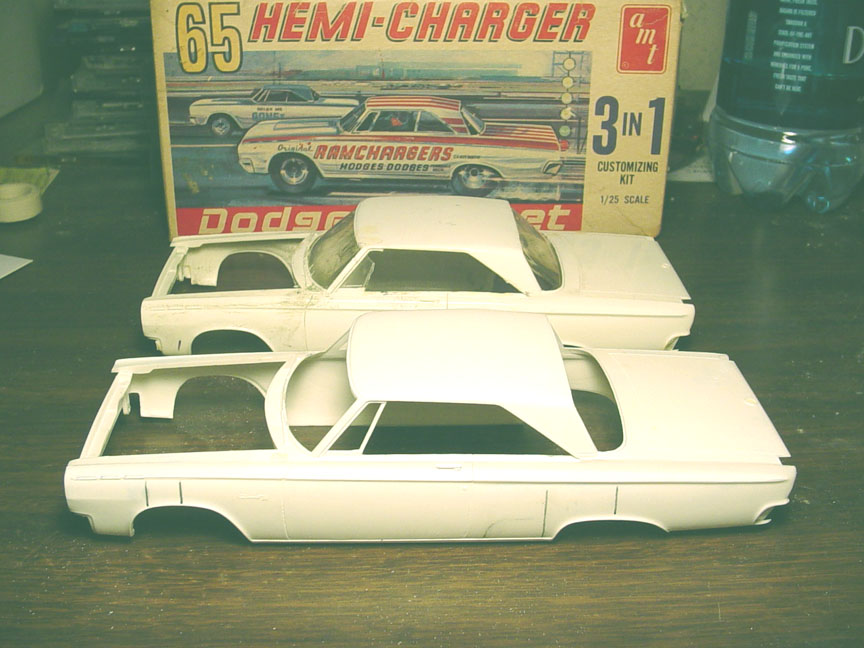
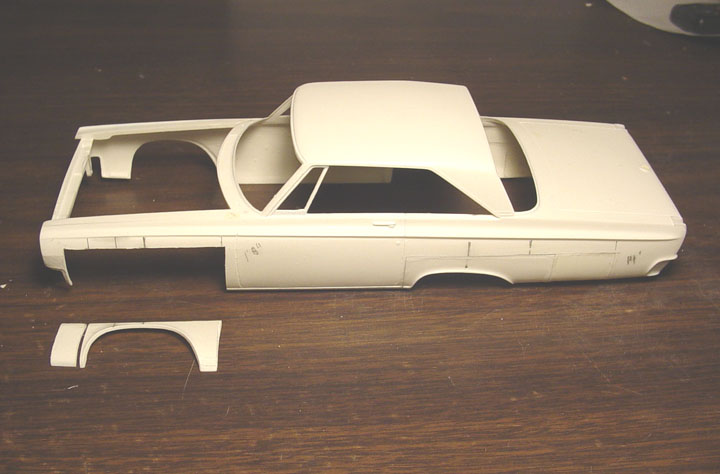
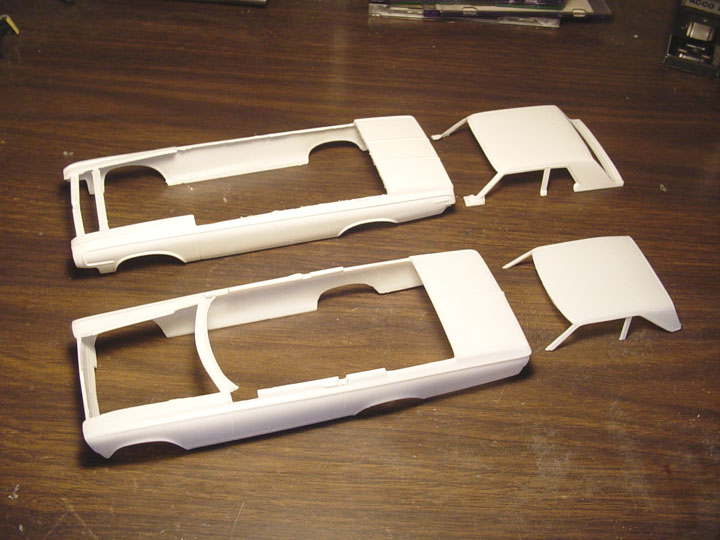
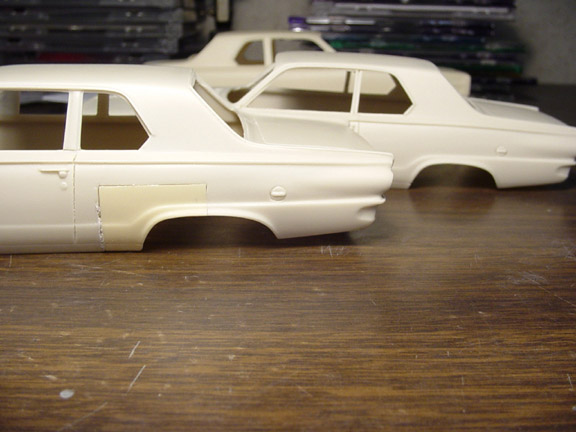
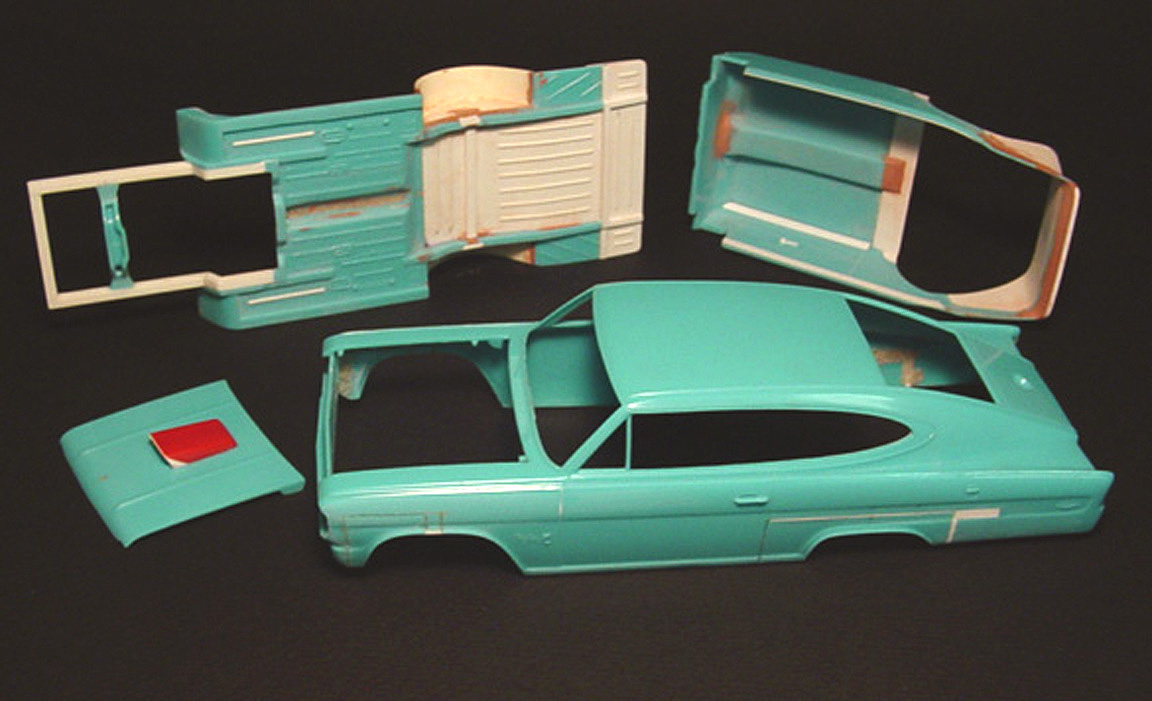
1965 DODGE CORONET SEDAN A/FX
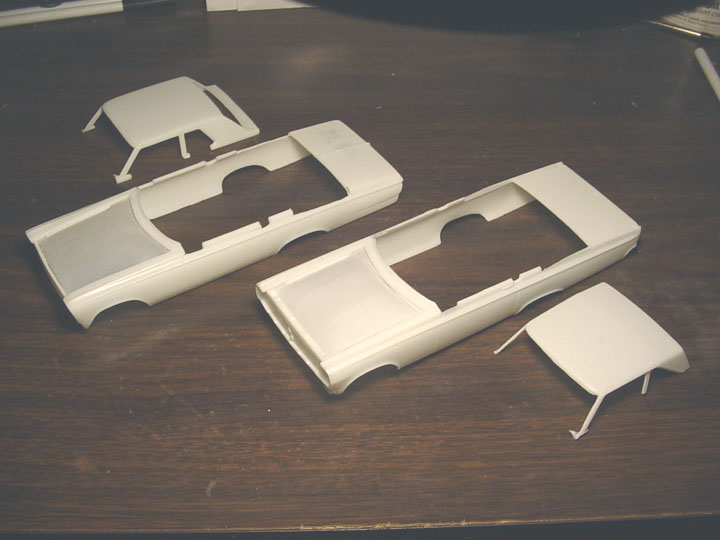 Starting with our '65 Plymouth
Sedan AFX, we removed the roof,
Starting with our '65 Plymouth
Sedan AFX, we removed the roof,
but left some body notches in for a better fit. (this also helps for sanding and body strength).
The '65 Dodge Coronet Hardtop ( that was mastered from an original amt Coronet ) roof was removed and the notches
were lined up to the new Sedan roof.
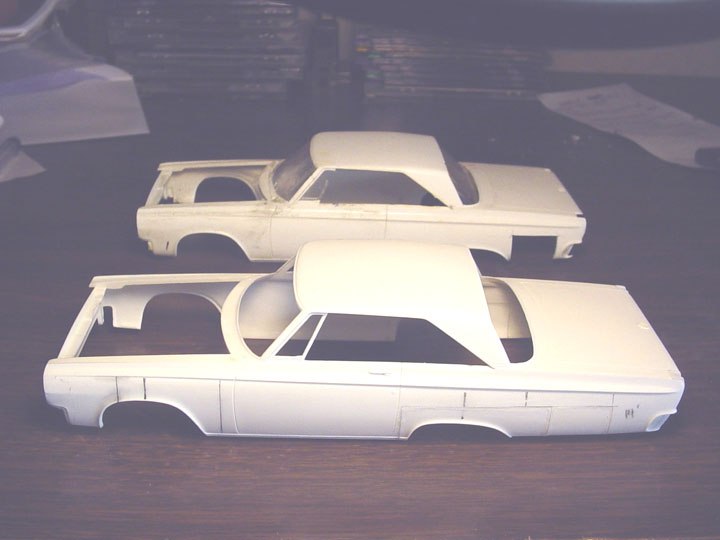
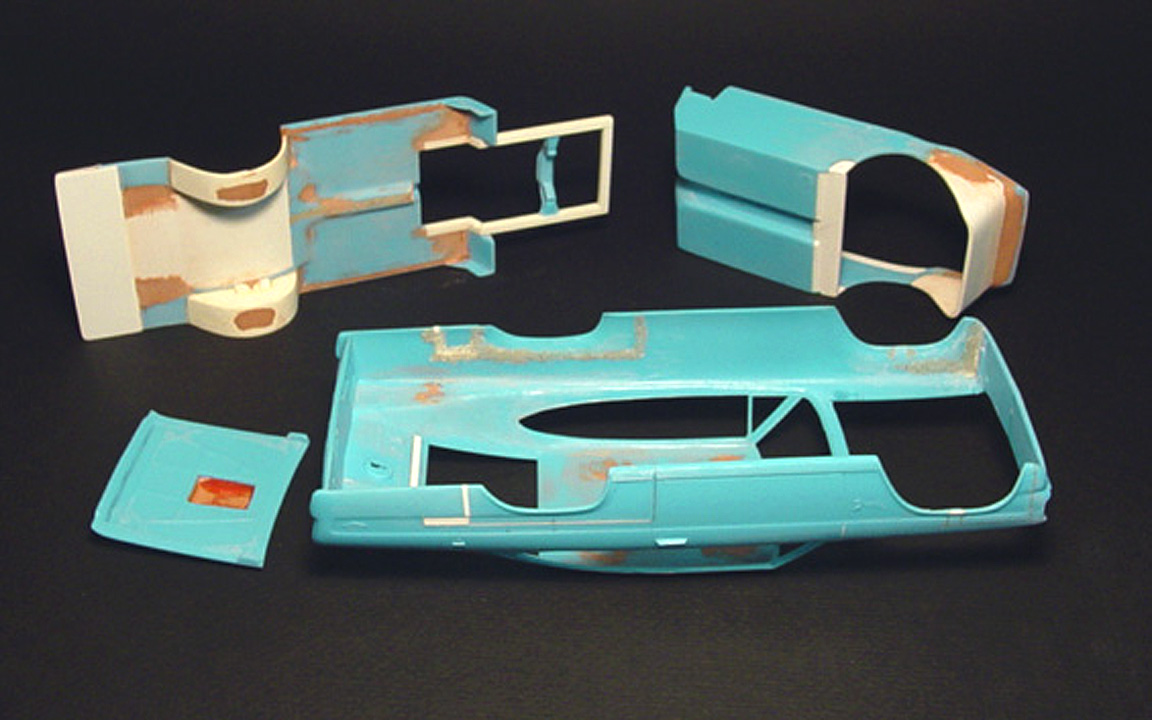
 Here is the '65 Plymouth Sedan roof along side the '65 Coronet body.
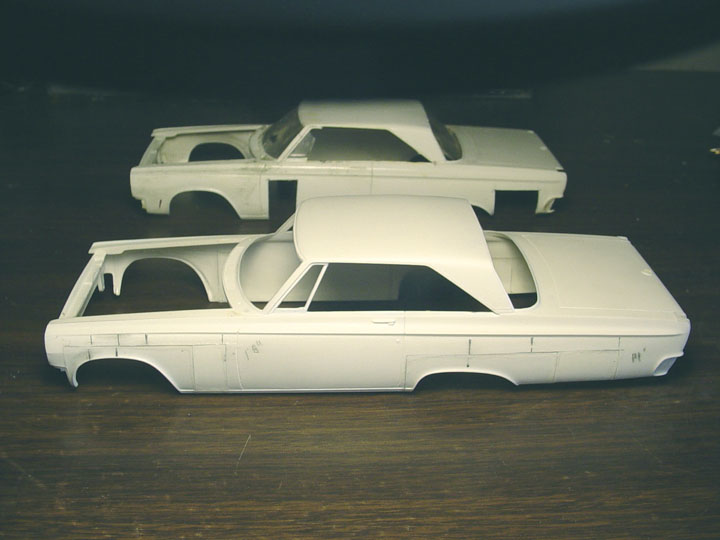
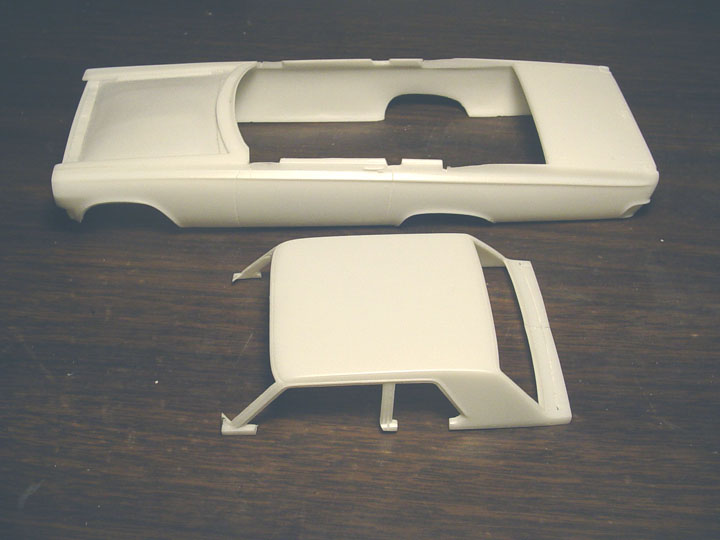
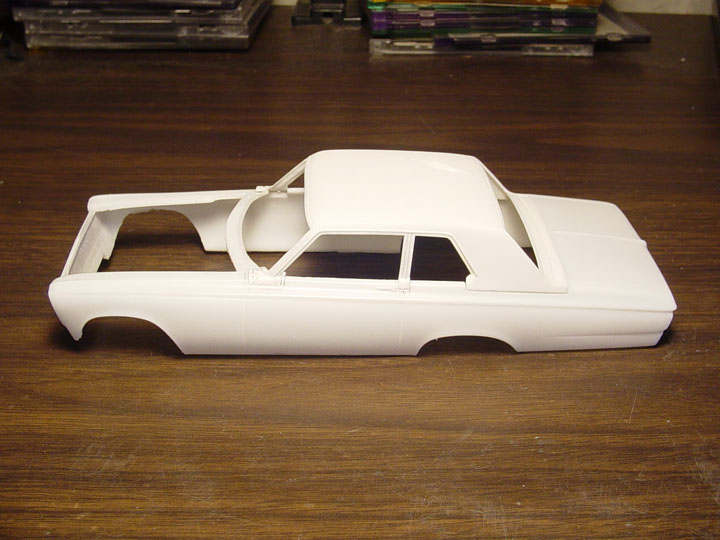
 The new Sedan roof had to be slit down the center and 3 " were removed,
so it can be angled into the front of the 1/4 panel. Here's how all the Pillars
fit into the body.
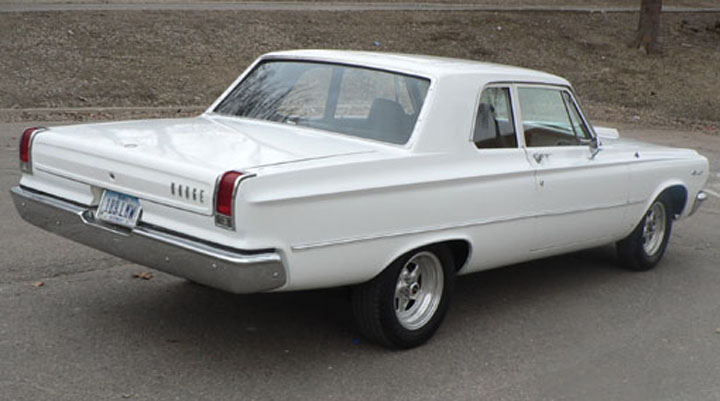 On the real car, notice how the roof has a seam along the trunk & sail panel.
Our model will have the same.
On the real car, notice how the roof has a seam along the trunk & sail panel.
Our model will have the same.
 The new sedan roof is finished !
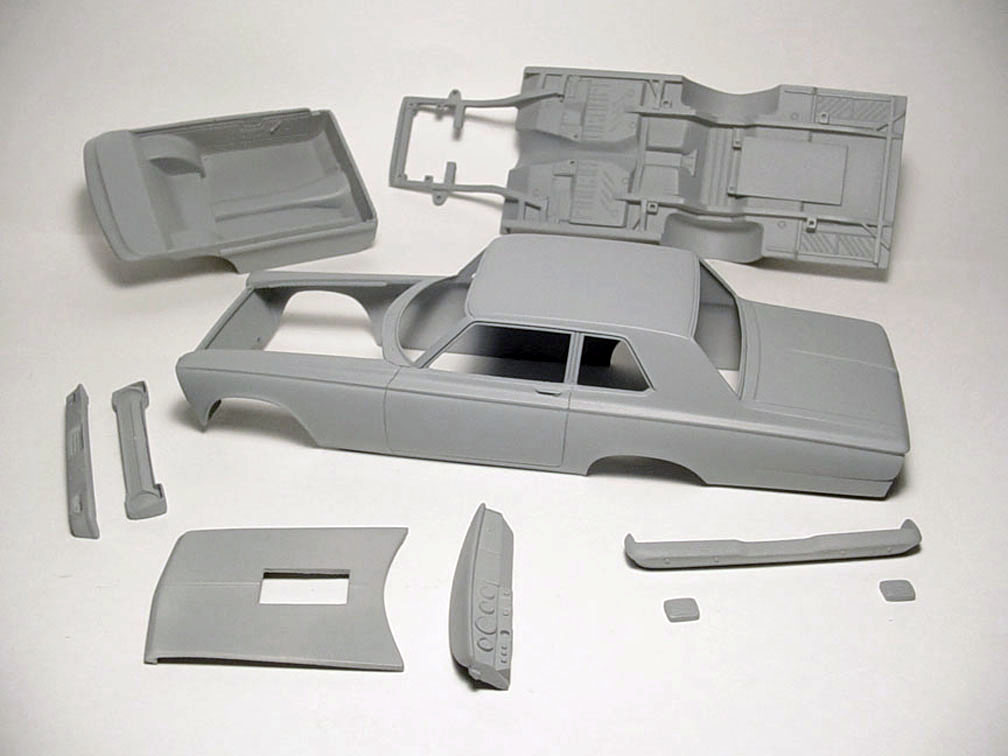
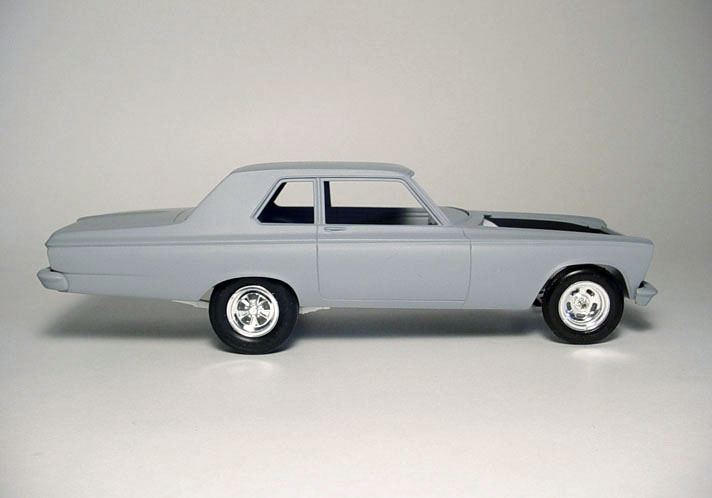
MASTER MODEL IS FINISHED !
This
model will come with the same parts as the '65 Dodge Coronet Hardtop A/FX
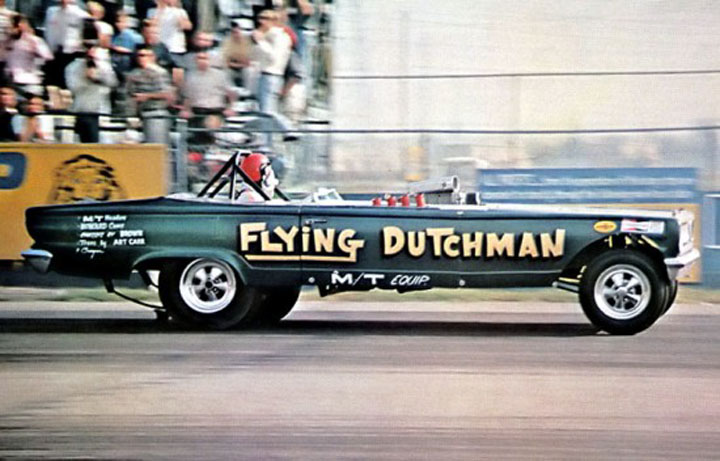
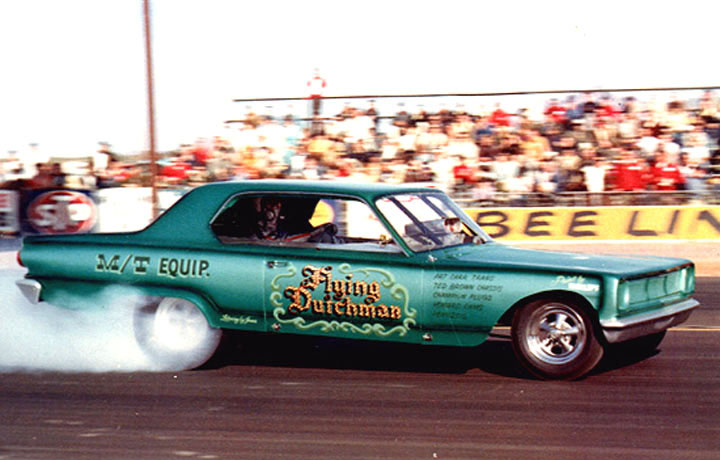
"FLYING
DUTCHMAN"
CHARGER
III F/C
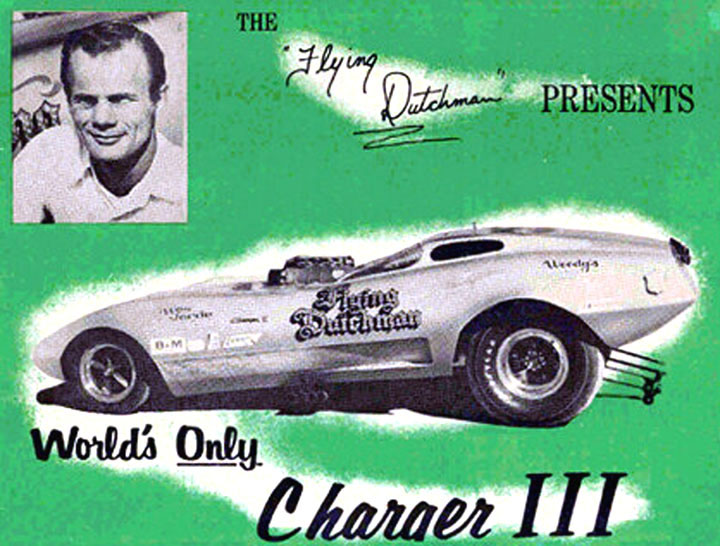

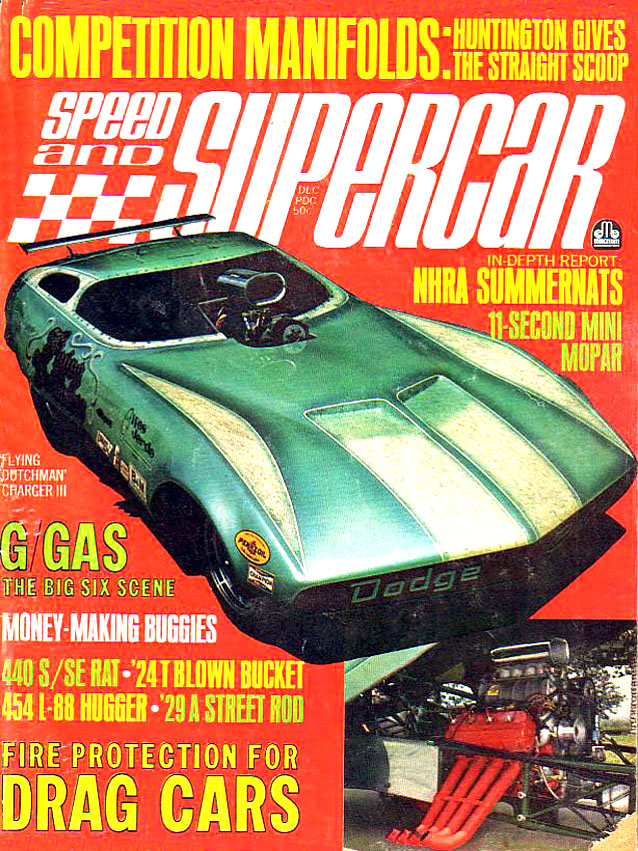
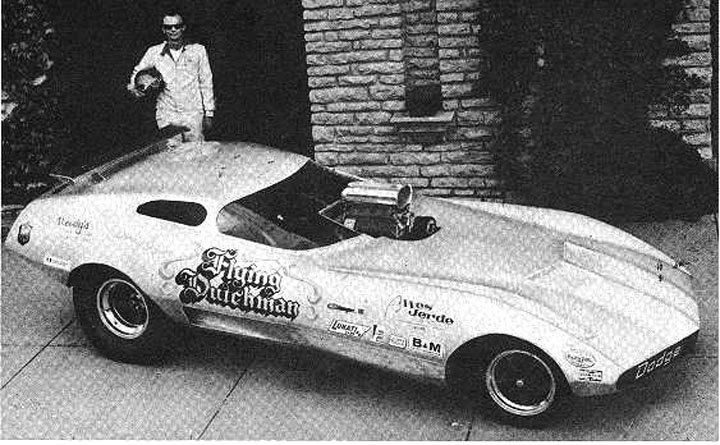
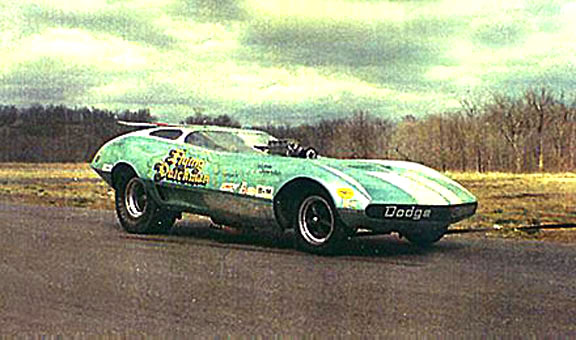
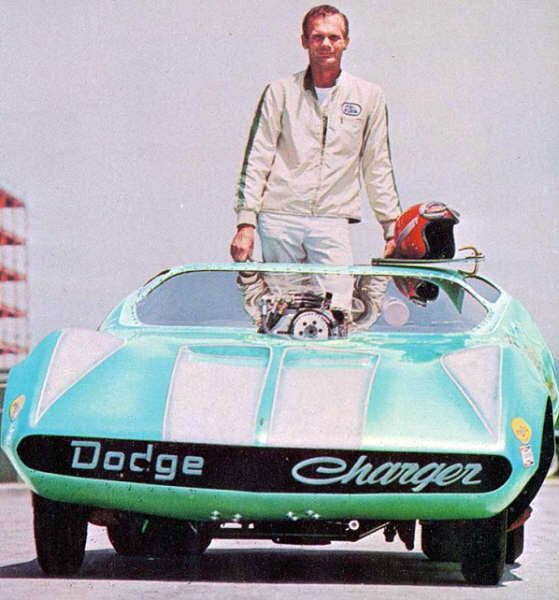
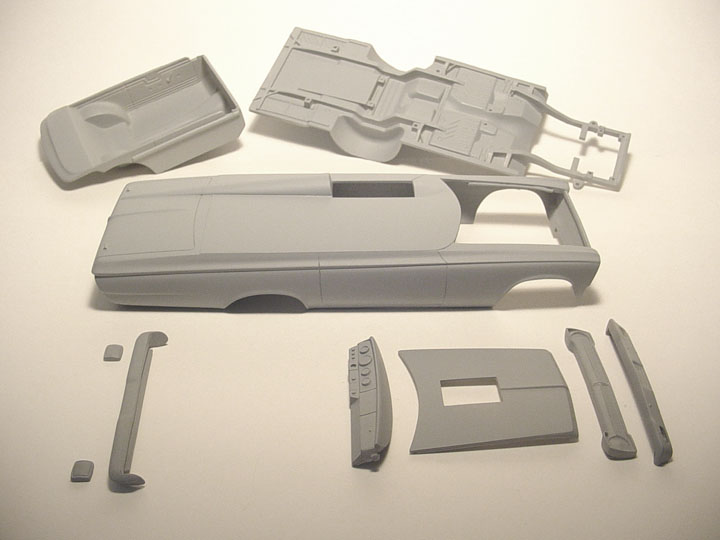
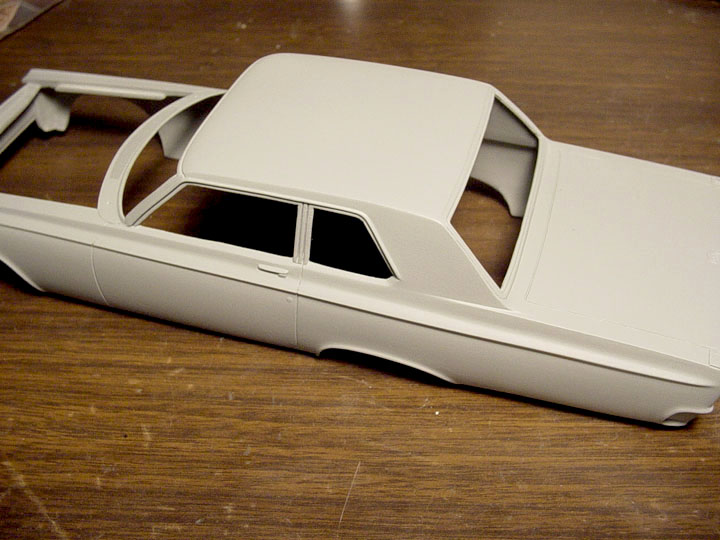
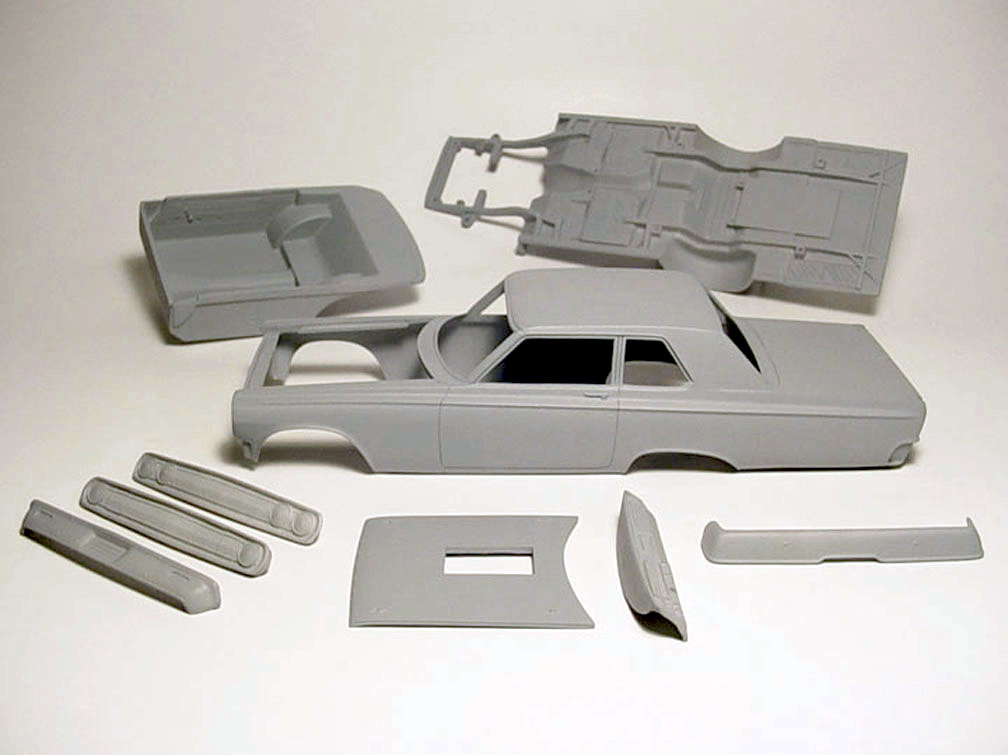
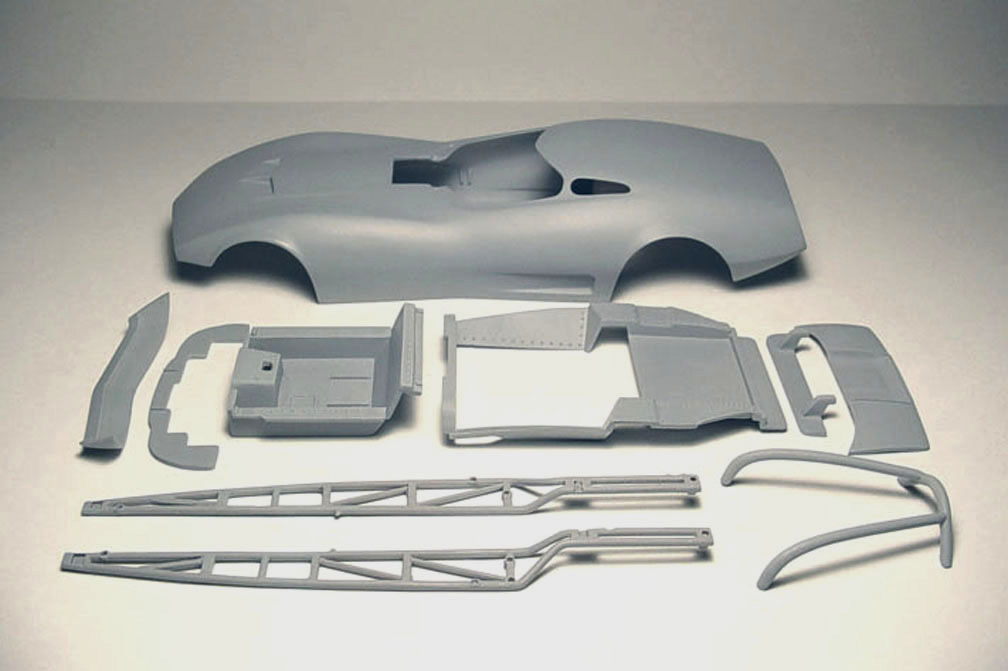
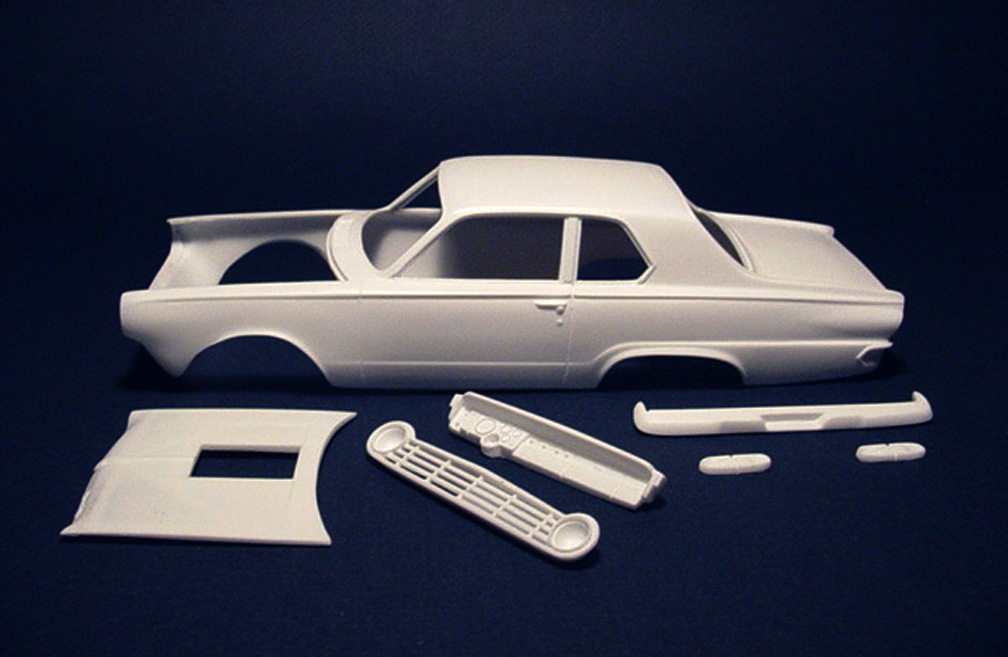
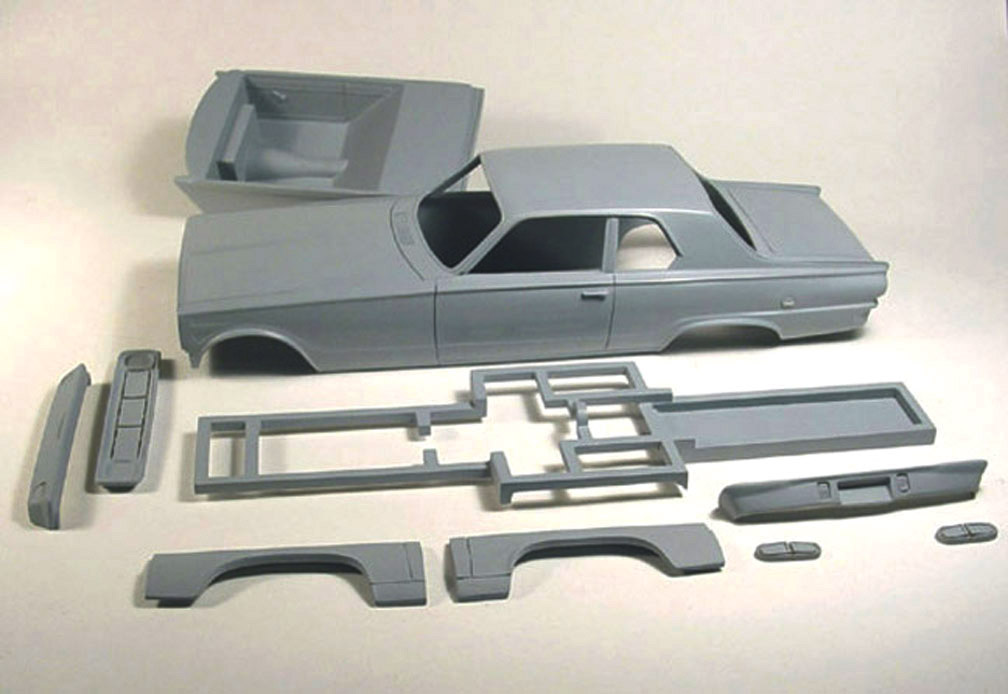
Unlike the original MPC model car; our resin model will have an "accurate body".

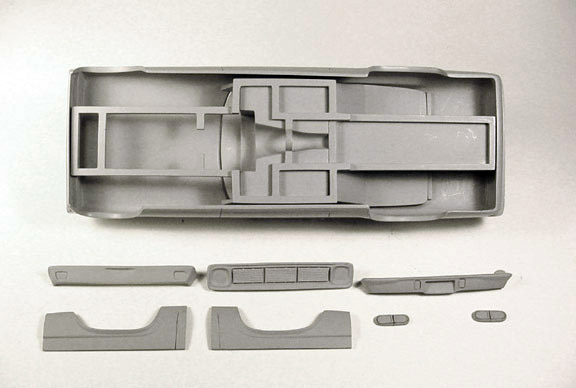
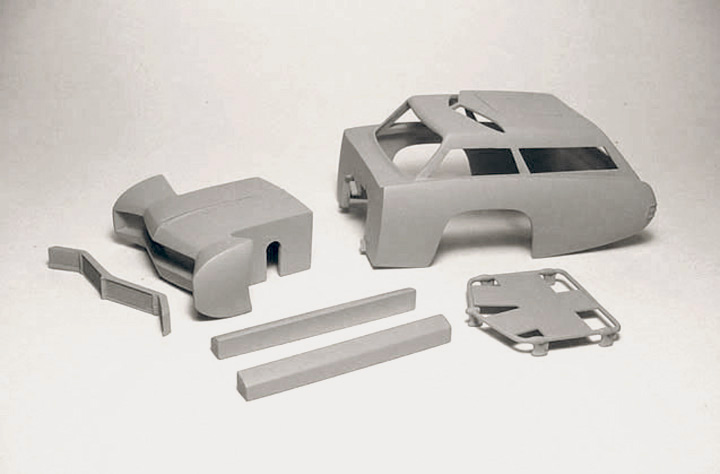
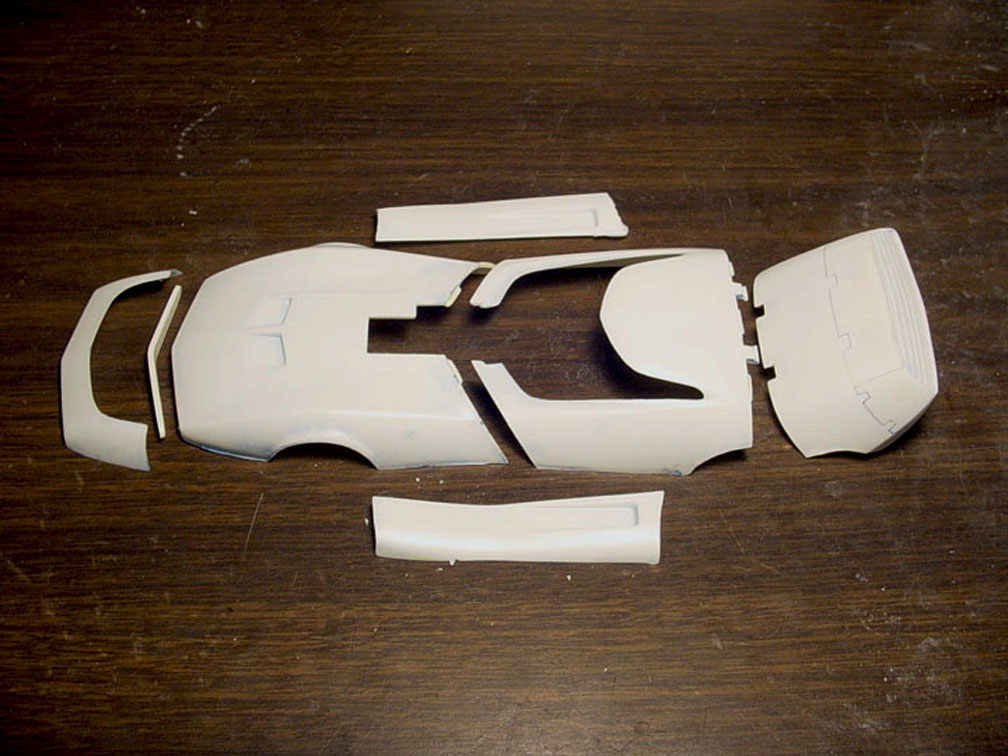 Here is a parts layout of all the original mpc. body parts.
The MPC model was designed wrong; so I will be correcting all the mistakes from the original plastic body.
 A- Pillars were added to create side windows.
 The rear Valance Panel was removed & will be a separate piece to be able to remove from the mold.
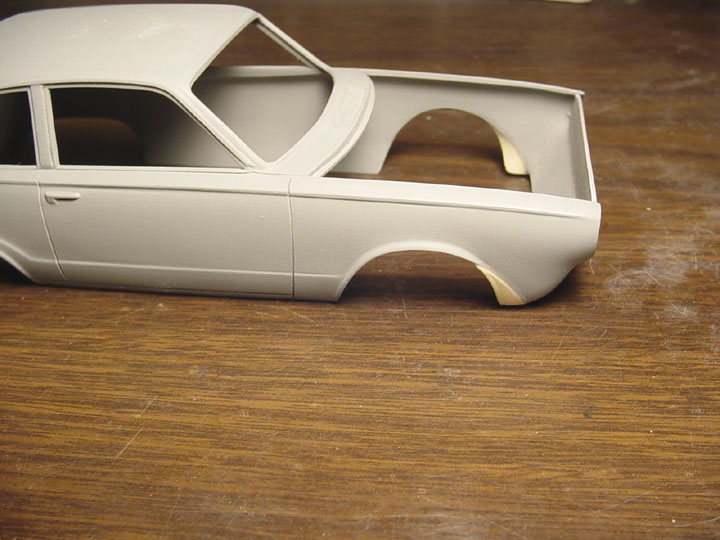
 The original rear wheel wells did not have a flare, so masking tape was applied
and was cut out for the shape of the flare.
The original rear wheel wells did not have a flare, so masking tape was applied
and was cut out for the shape of the flare.
Then it was puttied, after removing
the tape, it was sanded and shaped.
 New Re-shaped wheel wells !
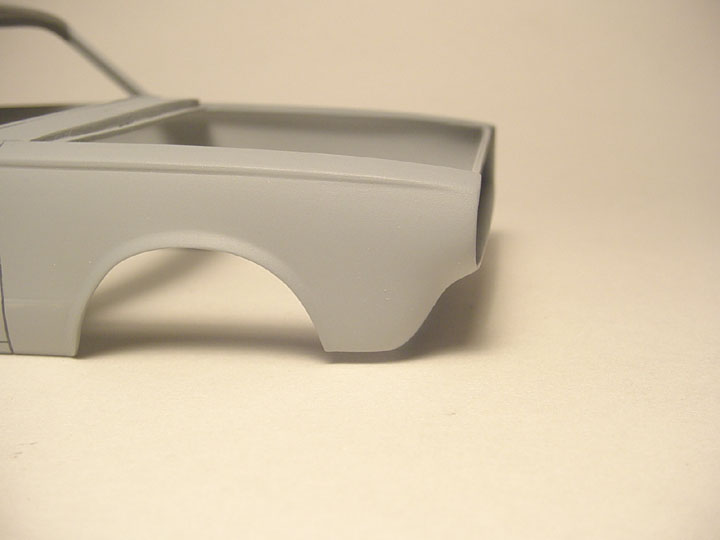
 The front wheel wells were moved forward 12 scale inches, just as the real car
was !
The front wheel wells were moved forward 12 scale inches, just as the real car
was !
A piece of
sheet plastic will be needed for a patch panel.
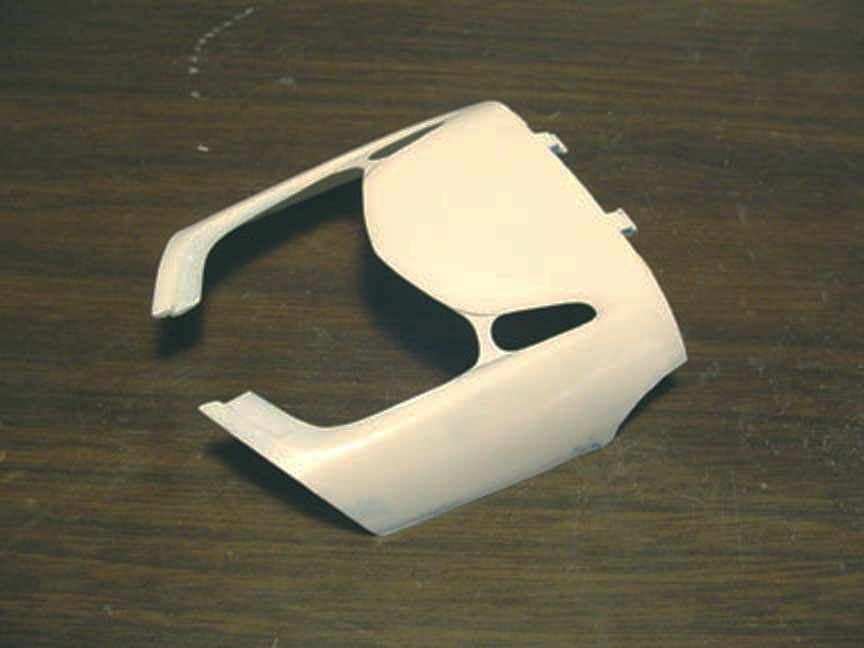
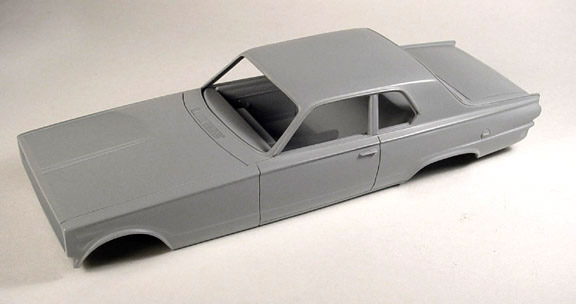
 This is what the stock mpc.body looked like before Wheel well alteration.
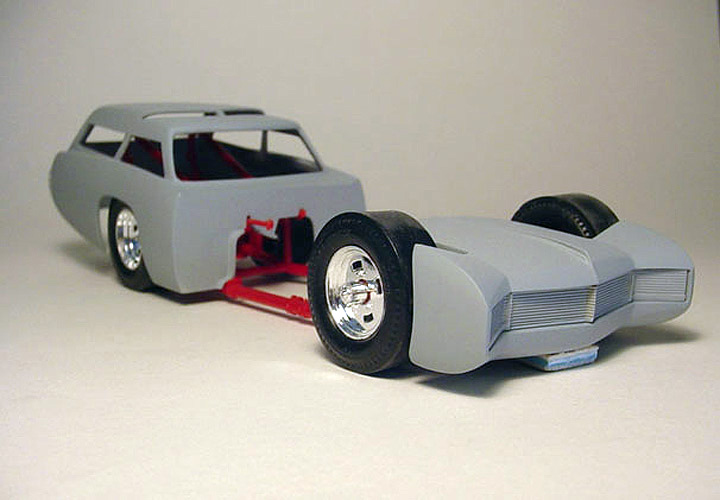
 Here's the New "ALTERED" Front Wheel Wells..... Now its looking like a
Funny Car !
Here's the New "ALTERED" Front Wheel Wells..... Now its looking like a
Funny Car !
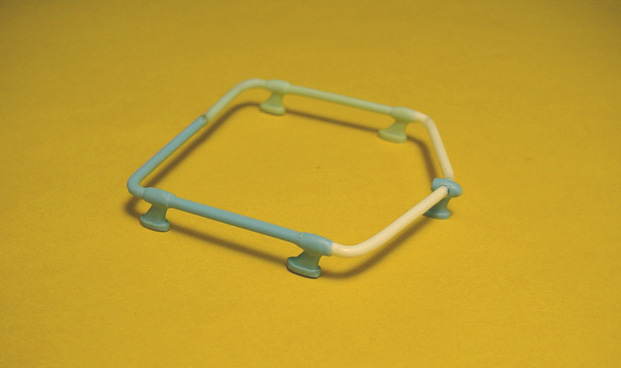
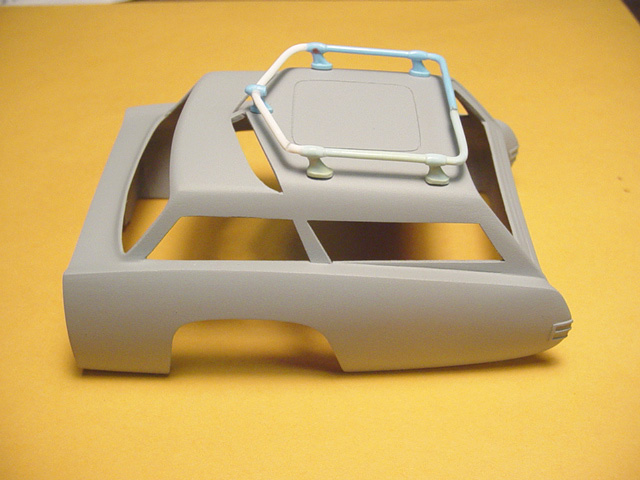
 A filler panel was needed for the cowl, as the original mpc kit was incorrect.
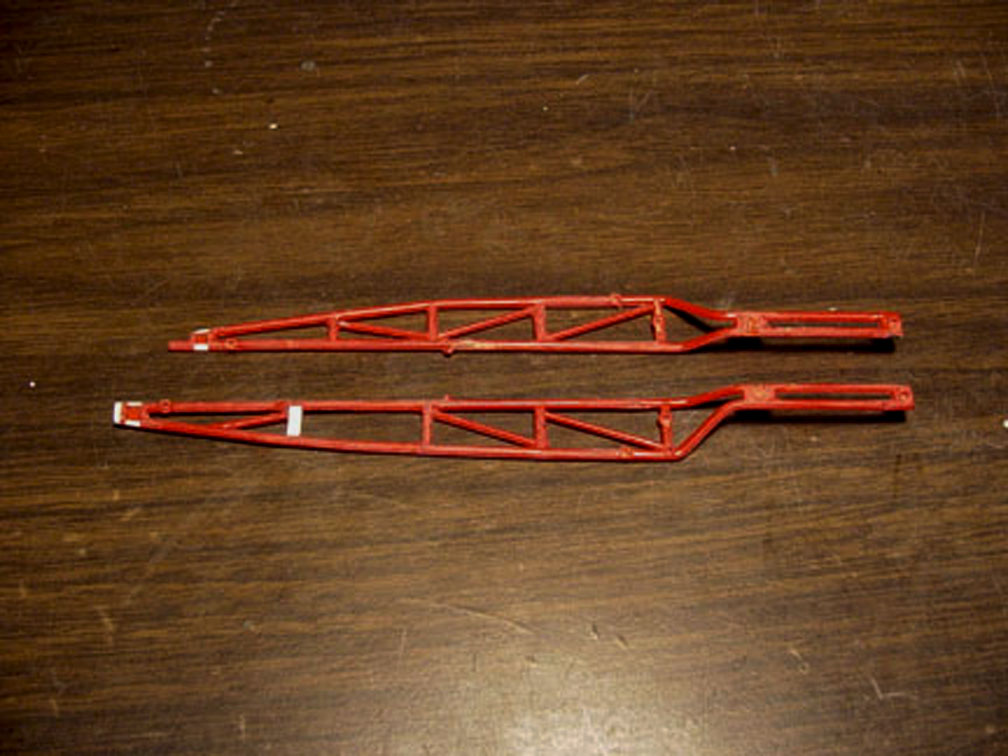 Shown on top is the original mpc. Flying Dutchman F/C frame,
the lower frame
has been stretched to fit our "new Altered Body" and a new mount was installed
to fit the Radius Rods from a,
"Model King" GTO Funny Car or the Kenz
& Leslie Cougar F/C.
Master is finished !
1965 PLYMOUTH BELVEDERE A/FX
(with all new Chassis, Interior parts and Correct A/FX factory specs.)
 Starting with an unknown resin body? There were a lot of flaws I needed to fix and a lot of parts that I will need to scratch build.
The
front & rear wheel flares were somewhat washed out, so Evergreen putty was
used to build them up.
The front wheel wells were cut out and moved forward by another 3 scale inches. The
entire body went through a complete re-surfacing.

I wanted to have a separate grill & front bumper, so a mold was made of the Grill/Bumper and one bumper was scraped
to save the grill;
and one grill was scrapped to save the front bumper.
Of all photos I've seen of these A/FX car's, not one had headlights; but they all
had cone shaped headlight covers.
Thankfully,
I have these.... (Thanks to the "Speed City Resin" AFX PARTS PACK).
The headlights were drilled out and the Cone Shaped "Block-out's" were
installed.
 Look at the 1:1 '65 Plymouth Grill, notice the middle body valance.... under
the grill.
Look at the 1:1 '65 Plymouth Grill, notice the middle body valance.... under
the grill.
This was not on the original Johan '65 Ply model kit body, and it wasn't noticeable
on the" Grill / bumper part" either.
Count less hours were spent on redesigning the front of the 1/4 panels to perfectly
match the new separate grill.
The correct spear molding was not on the original kit, so a little putty &
carefully taping & sanding and there it is.
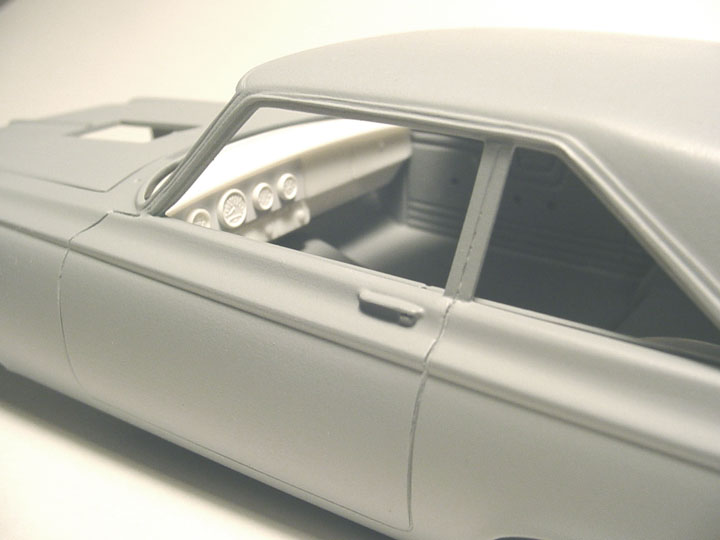
Windshield
wipers were removed and the holes were drilled in place.
 The cowl vents were really washed out on the original kit and the resin body,
so I cut out a cowl
from a Johan '63 Ply Fury resin body I had laying around.
Hood
supports were put in, but I later realized that the hood supports on the cowl need to be removed so the Lindburg Firewall would fit.
 The sail panel trim was also washed out, So on goes the reading glasses and
magnifying lamp for some "Plastic surgery".
The sail panel trim was also washed out, So on goes the reading glasses and
magnifying lamp for some "Plastic surgery".
The
top window trim was not very noticeable, so plastic 1/2 round was applied and
sanded down to match other trim.
You'll also notice that the B-pillars were removed....... (because they
didn't have the proper angle).
The
new B-pillars will be done last so they don't brake during all the construction.
 The top front window trim was also barely visible, 1/2 round plastic was added
and sanded to match.
The top front window trim was also barely visible, 1/2 round plastic was added
and sanded to match.
 The licence plate area was totally incorrect, so one was cut from the same Johan
'63 Ply Fury resin body along with some plastic sheet filler panels.
The licence plate area was totally incorrect, so one was cut from the same Johan
'63 Ply Fury resin body along with some plastic sheet filler panels.
The molded in Taillight Bezels
were also removed as I want to have separate Tail Lights.
The lower spear molding
on the trunk was washed out or sanded off and was built up with Evergreen putty.
 Bumper bolts were added to the rear bumper using PRO TECH's - PTMC 7 .040
bolt heads..... A nice added bonus feature !
Bumper bolts were added to the rear bumper using PRO TECH's - PTMC 7 .040
bolt heads..... A nice added bonus feature !
CHASSIS
 I wanted to make an all new chassis for this kit as the other one didn't have
good detail and the rear
I wanted to make an all new chassis for this kit as the other one didn't have
good detail and the rear
section of the chassis looked too much like a modern pro stock.
With trying to keep a stock '65 Ply chassis look, I started with a Lindburg
'64 Dodge 330 Chassis as the
'64 Plymouth's had brake lines and just didn't
have the detail as the Dodge had, but there basically the same.
The gas tanks
were removed on both chassis' and rear frame rail on the master was removed.
The other chassis lent its trunk section floor pan and both gas tank holes
were filled with sheet plastic.
The pieces were glued together, to add length
to the new A/FX chassis.
 Because the rear wheel wells were moved forward, the chassis had to have some
of the Un i-body
Because the rear wheel wells were moved forward, the chassis had to have some
of the Un i-body
floor pan removed.
 The Front wheel wells were moved forward and so the chassis needs to be moved
as well.
The Front wheel wells were moved forward and so the chassis needs to be moved
as well.
Keeping the K-member locations the same, so you can use the supplied Lindburg
kit suspension parts.
 Suspension Risers (shackles) were added to the frame, along with Shock Risers, so the Lindburg Dodge
or Ply. kit suspension parts would have the proper
ride height.
Another fine addition, saving you tons of time by not having
to add it yourself...... We keep the builder in mind.
INTERIOR TUB
 After getting some requests for an "Interior tub" with door detail and personally test fitting the Lindburg door panels to this this interior Floor
pan,
After getting some requests for an "Interior tub" with door detail and personally test fitting the Lindburg door panels to this this interior Floor
pan,
It was decided that a new Interior tub would need to be made to save
you builder's a lot of frustration.
An old amt
funny car chassis gave up its rear wheel wells, to add to our existing floor
pan.

 This is the new '65 Ply Belvedere A/FX Interior tub.
The
door panels were reworked from a Lindburg '64 Ply Belvedere and are very close
to '65 Ply door panels.
I've since taken out the window cranks after reading the story about the factory built Ply Belvedere
A/FXer's.
 New motor Mounts were added to the stretched frame, by measuring the displacement
of the original motor mounts on the K-member,
New motor Mounts were added to the stretched frame, by measuring the displacement
of the original motor mounts on the K-member,
This will keep the motor at
stock displacement and height. To
raise the front suspension, you can add pieces of plastic to all location
points on frame.
 After doing extensive research.... None of these cars had a stock hood.
So
after carefully measuring where the Injectors will come through, the hole
in the hood was cut out.
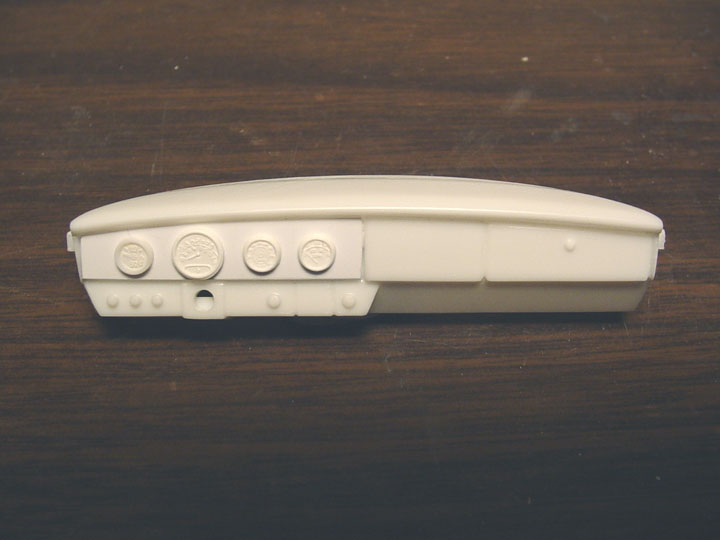

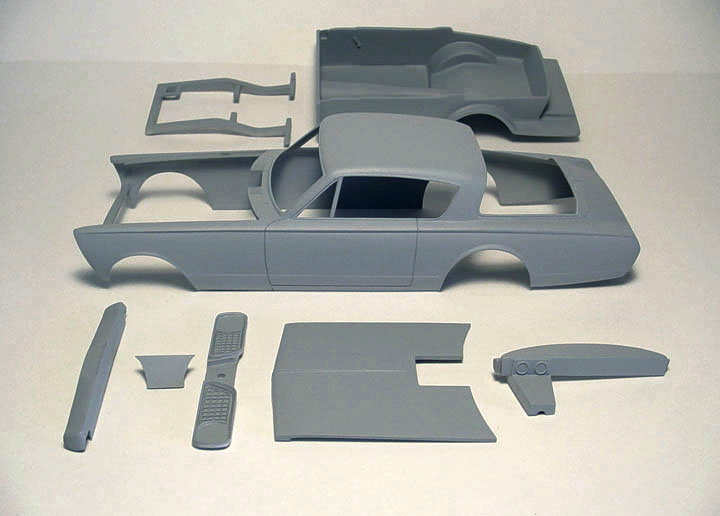
 Finally, a 1965 Ply Belvedere A/FX Dash !
It
was made by starting with a Lindburg '64 Ply Dash and adding Plastic Sheet
to fit the '65 Ply Cowl. (photo 3)
A new plastic insert was made to fill in the area from the original kit Instrument
Cluster. (photo 1)
New
Gauges, Including a Tachometer, Oil Pressure, Temp. & Voltage Meter. (photo
2)
Master model is shown before installation of motor mounts & before hood was cut out.


Here are the new parts.
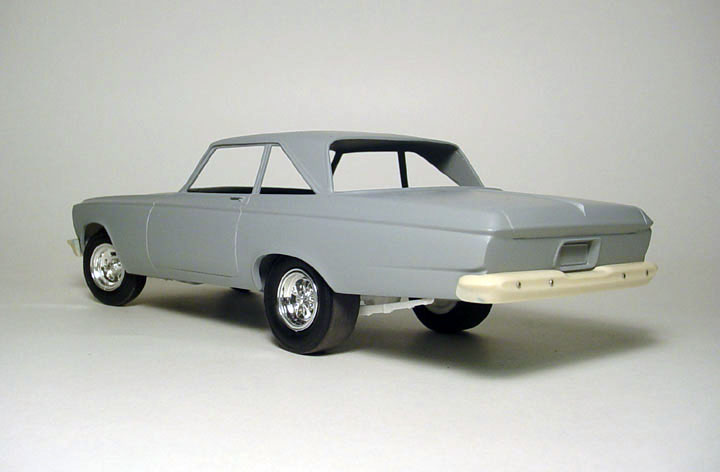
The master is finished and I guarantee it is the only correct '65 Ply A/FX Hardtop ever offered !
This NEW '65 Ply A/FX will come with "CORRECT" Body, Hood, Grill, Bumpers, Taillights, Interior Tub, Dash & Chassis.
"
YOU GET A BIGGER BANG FOR YOUR BUCK " at ![]()
1965
PLYMOUTH SEDAN A/FX
Ron
Ramsey stopped by to help us with this project,
it was a great time and we had
a lot of laughs !
After
carefully planning we decided where to make the cuts on a Lindburg '64 Dodge
to be grafted to our '65 Ply Belvedere AFX.
 The Lindburg '64 Dodge
(above) gave up its roof to put on our "Speed City" '65 Belvedere
A/FX body (below).
The Lindburg '64 Dodge
(above) gave up its roof to put on our "Speed City" '65 Belvedere
A/FX body (below).
 Here is the '64 Dodge Sedan roof being
test fitted to our '65 Ply Belvedere AFX body.
Here is the '64 Dodge Sedan roof being
test fitted to our '65 Ply Belvedere AFX body.
The rear of the '64 Dodge roof needed to be cut down the middle of the window
trim & trunk,
so it could be widened to correctly fit the '65 Ply body.

The master is finished and we guarantee it is the only correct '65 Ply Sedan A/FX ever offered !
NEW '65 Ply Sedan A/FX will come with "CORRECT" Body, Hood, Grill, Bumpers, Taillights, Interior Tub, Dash & Chassis.
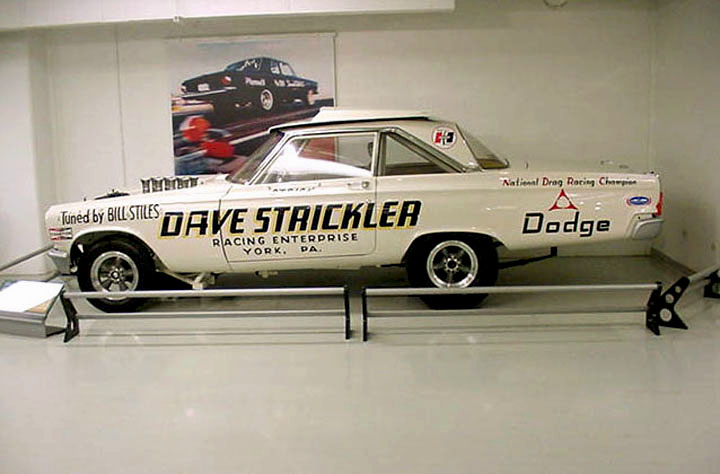
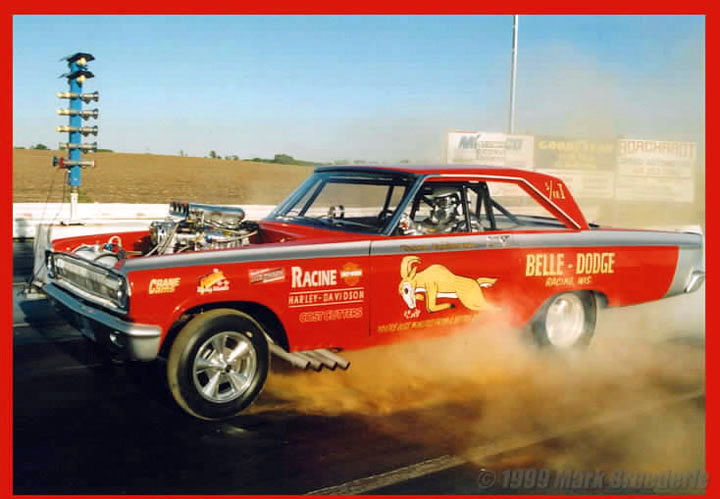
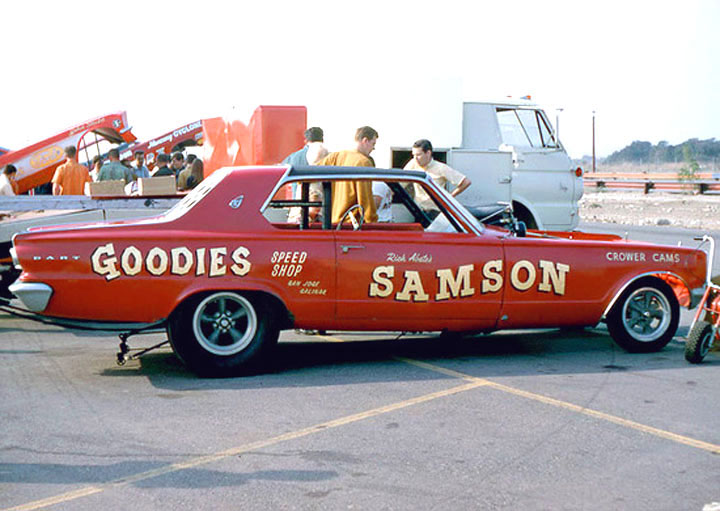
1965 DODGE DART A/FX
This was
the first Speed City model put into production on July 7 2006.
This master
model is getting a new face lift (2008) and extra parts with
new AWB Chassis, Frame & Interior Tub.
 The first
thing was to re-surface the entire body & Hood.
The first
thing was to re-surface the entire body & Hood.
The Inside body of
the body was thinned.
A rear trim molding was added to the top of the rear fender....... We
couldn't do this to the original model,
as it would have been to hard to remove it for all the other Dodge Darts
we planned on doing.
 Next, It was decided to rebuild the front wheel well as they were cut out
for the "Rambunctious Dart".
Next, It was decided to rebuild the front wheel well as they were cut out
for the "Rambunctious Dart".
 This new wheel well gives the new body some alternatives for the builder.
 This is the original body with the hogged out front wheel well.
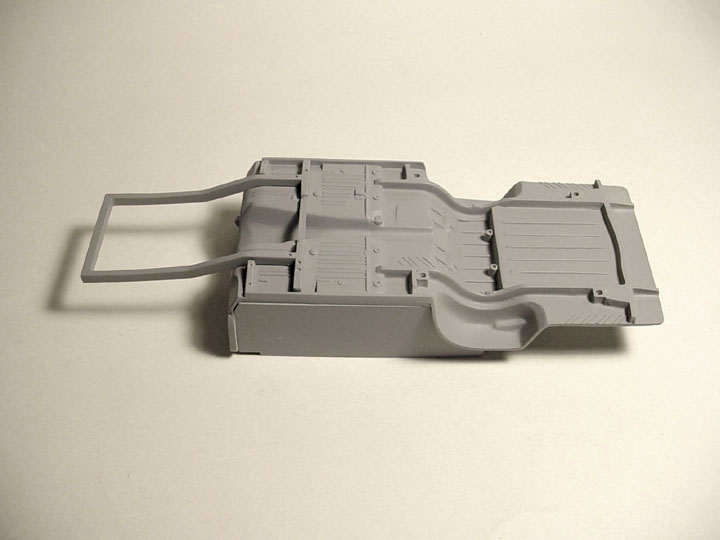
CHASSIS
64 pieces of Evergreen & Plastruct plastic sheet, half round, strip and tube were used to complete this new chassis.
 Starting with an amt/ertl '71 Plymouth Duster 340, The gas tank was removed
& all holes filled.
Starting with an amt/ertl '71 Plymouth Duster 340, The gas tank was removed
& all holes filled.
21 scale inches were removed from the floor pan, the chassis was then super
glued back together.
and
an extension was built to the trunk section to fill the gap.
 Starting with a '66 Barracuda firewall, The side panels & holes for the
hood brackets were filled in.
Starting with a '66 Barracuda firewall, The side panels & holes for the
hood brackets were filled in.
all wires were sanded off, but the master cylinder, water heater housing,
ground
bolt & electronics box were left on, which gives the firewall some nice
detail !
 The '71 Duster front frame clip need to be simplified for drag racing.
Extra
plastic strips were used to fill in the frame holes. and a solid square tube
was used for the front frame rail.

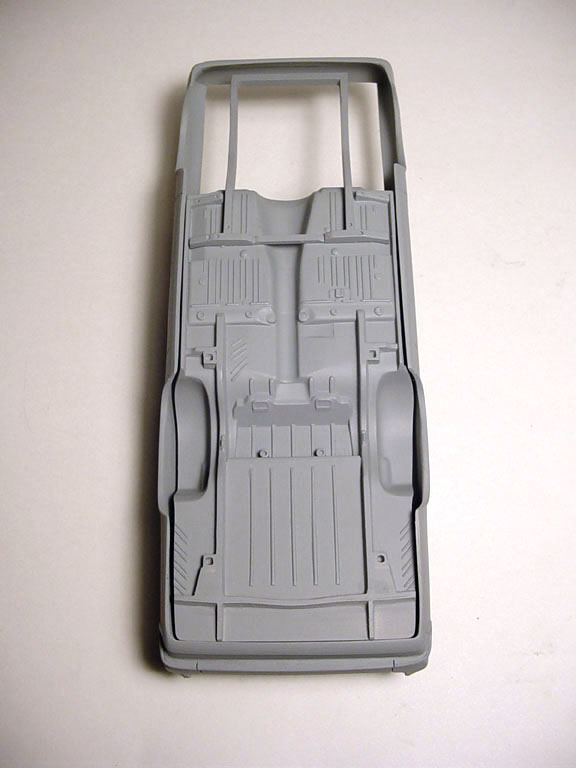
 The door panels are all scratch built from plastic sheet, flat strip, square
strip and half round.
The door panels are all scratch built from plastic sheet, flat strip, square
strip and half round.
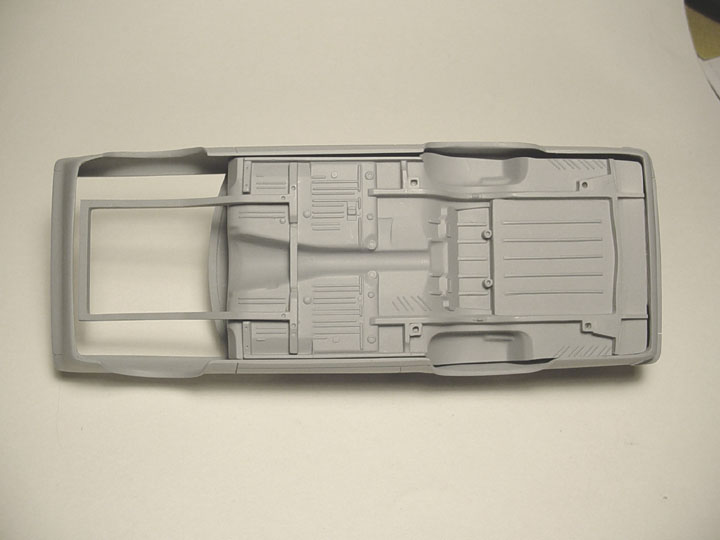
 These are the new pieces that will be added to the '65 Dart AFX #SC-1.
 Check out how nice this new chassis looks, it's even better than my original chassis I built for myself.
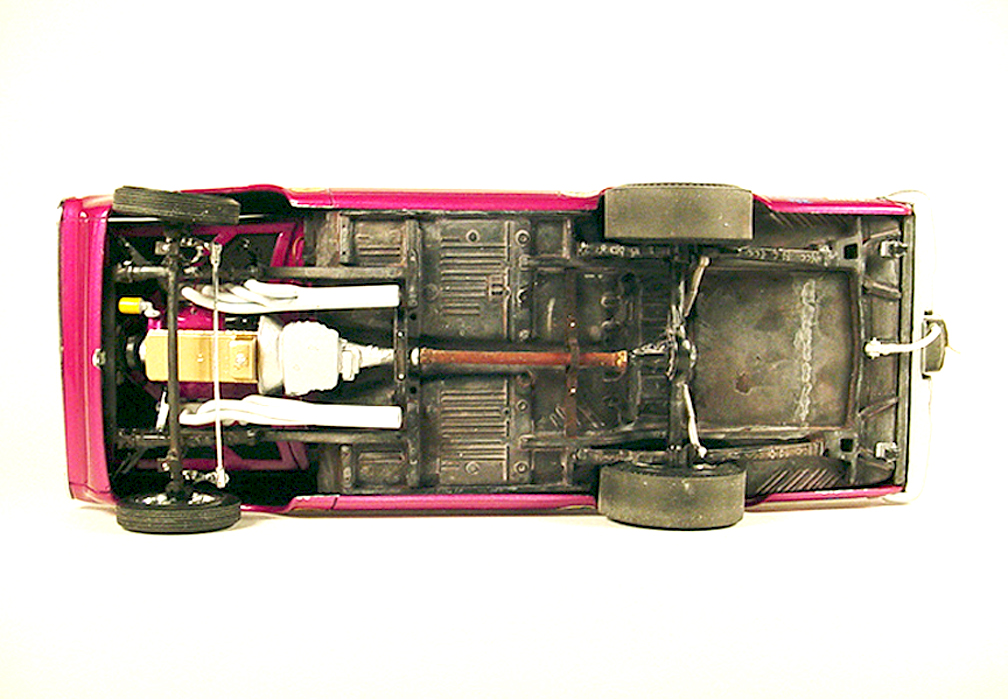
The
'71 Duster rear end & suspension will fit, or you can create your own
from the parts box ?
 Here's a top view showing how well the Interior door panels fit.
Door panels have braces for the dash board to be glued to......... another
bonus !
The new master is finished !
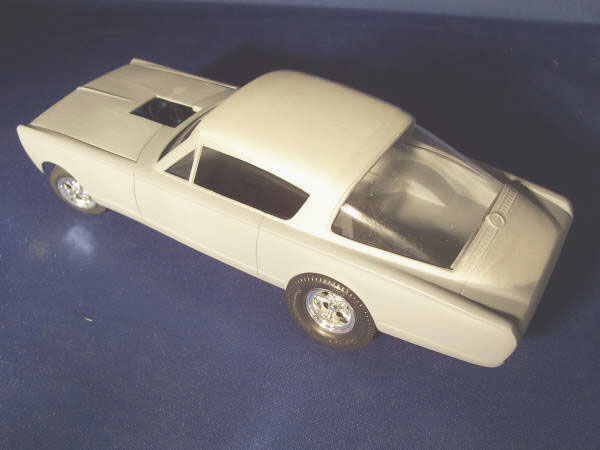
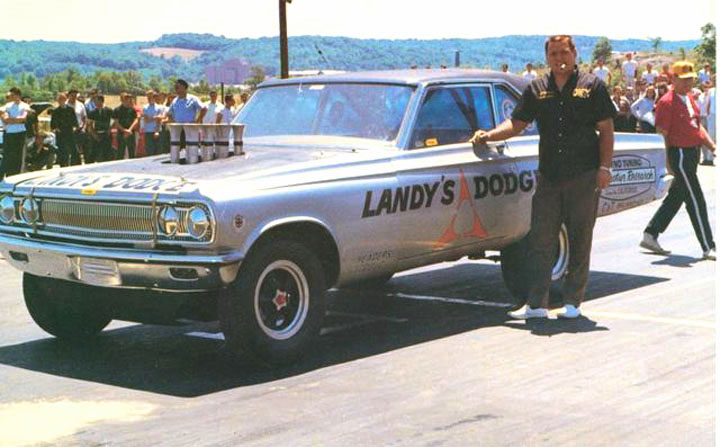
'66 LONG DART FUNNY CAR
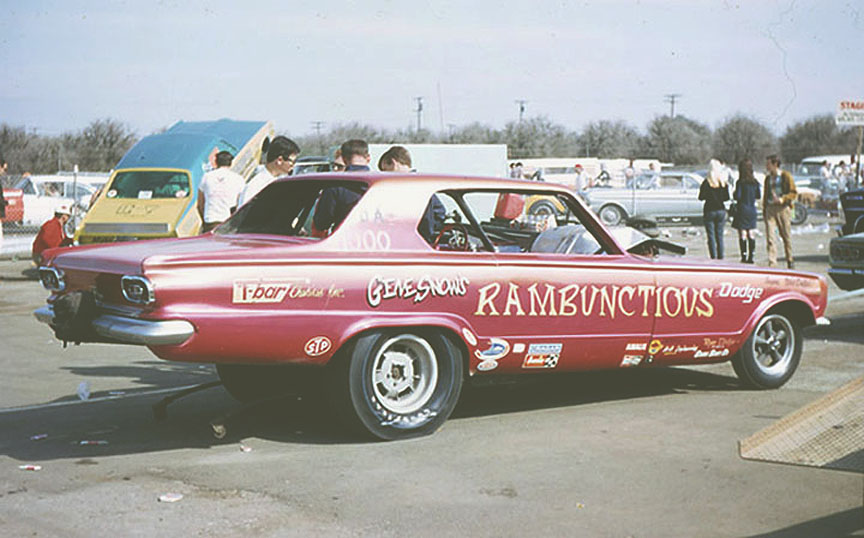


As you can see by the photos here, every Dart funny car had differences,
long nose/short nose,wheelbase,stock bumper/ cut bumper, etc, etc.
It took several days just to come up with an idea to make one
Body, Chassis & Interior Tub
to do any version of the'66 Dart F/C bodies.
It took several months to do all the research, design &
painstaking labor !
You will need to make some alterations to do any individual
car. Though with this set up, Any individual car can be done.
2- rear 1/4 patch panels will be supplied to do the rear wheel
alterations ( if needed) some ran stock location wheel wells.
We will also add a printable instruction sheet to make the
"shorter front clip" cars, (most are shown on the second row).
Extreme amounts of time were put into research and designing
this model to make sure it will be as accurate as possible.
BODY WORK
 Our '66 Semi-Stretched
LANDY DART was taped off to cut 6 scale inches ahead of its already 6" stretch,
Our '66 Semi-Stretched
LANDY DART was taped off to cut 6 scale inches ahead of its already 6" stretch,
giving the front clip the correct factory fiberglass one foot stretch !
 Our '66 LANDY DART ( front
clip) cut off and our '66 Stock Dodge Dart ( body in back ground ).
Our '66 LANDY DART ( front
clip) cut off and our '66 Stock Dodge Dart ( body in back ground ).
The '66
Stock Dart body needed to have several alterations done before we could mate
the two bodies together,
including new door handles.
 Front wheel wells being altered
( Notice correct wheel well moldings and position ).
Front wheel wells being altered
( Notice correct wheel well moldings and position ).
 Rear wheel wells in stock
position, but needed to be widened 4 scale inches to fit slick tires.
Rear wheel wells in stock
position, but needed to be widened 4 scale inches to fit slick tires.
 LANDY DART (front clip) &
'66 STOCK DART (body ) ready to be glued together.
LANDY DART (front clip) &
'66 STOCK DART (body ) ready to be glued together.
 '66 LONG DART body ready
for final sanding & polishing. (hood was left in for integrity
reasons,
'66 LONG DART body ready
for final sanding & polishing. (hood was left in for integrity
reasons,
though hood can easily be scribed out with the back a razor knife
INTERIOR TUB
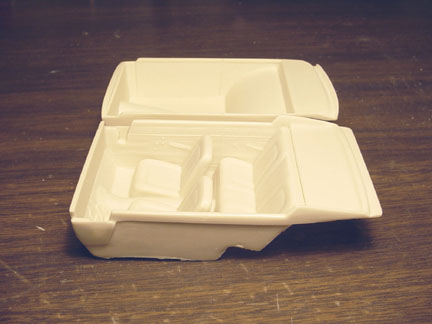 Starting with our '66 Stock Dodge Dart Interior
Tub ( shown in Front ) and our
Starting with our '66 Stock Dodge Dart Interior
Tub ( shown in Front ) and our
" HAIRY CANARY" Valiant Interior tub ( shown in Rear ).
 Saving the floor from the "HAIRY CANARY"
( because of its enlarged tranny tunnel ) & using the interior sides
Saving the floor from the "HAIRY CANARY"
( because of its enlarged tranny tunnel ) & using the interior sides
&
package tray from a '66 STOCK DART , the two were mated together along with
a large engine housing ( in green plastic).
 The '66 Dart stock interior had all its arm rest's,
door handles & window cranks removed.
The '66 Dart stock interior had all its arm rest's,
door handles & window cranks removed.
*saving the top of the door moldings*
New correct door handles were installed, along with kick plates.
New sheet
was added for firewall, angled flat dash and rear seat area.
 Notice how motor will sit back ( if needed ). 23
separate pieces were used to create this "ONE OF A KIND" interior
tub.
Notice how motor will sit back ( if needed ). 23
separate pieces were used to create this "ONE OF A KIND" interior
tub.
 We mastered this interior tub to resemble Gene
Snow's "RAMBUNCTIOUS" funny car.
We mastered this interior tub to resemble Gene
Snow's "RAMBUNCTIOUS" funny car.
Although it will fit any other
Dart funny car you plan to build !
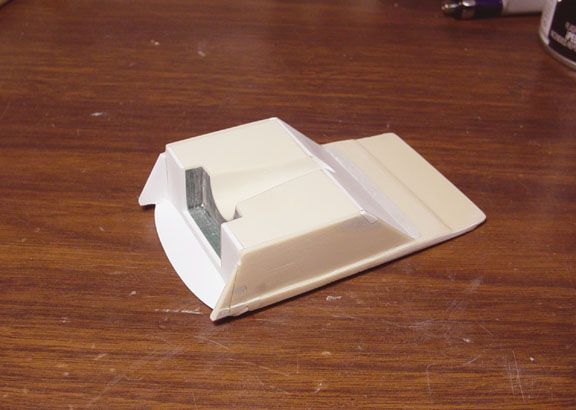
 Shows how interior
fits to body, clearance was used to accept windows
Shows how interior
fits to body, clearance was used to accept windows
( use .010 clear or tinted
plastic sheet for glass ).
CHASSIS WORK
 30 separate pieces were used to build the chassis
for the new '66
LONG DART FUNNY CAR PROJECT.
30 separate pieces were used to build the chassis
for the new '66
LONG DART FUNNY CAR PROJECT.
 Here you can see how any displacement of front and rear wheels
can be archived,
Here you can see how any displacement of front and rear wheels
can be archived,
second frame brace can be used when body is cut back one
scale foot (a full scale half inch ).
Motor mounts can also be moved if needed
? (notice patch panels to do rear wheel well alterations.
 Shows how to set up patch panels most will line
up with door line.
Shows how to set up patch panels most will line
up with door line.
 Shows how to tape on pencil lines and remove stock
location wheel wells and
Shows how to tape on pencil lines and remove stock
location wheel wells and
add altered wheel well "Patch Panels".
MASTER IS FINISHED

This new resin
kit will come with the only "CORRECT" '66 Dodge Dart Funny Car Body,
Chassis, Interior tub,
Front grill, Bumpers, Taillights & Two ( left &
Right ) 1/4 Patch panels.
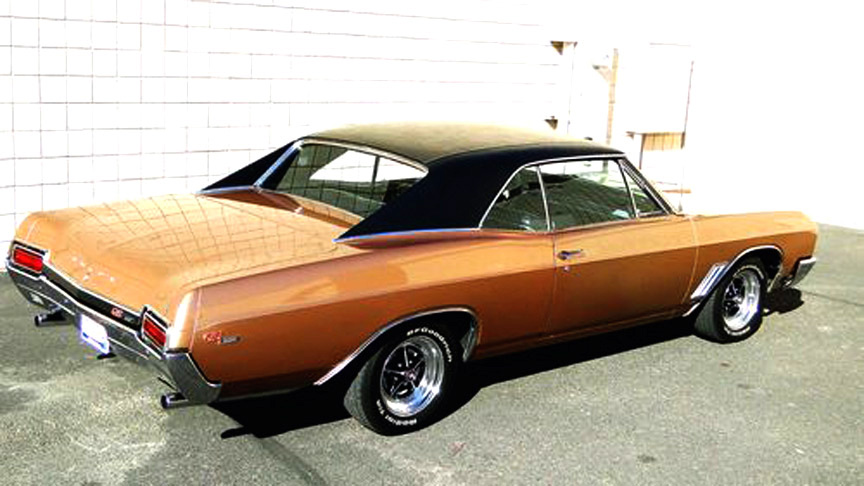
1967 BUICK SKYLARK G/S 400
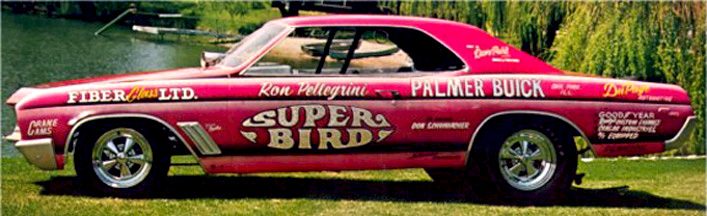
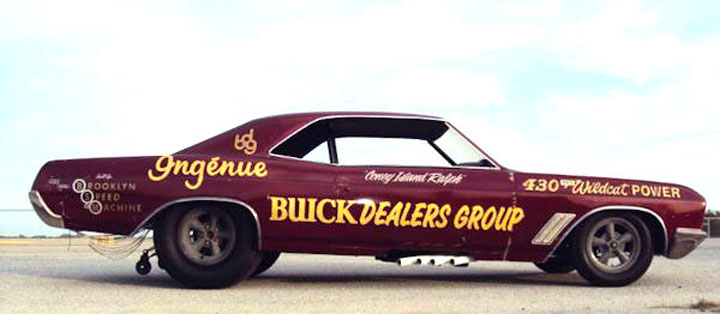
Originally, I was only going to do the Funny Car version,
but I got some interest from others to do a full stock version as well.
TRUNK, BUMPER & TAILLIGHTS
 Starting with a vintage 1966 Buick model, The interior of the body was cleaned up of all it's mess.
The back of the bumper and the tops of the 1/4 panels and trunk was filled in with putty, since all these parts will need to be reshaped.
Here you can see the original '66 Buick bumper assembly.
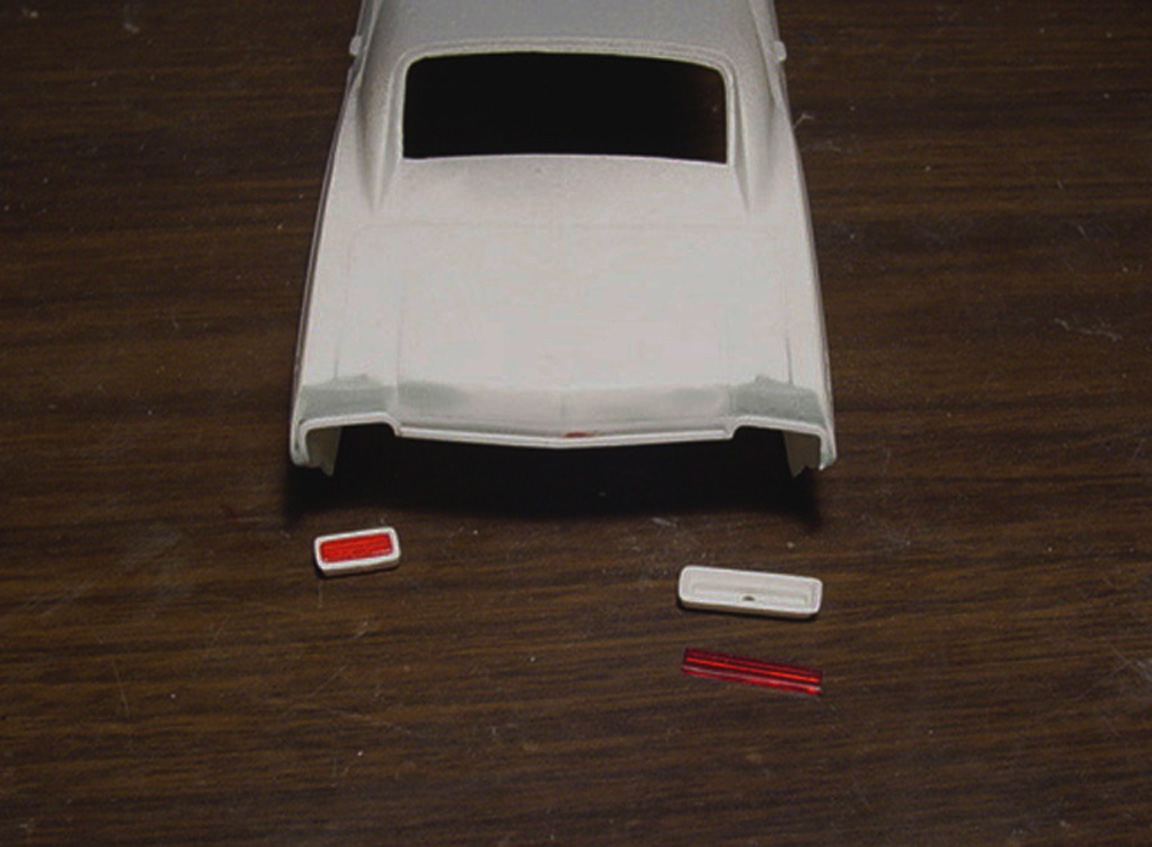 The tail lights and lenses came from the parts box.
The tops of the tail light shrouds were made from sq. plastic strip and the leading edge of the trunk trim was also made from strip.
 After making the tail light bezels to fit, 2 pieces of .010" round was used between the 2 red lenses'.
The rear bumper was re-shaped and .020" sheet was used top create a step in the bumper.
The 1966 license plate was removed and new directional's were cut into the .020" sheet.
The sheet was then super glued to the bumper.
The top of the trunk had new chrome trim added by using H.O. scale train lap siding for scale houses.
The tail lights were then glued to the bumper.
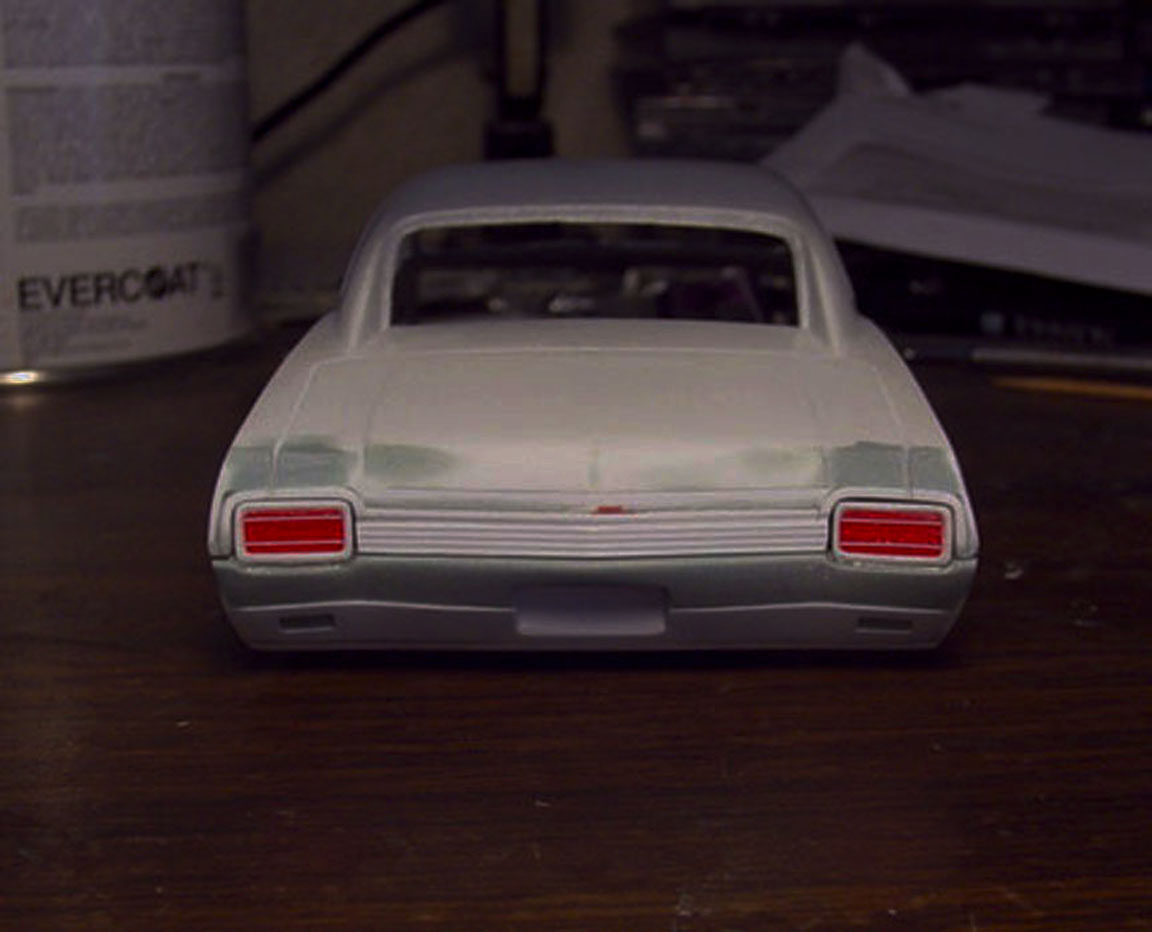 Here's how all the parts are fitting so far..... Notice the newly shaped trunk lid.
 I almost forgot..... A new trunk lock was cut from another model and added.
'67 BUICK GRILL
 To do a new '67 Buick grill, I started with a red parts box grill that had the same dual headlight bezel shape I needed.
The tops of the bumper protrusions also need to be re-shaped.
 Another center bar was added using .020" plastic strip. Small head light lenses were reversed and glued in to be used as backing plates.
 A photo-etched G/S badge was applied.
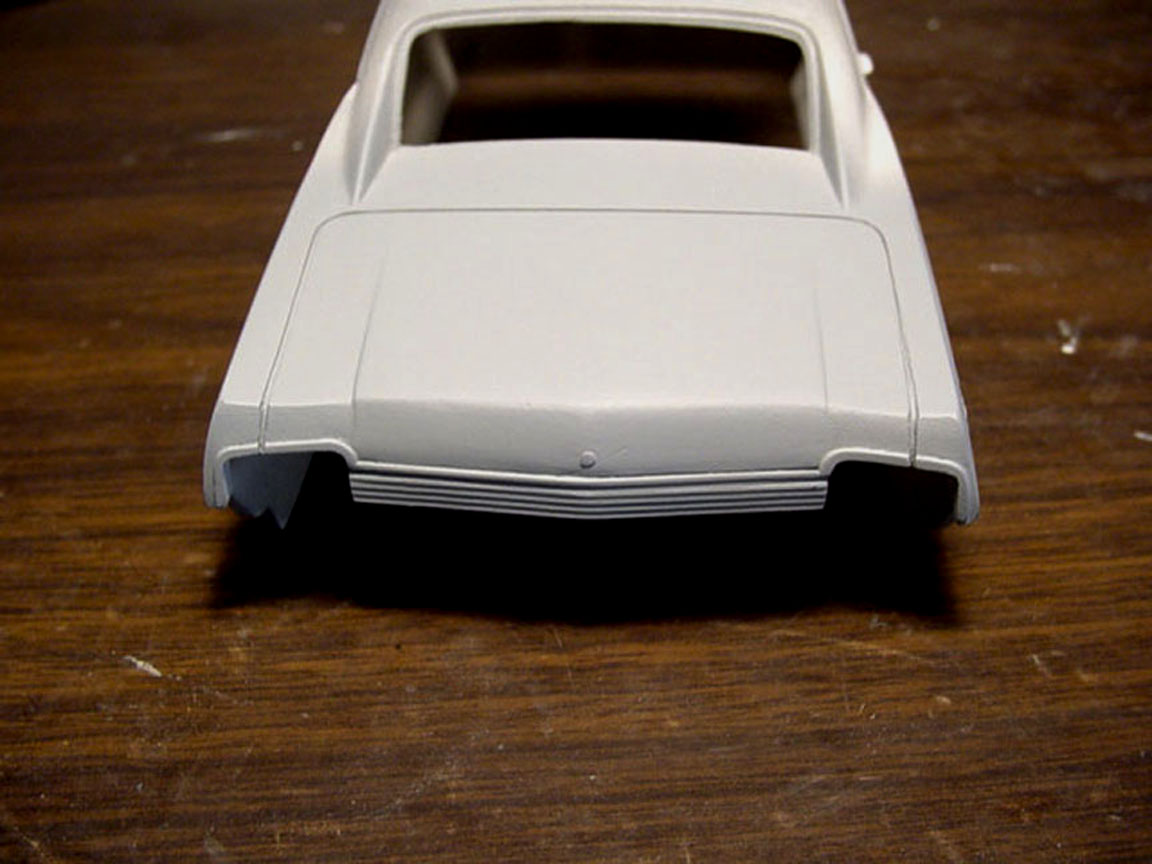
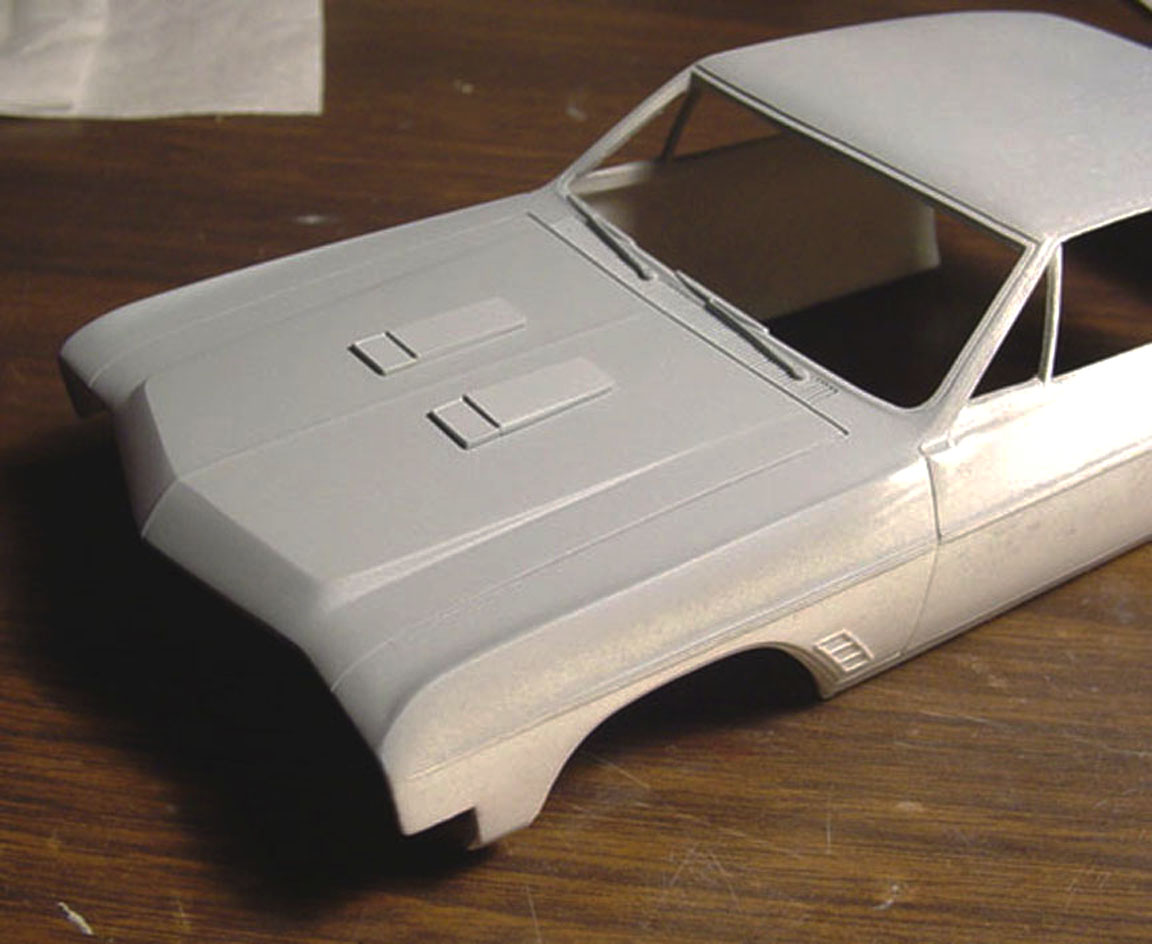
HOOD
 The '66 Buick hood was glued to the body and back filled with plastic.
Yes, it would have been nice to have a separate hood, but I'm mainly building this model to be used as the Funny Car version and.....
It will make all the hood alterations to be easier.
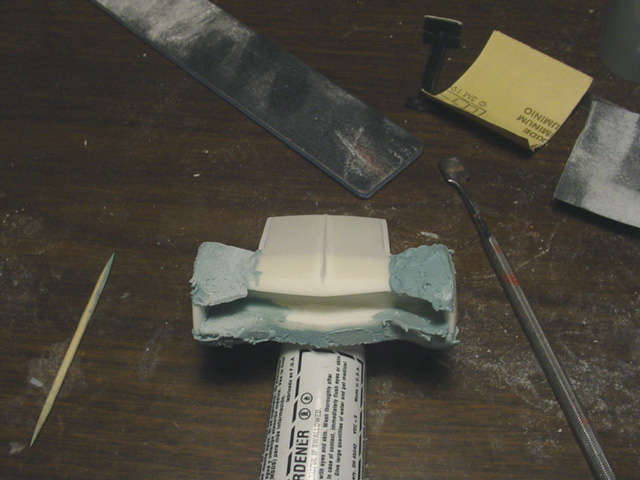
All the detail on the '66 Buick hood was removed and a piece of .020" sheet was used to create the lift in the center of the hood that is needed
to make this into a '67 Buick hood.
 Putty is being used to make a newly shaped hood.
 After a lot of sanding !
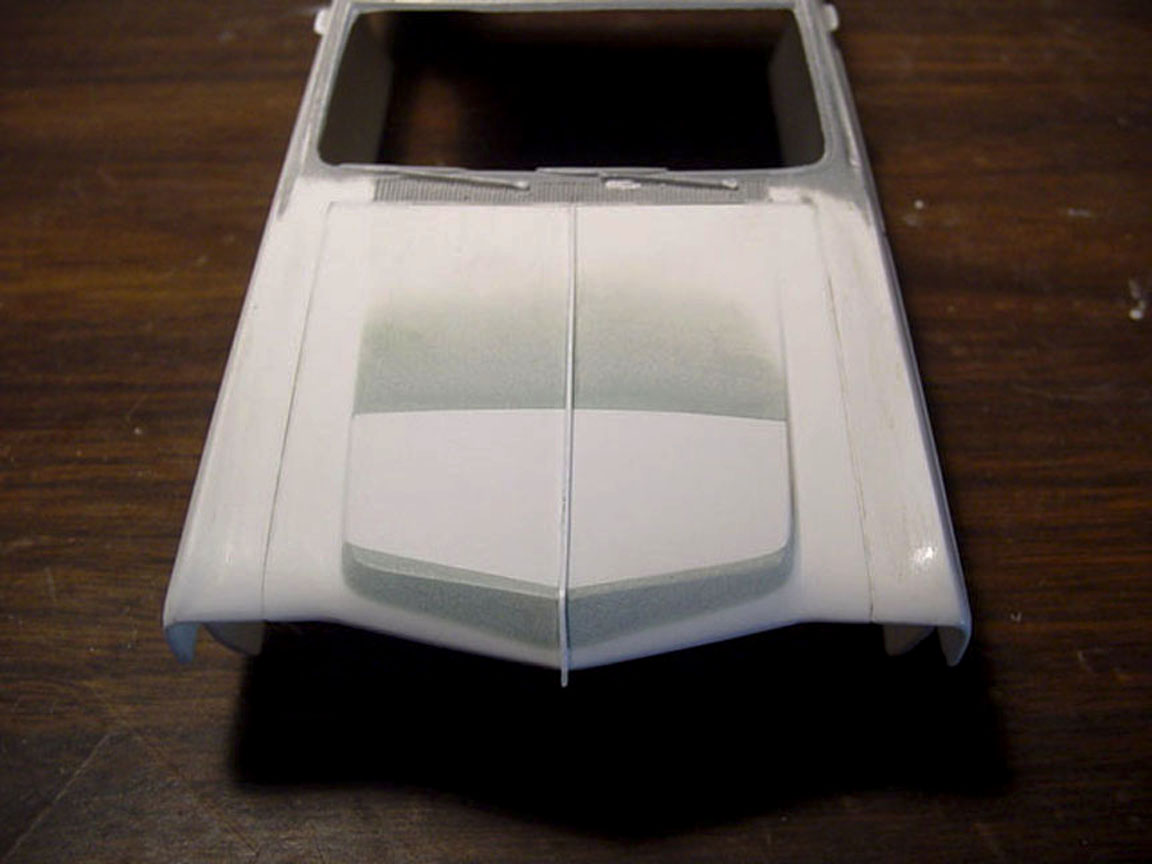 A .020 x .020" strip was used to make a center crease in the hood.
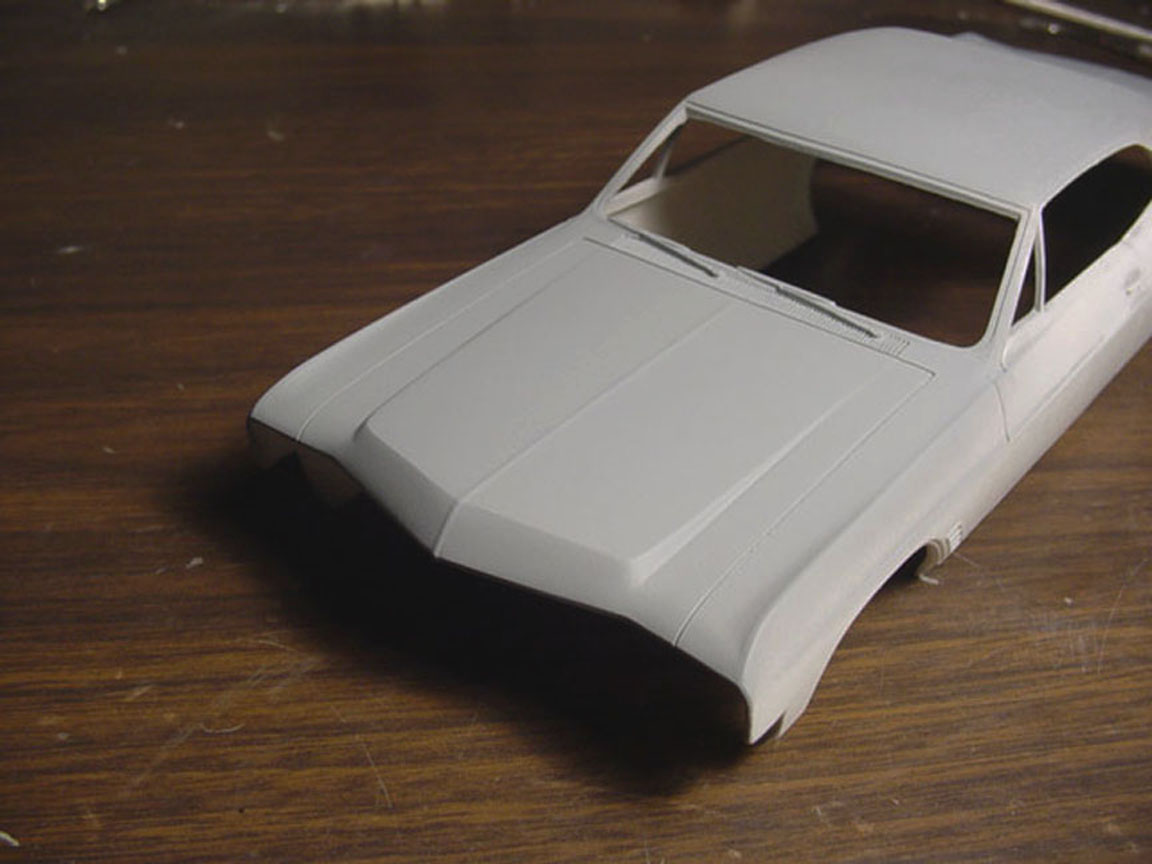
 We now have a 1967 Buick Skylark hood & Grill.
HOOD SCOOPS
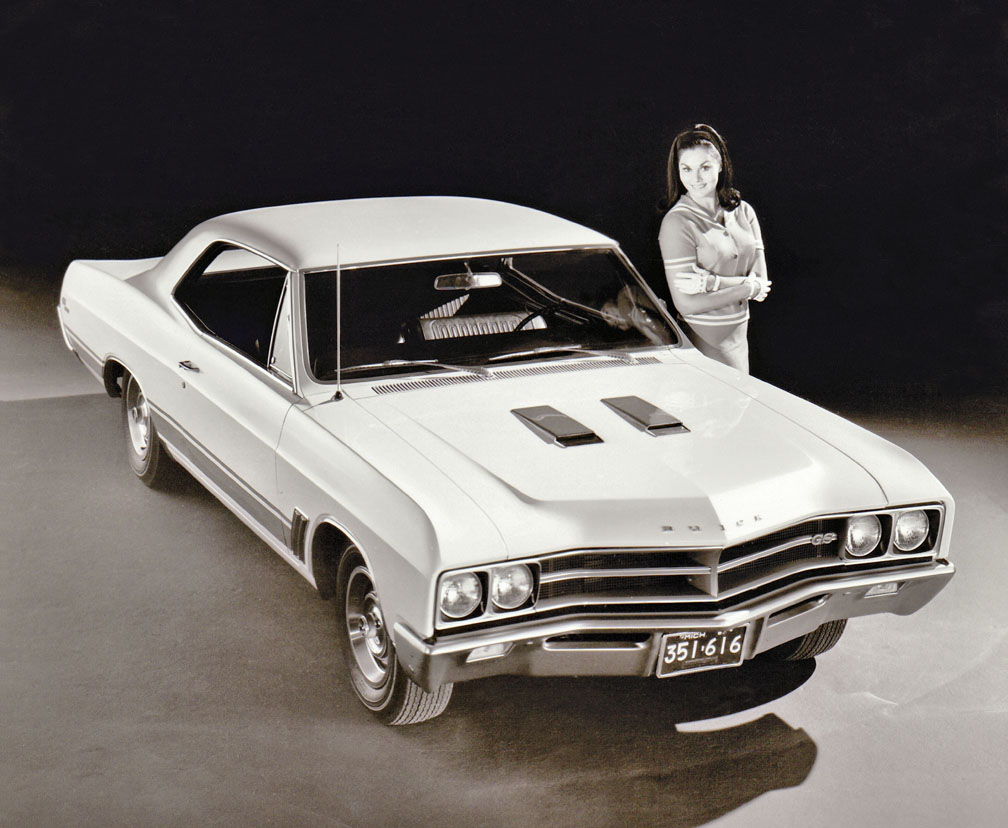
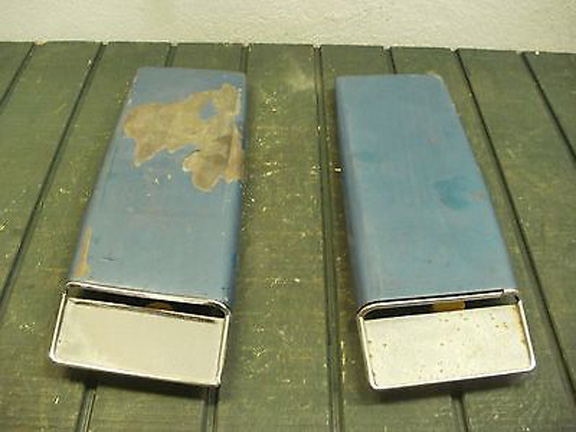 The '67 Buick skylark G/S 400 had 2 scoops on the hood..... Were going to try to replicate these.
 Starting with 2 parts box white scoops and 2 chrome step plates from a truck.....They were reshaped.
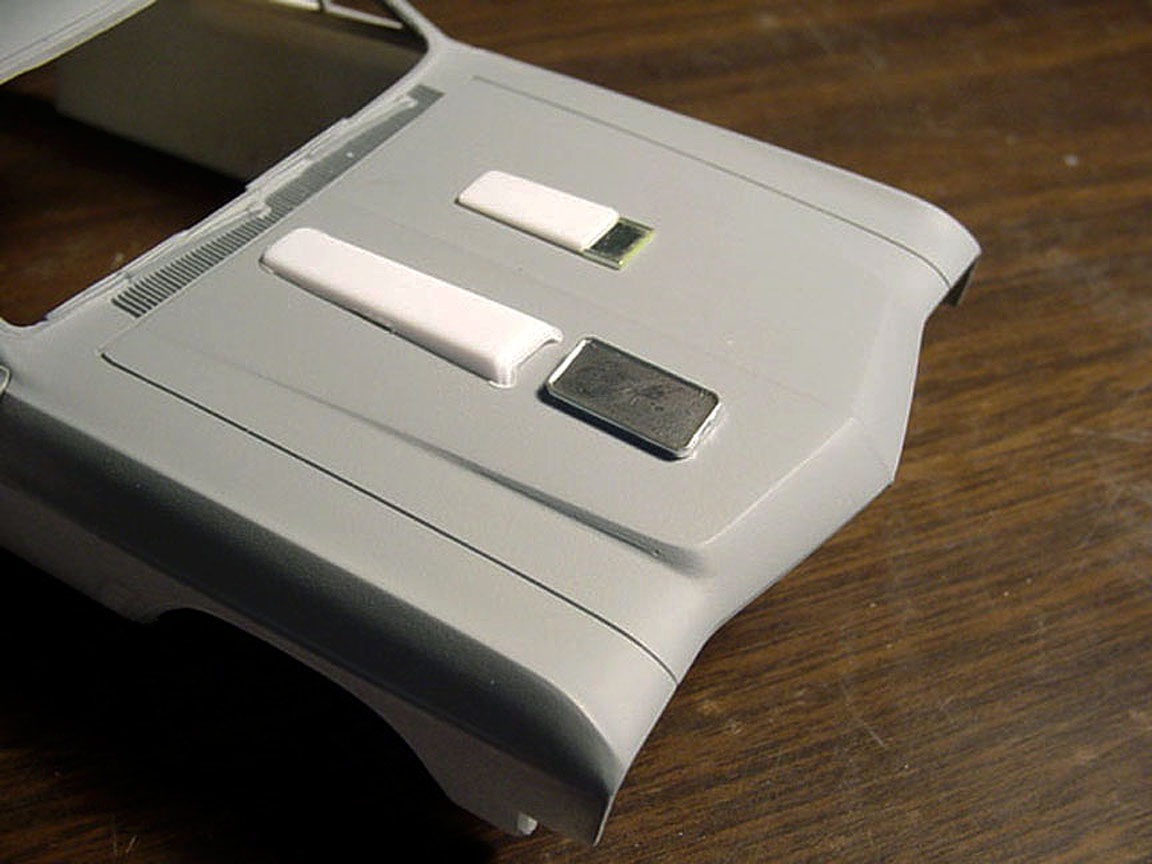 The 2 pieces are looking very close to the scoops needed.
 Scoops are finished.
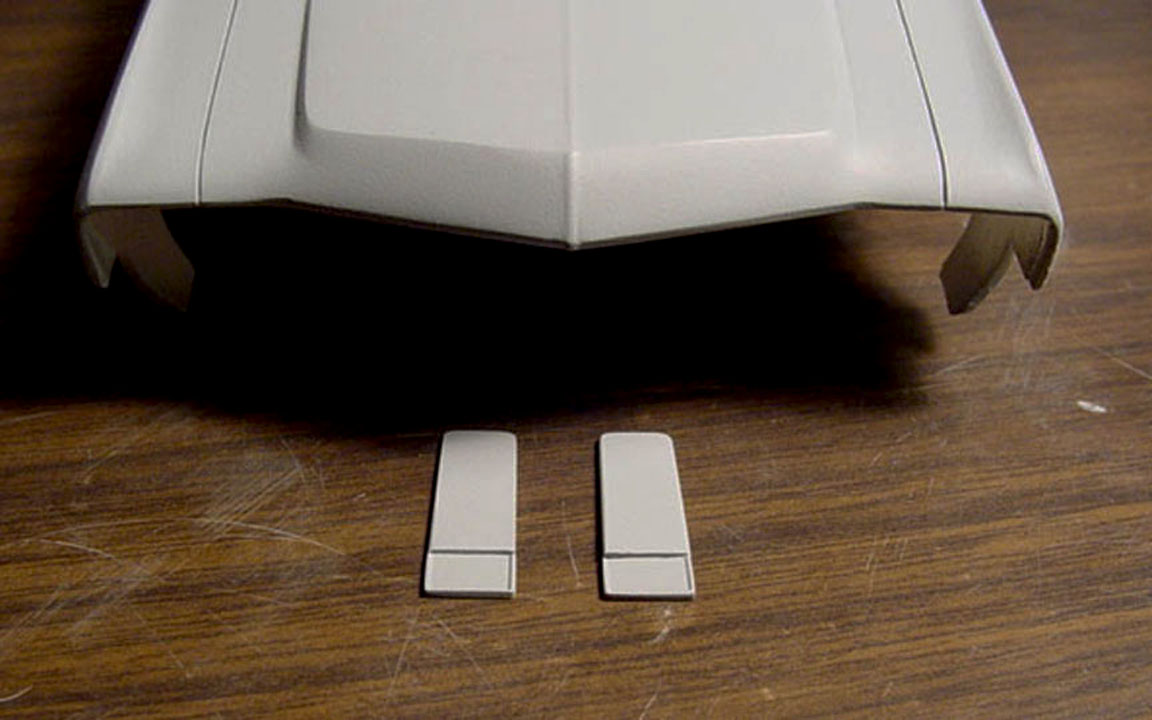 Scoops will be made separate from the hood.
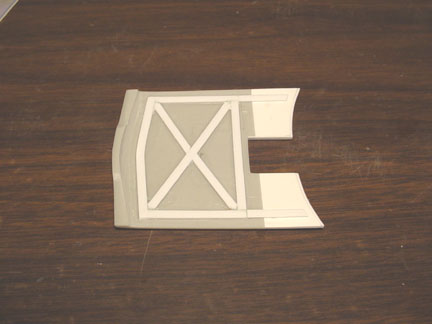
SIDE VENTS
 After spending 3 days on trying to come up with a part I could use to make the side vents,
I decided to use a part of a Ford Thunderbolt grill. Then plastic strip was added to the sides to make it look like it is incased.
 The vents were glued to the body and a piece of plastic strip was added all around both of the 2 vents.
WHEEL WELL TRIM
 Wheel well trim was added using 1/2 round and after spraying primer, the cleaning up process begins.
 New molding on the rocker panels and rear wheel well trim was added.
All imperfections and defects were fixed and then the body was polished.
The '66 Buick Dash board was altered to better resemble a '67 Buick.

Master was finished in 2008
Gary
Weckesser's
MACH
IV Mustang Dragster
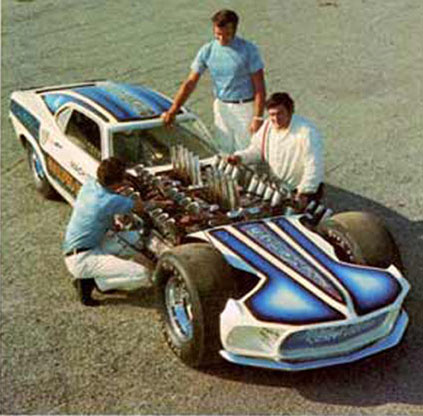
Thanks to the help and permission of Gary & Jill Wekesser.
We were able to get all the proper dimensions and photos of the actual car
being built.
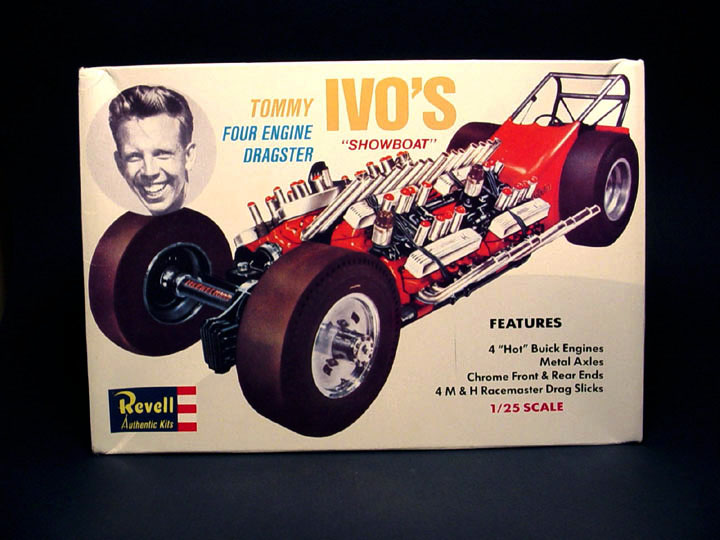 We built the model around a Revell Tommy Ivo Showboat chassis.................to be used as a donor kit.
Although not a totally accurate chassis, it is a chassis
to work with or to work from, if designing a correct chassis.
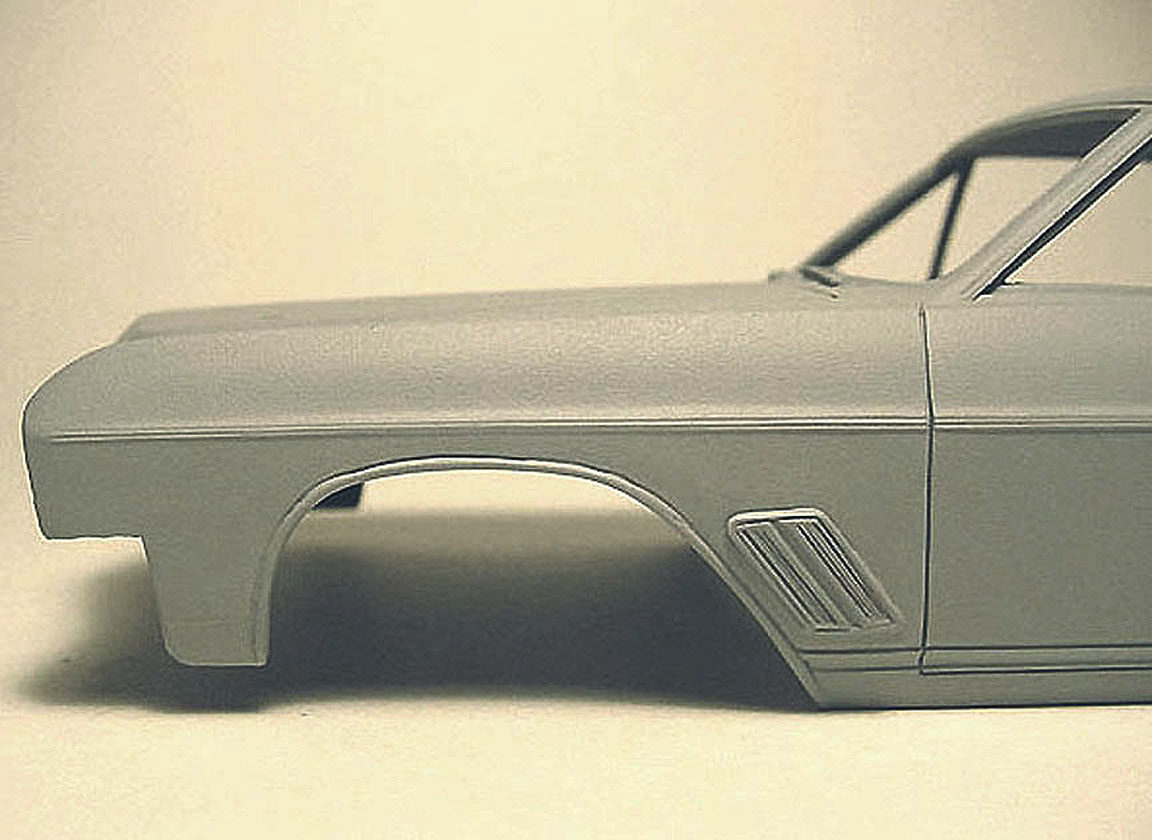
 Starting with a 1/25 scale MPC '69 Mustang model, The rocker
panels need to be kicked out,
Starting with a 1/25 scale MPC '69 Mustang model, The rocker
panels need to be kicked out,
Using a '67 Mustang To rob the NEW rocker panels
from.
 After the new rocker panels were in place, the rear wheel
wells were cut forward and the front clip was removed.
After the new rocker panels were in place, the rear wheel
wells were cut forward and the front clip was removed.
All door lines were filler with Ever coat putty & a "NEW"
rear wheel well lip was formed, creating a wider wheel well.
 All moldings, emblems, wipers & marker lights were then
sanded off and cowl vents & all sink holes
All moldings, emblems, wipers & marker lights were then
sanded off and cowl vents & all sink holes
were filled in.
 Carefully splitting the body in half and removing
14" scale inches from the length, it was then re glued.
Carefully splitting the body in half and removing
14" scale inches from the length, it was then re glued.
 The roof was removed and 4" were cut out as to
"drop the top".
The roof was removed and 4" were cut out as to
"drop the top".
 The A-pillar posts had 4" removed and set
back into the body 6 scale inches.
The A-pillar posts had 4" removed and set
back into the body 6 scale inches.
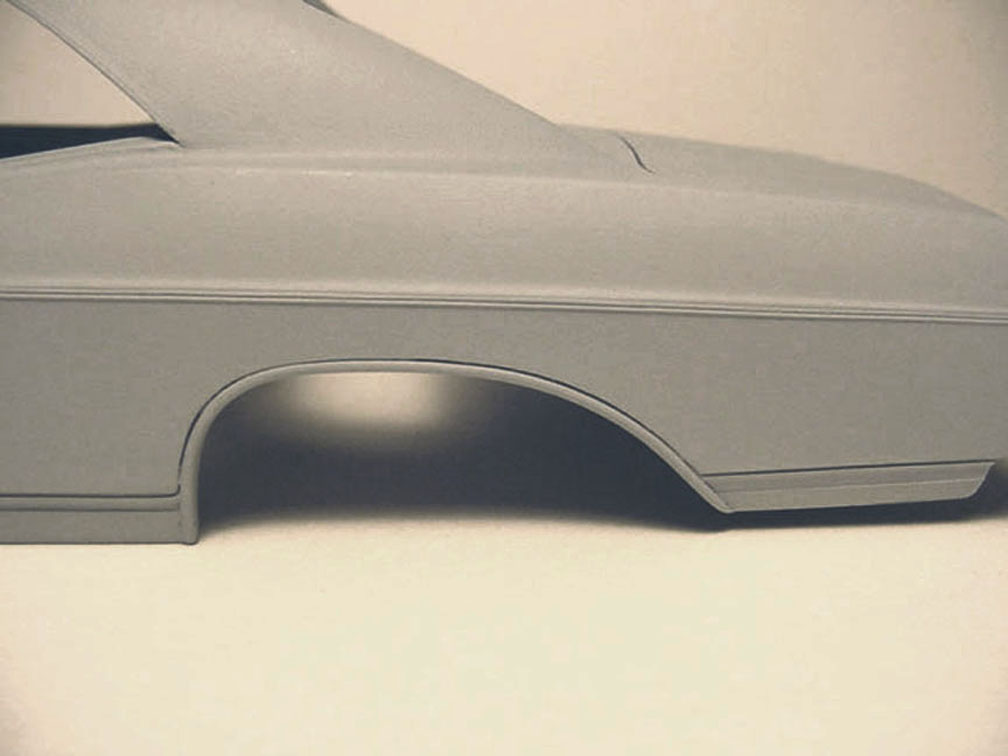
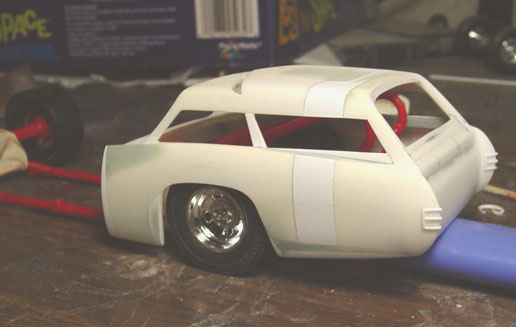
 Cowl and A- Pillars installed. The door lines and rear wheel well were sanded smooth.
The front of the rear wheel well lips were re-shaped using putty.
 The entire body was then sanded smooth.
SO HERES WHERE IT WENT WRONG........... after looking at
the body , it still looked Too wide.
Calling Gary Weckesser, he informed me that the body was 18 inches thinner
(not 14").
So Its back to re-taping and removing another 4 inches from the length.....
AGAIN.
If it wasn't extremely painful the first time, it was a real kick in the pants
the 2nd time around.
But I'm a perfectionist, and if it's not right...... It's wrong.
 The firewall was traced from the original Revell Showboat
model and re-fit to the new body,
The firewall was traced from the original Revell Showboat
model and re-fit to the new body,
this was done so the body would sit on the chassis properly.
 The taillights were filled in and the rear splash panel was
molded to the body,
The taillights were filled in and the rear splash panel was
molded to the body,
along with an insert for the NEW shorter rear bumper.
 In this photo, you can see the pivot points , so the body
can tilt up.
In this photo, you can see the pivot points , so the body
can tilt up.
At this point the firewall was reconstructed to fit the "SHOWBOAT" bell
housing. You can also see the new side windows.

 Door handles from a Revell Ford Thunderbolt were glued to the body and a
.010" was glued to the center of the door handle making them "SEMI-HOLLOW DOOR HANDLES".
The center of the door handles can be punched out making them completely hollow.
 The front clip took so much thought, planning and work I
didn't have the time to do all the
The front clip took so much thought, planning and work I
didn't have the time to do all the
"In Progress" shots. Rather than give you a lengthily detailed list of all the labor done, I'll just let the
pictures do the talking.
The front and rear bumpers were altered at this time too.
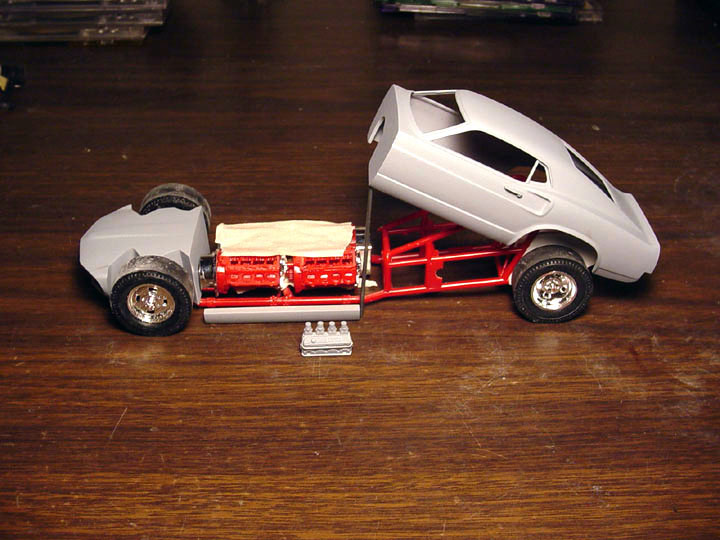
 Using a Revell Tommy Ivo Showboat 4 engine dragster model kit as a donor, we
had a major dilemma ?
Using a Revell Tommy Ivo Showboat 4 engine dragster model kit as a donor, we
had a major dilemma ?
The SHOIWBOAT has 4 Buick engines, but the MACH IV has 4
Ford engines.
It would be very costly for a builder to go out and purchase
4 Ford model kits to rob the engines from and it wouldn't be cost effective for us to cast an additional
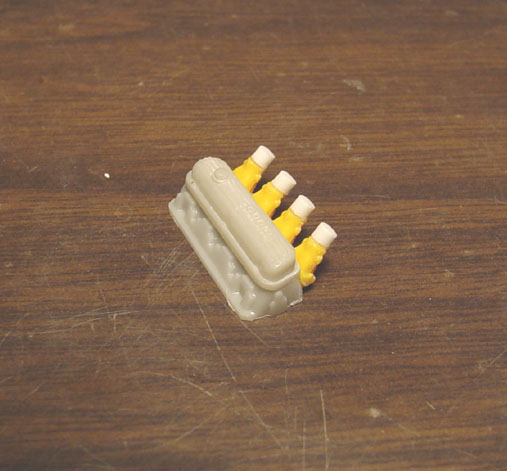
4 ford engines to go with this kit, so we created a Ford 1-piece "HEAD, VALVE COVER & INJECTOR
MANIFOLD" set-up.
The Injection Ports were robbed from the Monogram BEER WAGON and plastic round tube will aid in adding our Injection Stacks.
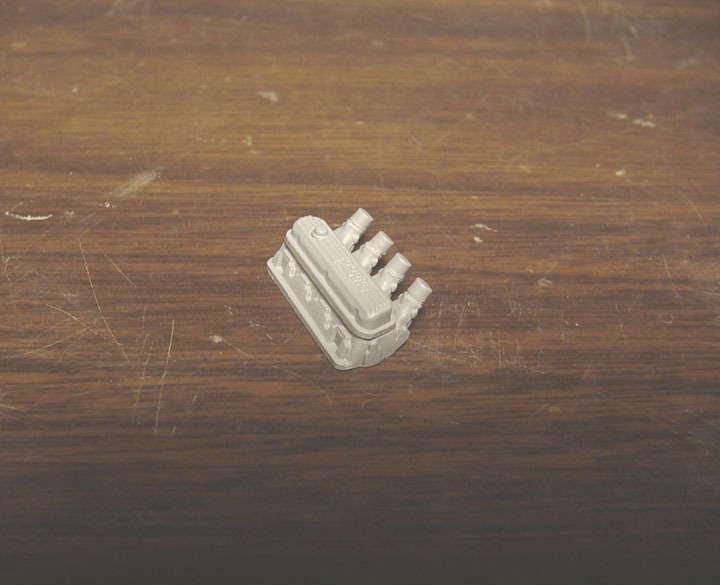 We will make a mold of this one master, cast 7 others and then
make a mold of all 8 (shown in last photo).
We will make a mold of this one master, cast 7 others and then
make a mold of all 8 (shown in last photo).
These Heads can be added to the buick engine blocks, It's
not 100% correct, but it works ...............![]()
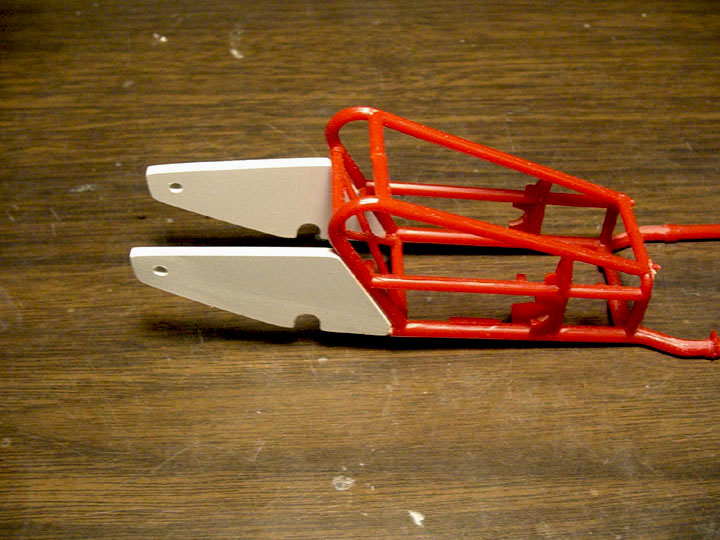 I felt It was necessary to
make frame extensions, to accommodate the longer Mustang body.....
I felt It was necessary to
make frame extensions, to accommodate the longer Mustang body.....
sounds
easy right ? ........ NOT AT ALL !
This was the most aggravating part of the project and took
3 attempts before it all fit perfectly !
The Rear axle had to fit correctly so the frame would sit level, while at
the same time
the holes for the hinges needed to make the body have the correct ride height
and correct body displacement.
DID
WE REALLY NEED TO MAKE THE FRAME EXTENSIONS.....NO,
but
I am first & foremost a model builder and this is what makes "SPEED
CITY" stand out from the rest.
WE CARE ABOUT THE BUILDER AND KEEP THAT IN MIND WHEN DOING A PROJECT.
Were not out to make a quick buck, We're out to design the best product on
the market !
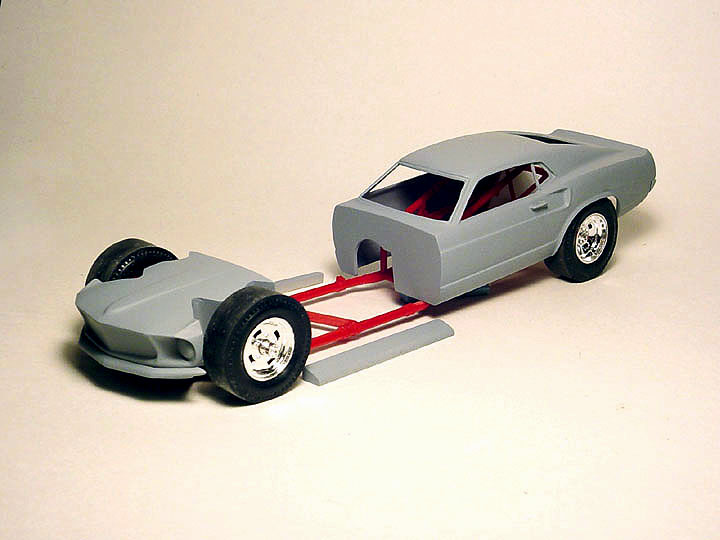 Here's how all the parts
will sit on Showboat frame.
Here's how all the parts
will sit on Showboat frame.
 This shows the body on its
pivots so the body can be raised.
This shows the body on its
pivots so the body can be raised.
Rocker panels can be mounted using cut pieces of a paper
clip and gluing to the frame.
Finally I made the 2 side rocker panels from 6 small sheets of .080" plastic sheet, Shaped and cut to size (no photo).
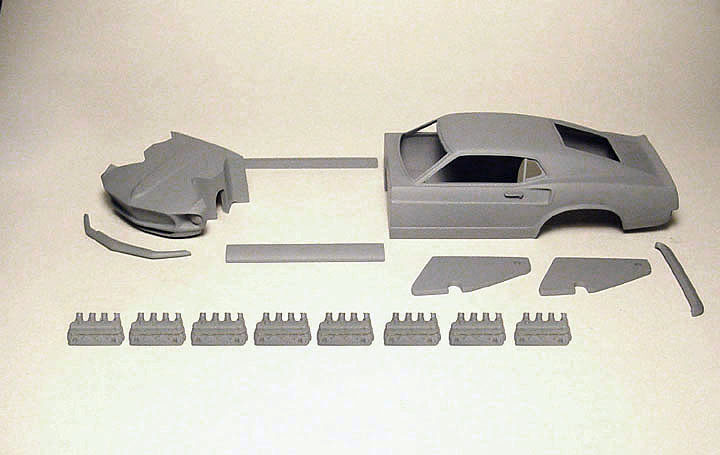
The finished "MASTER
MODEL" and all the parts that will come with this new ![]() resin kit !
resin kit !
RIVIERA "WAGON MASTER"
4-ENGINE DRAGSTER


Unfortunately,
we only have these photos. These photos were taken before we created the "IN PROGRESS" page.
BILL KRAFT RAMBLER
1965 AMC MARLIN A.W.B. Funny Car
 I just recently found these 2 photos today (8-26-2020). This master was made back in 2007 Before I had the "IN PROGRESS" page.
Besides the rear wheel well being altered, notice that the front fender was also widened 4 scale inches.
 A lot of extensive work went into that chassis and interior tub !
Page 1
Page 2
Page
3
All rights reserved. Do not copy any Speed City Resin bodies or parts without permission and consent.